Two-step verification came into existence when there was a visible increase in hacking incidents. Simply locking down your email account with a password is not secure anymore. Various tech companies have decided to eliminate the passwords or replace them with more secure methods such as biometric or PIN-based login methods. However, there is still some work to be done, till the time you can consider two-factor authentication.
What is Two-Step Verification by Gmail?
You must be aware of the password login method that is commonly used by most social media platforms including Gmail. But as the times have changed, so has changed the login methods where now email giants and other social media platforms are slowly moving towards secure login methods.
“Google was the first company to offer two-step verification to its accounts users.”
Keep the security motive in mind, Gmail has added an extra layer of security by adopting two-factor authentication as a login method. This is done to verify that a login attempt has been made only by the account owner. Two-step verification eliminates the possibility of getting your account hacked and it also becomes easy to recover your Gmail account.
Why Do You Need 2-Step Verification For Gmail Account?
Gone are the days when passwords were considered strong enough and it was difficult to crack them, but that’s not the case anymore. You need to go that extra mile to secure your account if you don’t want it to get hacked or compromised.
Seeing the increase in hacking incidents, email services are taking steps to tighten their security so that users don’t start feeling unsure about the safety of their data. Email giants like Gmail are feeling it obligatory to take steps towards improving the security and make the boundaries difficult to cross so that no illegal access happens.
Also, if the users will not feel secure enough they will start looking for better alternatives and Gmail may lose a huge user base.
So two-step verification ensures that even if someone has your password they will not be able to enter your account if two-step verification is turned on for Gmail.
After enabling 2FA for Gmail, the person who is trying to log in using any device such as Desktop, Android, Mac, iPad or iPhone will be required to enter a code or to click on an emailed link or type the number sent by the authenticator app failing which he will not be able to access your account.
Steps to Activate Gmail’s Two-Step Verification
To enable two-step verification for your Gmail account, here are the steps you need to follow:
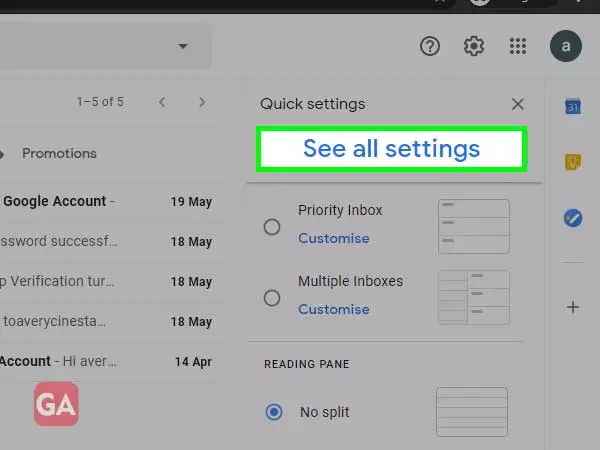
Log in to your Gmail account and click on the ‘Settings’ icon in the top-right corner; click on ‘See all settings’.
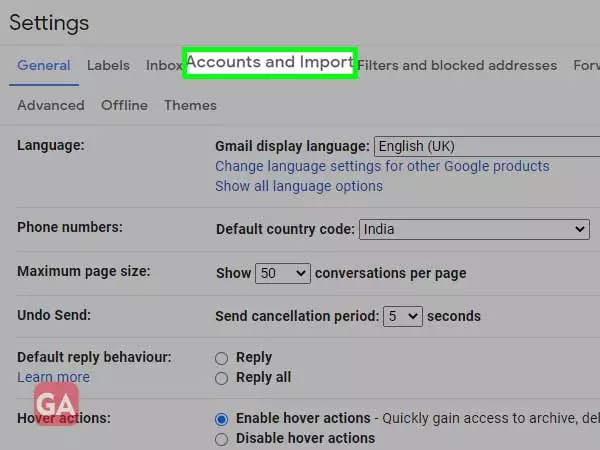
From the options given at the top bar, click on ‘Accounts and Import’.
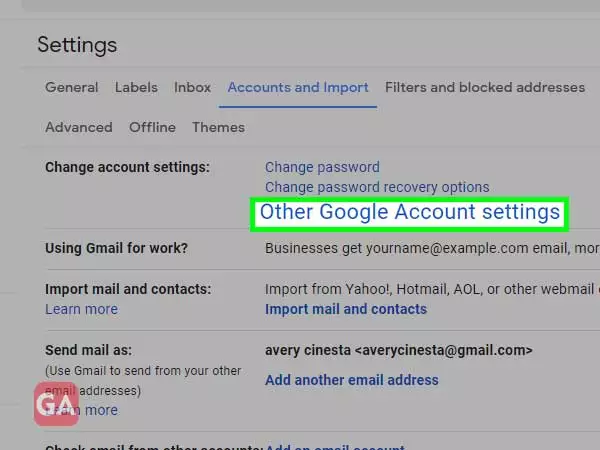
Click on the option ‘Other Google Account Settings’ given under the title ‘Change account settings’.
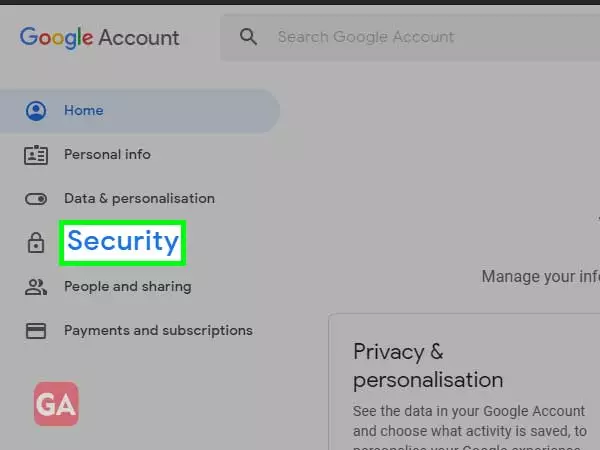
A new tab will open; in the left column, click on ‘Security’.
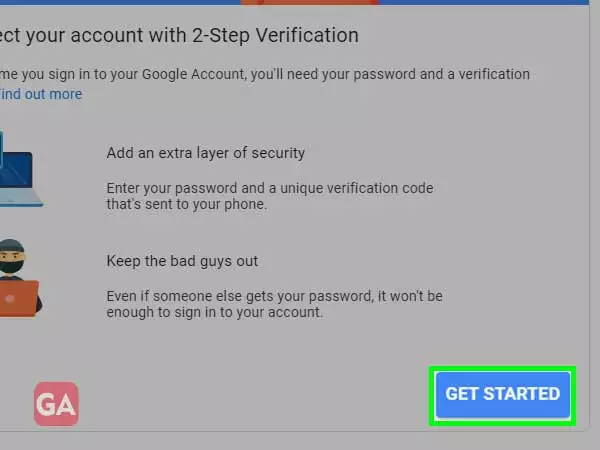
On scrolling down, you will find the option for ‘2-step verification’; click on it to expand further.
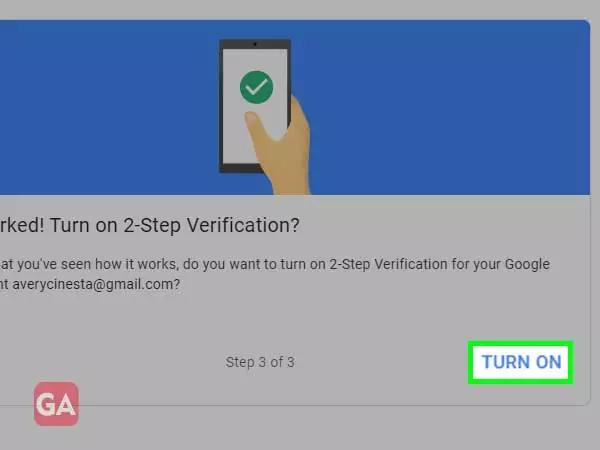
Scroll down and click on ‘Get Started’ to enable two-step verification for Gmail.
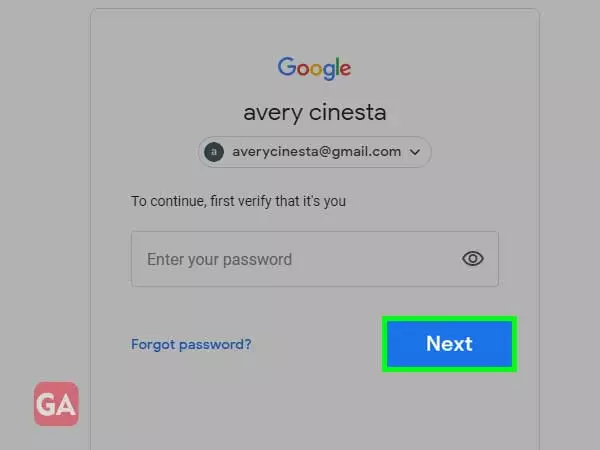
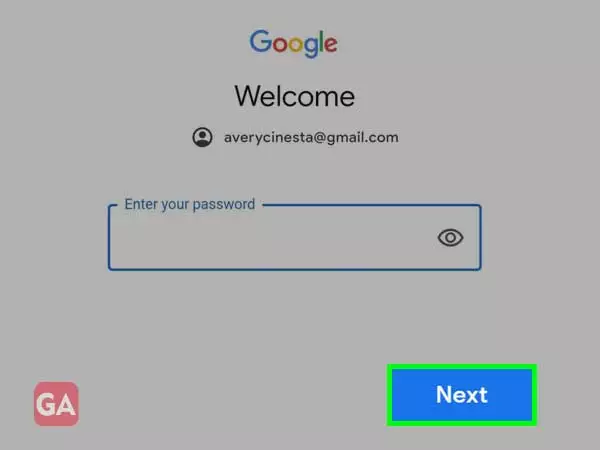
Next, you will be prompted to enter the password for your Gmail account and click on ‘Next’.
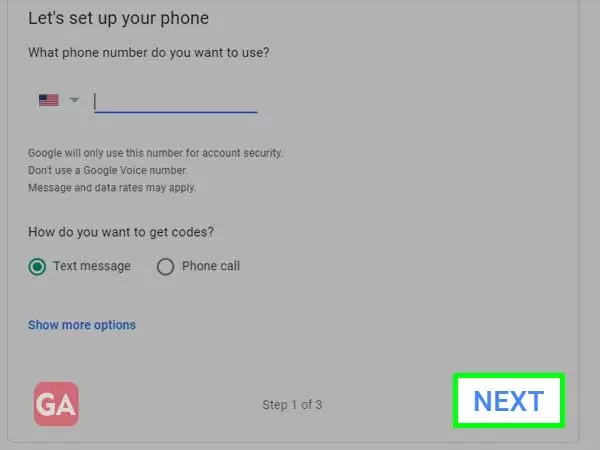
Enter the phone number in the given space and select whether you want to receive the code via ‘Text Message’ or ‘Phone Call’ and click on ‘Next’.
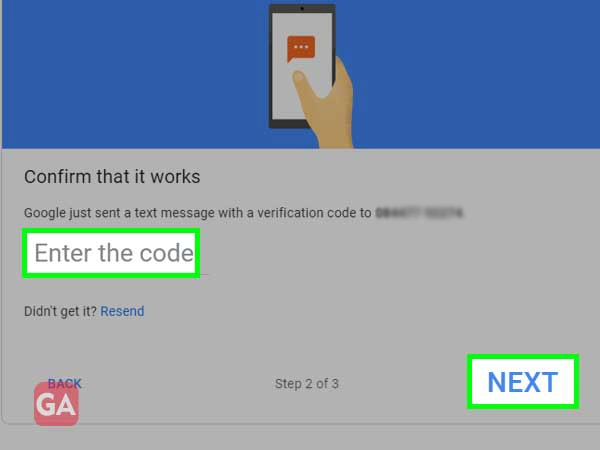
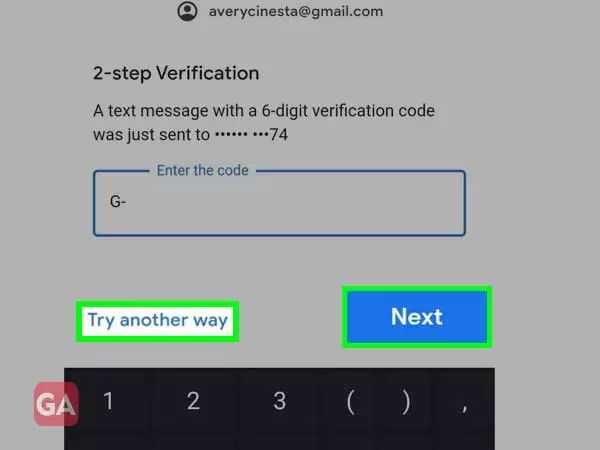
You will receive a code on the phone number entered in the previous step; enter the code and click on ‘Next’.
The last step is to turn on the two-step verification for Gmail by clicking on ‘Turn On’.
You can also watch this video-
How to Login When Gmail’s Two-Step Verification is Enabled?
Gmail Login Process is quite easy and there is nothing complex. However, things change a bit when you enable 2FA for Gmail. This adds an extra step in the login process of Gmail. Now we will see how to login to Gmail after you have set up two-factor authentication.
On Computer
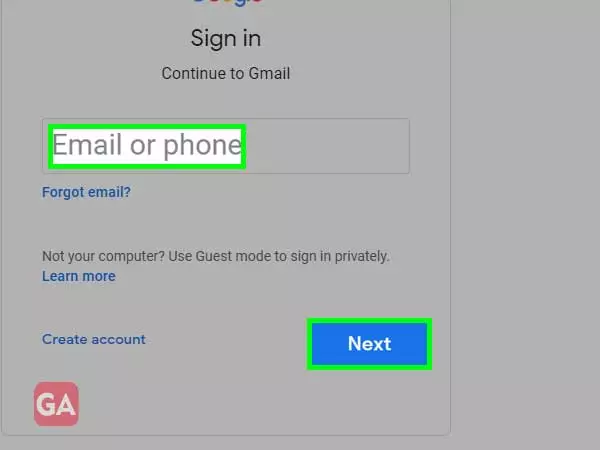
Head over to Gmail’s official website- www.gmail.com and enter your email address or phone number and press ‘Next’.
The next step is to enter the password and click on ‘Next’.
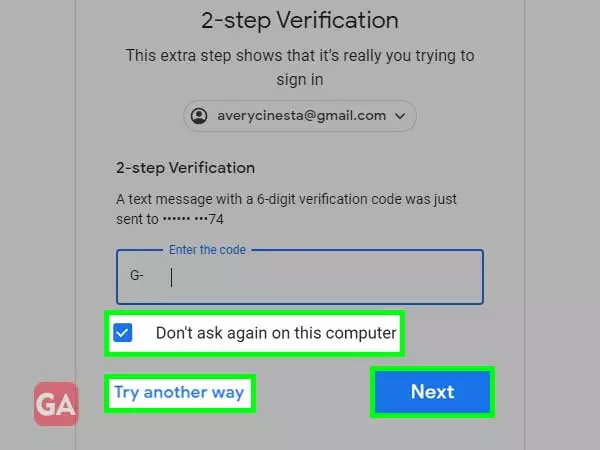
Here comes the additional step where you will be prompted to enter the verification code you have received on your phone number and press ‘Next’. If you didn’t receive the code, click on ‘Resend it’. You can also select the checkbox for ‘Don’t ask again on this computer’ if you are using a personal device to log in to Gmail so that the next time when you will use the same device it will not ask for the Google authenticator code. You can even click on ‘Try another way’ to get more options to receive the code.
Once you have entered the correct code, you will be successfully logged into your Gmail account.
On Mobile Device
Click on the profile icon in the top-right corner and then click on ‘Add another account’.
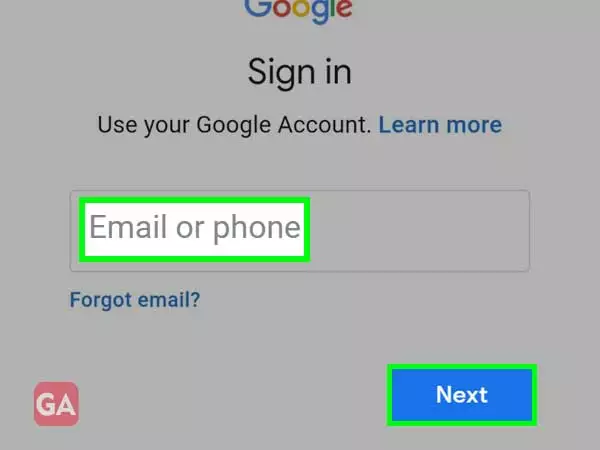
Enter the Gmail address for which you have just turned on two-factor authentication and tap ‘Next’.
Next, enter the password and press ‘Next’.
After this, you will be prompted to enter the verification code that you have received on your mobile number and press ‘Next’. You can also select the option ‘Try another way’ if you have linked more than one option for the two-step verification.
The last step is to agree to Google’s Terms of Service and you will be logged into your Gmail account.
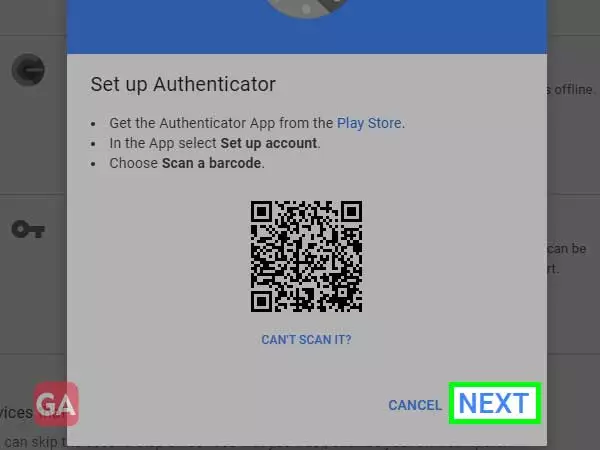
You can get the Google Authenticator app from the Google Play Storefor Android devicesor the Apple Storefor your iPhone or iPad devices.
Here is how to set up the authenticator app:
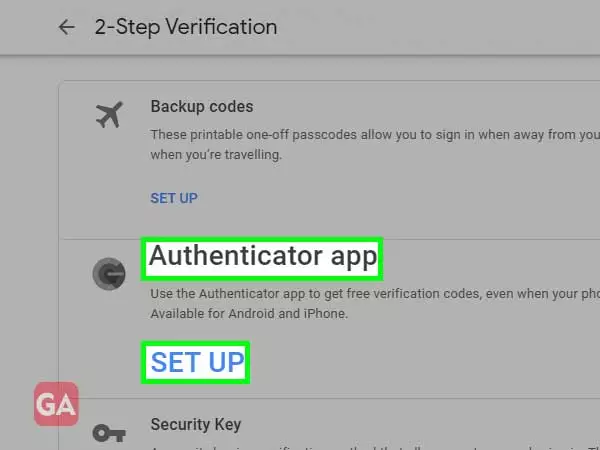
Once you have enabled the two-step verification, scroll down and you will see a few more options including the one for ‘Authenticator app’; click on ‘Set Up’ to proceed.
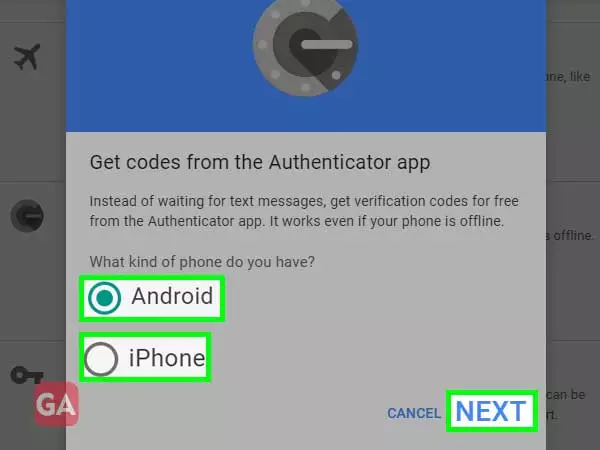
Select the device for which you want to use the app i.e. Android or iPhone and click on ‘Next’.
You will be shown the steps to follow to get the authenticator app for your device and how to use it. Install the app from the link and follow the on-screen instructions. Once you are done with that, press ‘Next’.
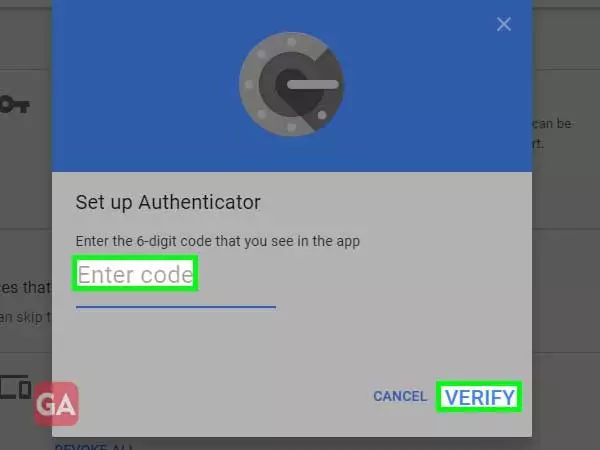
Enter the code that you see in the app to and click on ‘Verify’ to complete the setup.
How to Turn Off Two-Step Verification for Gmail?
If you want to turn-off the two-step verification for Gmail, follow the steps listed below:
Click on your settings icon and then click on the option ‘See all the Settings’.
Click on the option ‘Accounts and Import’.
Then click on the option ‘Other Google Account Settings’; the third option from the top.
A new tab will open, click on the ‘Security’ option in the left column.
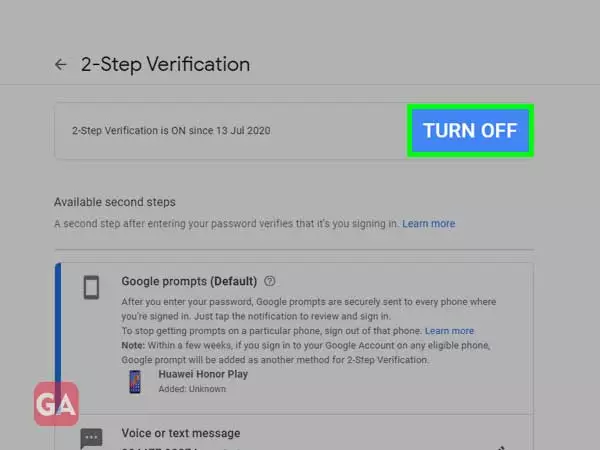
Scroll down and click on 2-step verification that is currently ‘On’.
Enter the password and press ‘Next’ to proceed.
You will see the date from which the two-step verification is ‘On’ along with an option ‘Turn Off’; click on that.
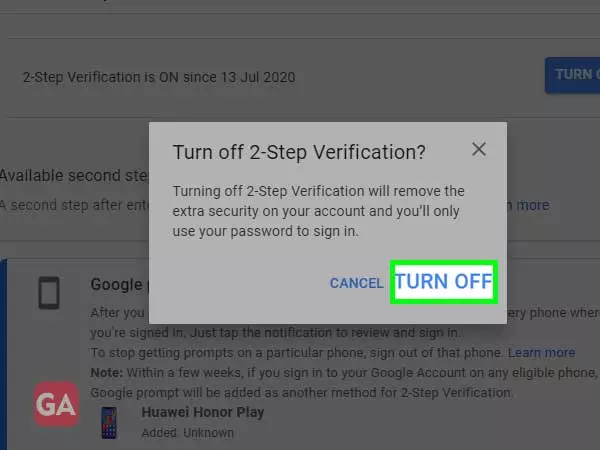
Again click on ‘Turn Off’ to confirm the action.
You can also watch this video-
Important Points
You can use Google Authenticator to issue codes for several accounts through the same mobile device; however, each Google Account will need a different secret key.
You will need to turn on 2-Step Verification for each account and use the same Google Authenticator app to login when there is no internet.
2-step verification can be turned off individually for known devices and it will still work if someone will try to illegally access your account.