Unlike any other email client, Outlook is highly customizable. From changing the account password in Outlook to changing the view, the platform offers many possibilities to its users.
Microsoft has really looked deep into the user experience and made available every possible way and function so the user can interact better with the application. One such feature that allows users to customize Outlook according to their needs is ‘Change Outlook View’.
You will be able to make the information you need to see more available every time you open Outlook by modifying and customizing its View. You can arrange your email more effectively by changing Views in Outlook. Further, suppose you have configured Gmail in Outlook or any other email account. In that case, you can have different views for them all to differentiate among them easily and not get confused as to which account is open.
In the write-up below, we will teach you how to change View in Outlook folders and discuss the ways you can customize it further to your liking.
How to Change Outlook View on Mac?
When you are used to something, it is difficult to switch from it and adapt to new changes. The same is the case with Outlook View. If you are worried that your View in Outlook changed, there’s nothing to bother about, as you can always change the way your Outlook looks.
So, to eliminate this worry of yours, listed below are the two ways to know how to change Outlook View on your Mac.
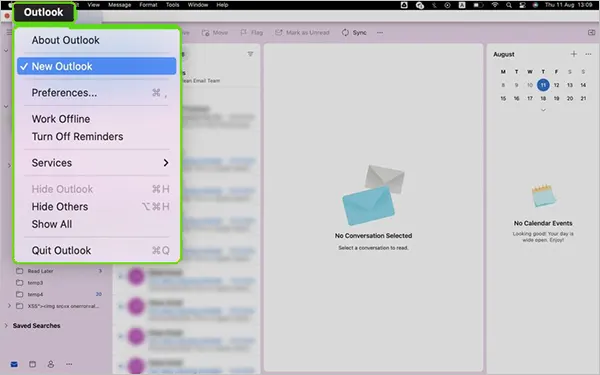
Once your Outlook app opens, click on the Outlook menu option present on the left of the top menu bar.
From the menu that opens, uncheck the New Outlook option to change to Outlook Classic View.
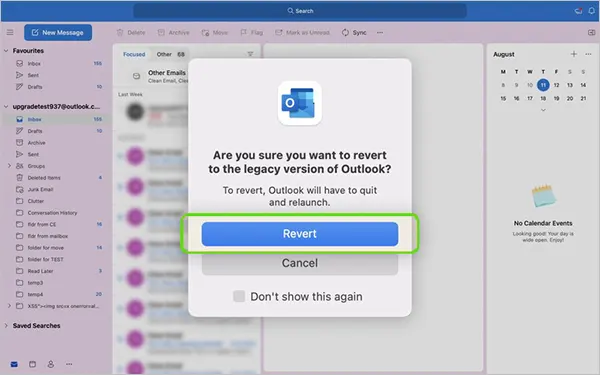
A pop-up will appear on your screen, where you have to select the Revert option to confirm the View change.
Wait for a few seconds, and your application will change to the Classic View. If your Outlook view doesn’t change, it might be because your Outlook cannot connect to the server. To resolve this, check your internet connection or refresh your Outlook email.
Method-2:
Launch the Outlook app on your Mac.
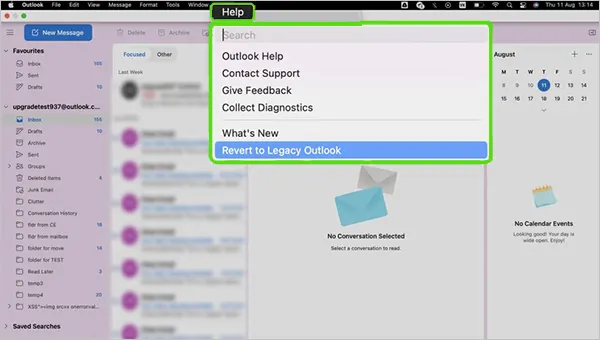
In the top menu bar, click on Help.
This will open a menu where you have to click on the Revert to Legacy Outlook option.
A pop-up screen will appear where you have to select the appropriate option to confirm the action.
And finally, wait for a few seconds for Outlook to change its View.
What are the Steps to Change Outlook View on Windows?
From the above section, you now know how to change Outlook View on Mac, but what about Outlook on Windows? Of course, you can change View in Outlook on your Windows system. However, the steps for doing so are different from the ones stated above.
Jotted down is the process for changing Views in Outlook on Windows:
Open the Outlook app on your Windows.
In your Outlook dashboard, switch to the View tab.
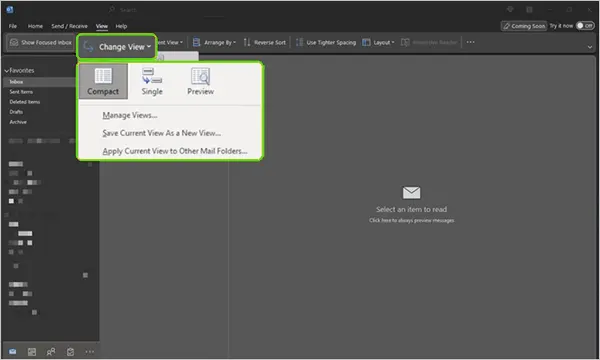
Under View, click on the Change View option.
This will open a small menu, where you can choose from Compact, Single or Preview View options. In order to get your Outlook to its usual View, select the Compact View option.
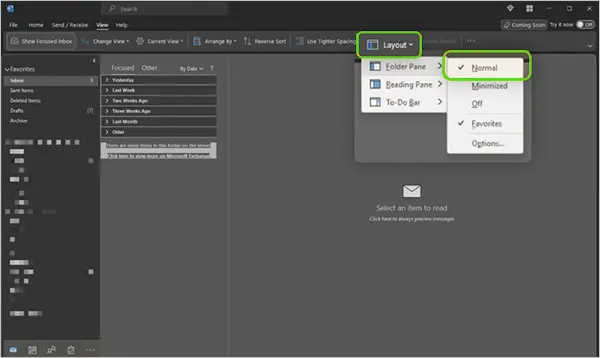
Your Outlook View will be changed after the above step; however, if you want to change how things are arranged, you can do so by chaining the layout. To do so, click on the Layout menu under the View tab.
This will open a small menu from where you can change the Folder Pane, Reading Pane, and To-Do Bar layout by selecting the alignment options under each of them, according to your preferences. Like Folder Pane > Normal or Reading Pane > Right.
Can you Customize Views in Outlook?
From the above section, you know how to change View in Outlook, but do you know you can further customize it? Yes, you can change the font style, its size, color, etc. by using several customization options available in Advanced View Settings.
So, if you are excited to know how you can customize and change Outlook View, then follow the instructions given further:
Steps to Change Font or Font Size in Message List
The steps stated below will guide you on how to change the font properties in the list of emails that are present in different folders:
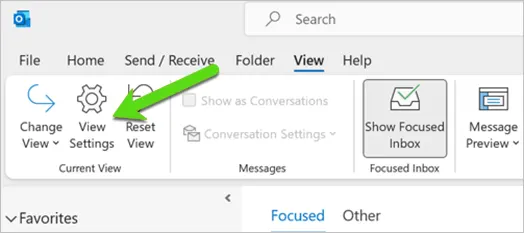
Open your Outlook app and go to the View tab.
Under View, click on the View Settings option.
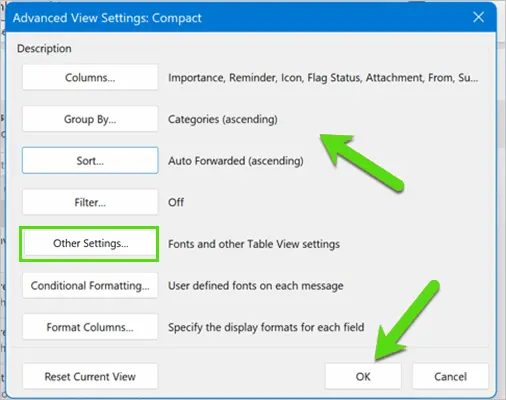
After that, the Advanced View Settings dialog box will appear on your screen, where you have to click on the Other Settings button.
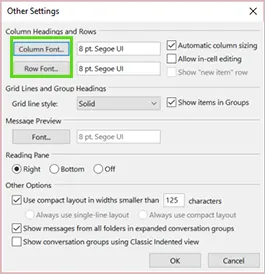
Then, click on the Column Font or Row Font button in the Other Settings window.
After that, you can select the Font, its style, and size.
Notes
Choose Row Font to adjust the font size of the message preview, sender name, and subject line in the default Inbox View. However, you have to select Font under Message Preview if you simply want to modify the font or font size for the message preview (the line of message text that appears beneath the topic and sender).
Once you are done changing the font settings, click OK three times in the windows that are opened in order to save and apply the changes.
Change Font or Font Size in Reading Pane
You cannot alter the default font or font size in the Reading Pane. You can, however, simply zoom in and out. You may also instruct Outlook to show all of your email messages in plain text and change the font size.
If you have a Microsoft 365 subscription, you may set a custom zoom percentage that applies to all messages you read, leading to Outlook changing view. Stated below are the steps on how you can do so:
First off, open the Outlook app.
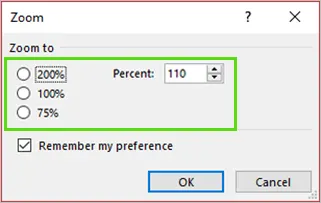
Click the percentage (typically 100%) in the lower right corner of the Reading Pane to open the Zoom While Reading dialog box.
Select one of the default percentages or enter your own.
To keep your zoom level consistent across all messages, tick the Remember My setting option.
At last, to apply the changes, click OK.
However, if you do not have a Microsoft 365 subscription, the Zoom percentage will not be saved for all the messages. You will need to zoom in or out every time you switch messages in the reading pane. In order to do so, use the instructions below:
Look for the magnification sliderin the lower right corner of the Reading Pane to zoom in or out.
To modify the size of the text in the Reading Pane, move the slider left or right.
Change Font When Composing, Replying, or Forwarding Messages
If you want to change Outlook email View by tweaking its font properties, then you can do so as well. Listed further are the instruction on how you can change the font size while composing a new email, replying to a mail, or forwarding one:
Open the Outlook app and click on the File menu option from the top toolbox.
On the following screen, click on Options.
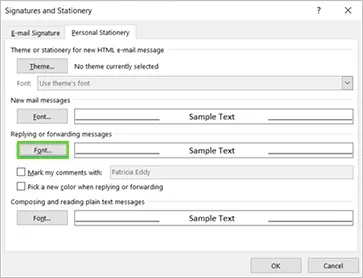
Switch to the Mail tab from the left side pane of the Options window and select the Stationery and Fonts option.
Then, click on the Font button in the New Mail Messages or Replying or Forwarding Messages section to modify the default font, font size, and font color while creating or replying to messages.
Select your preferences for the font settings.
After you are done, click OK on the opened windows to save and apply the changes.
With all the above-given procedures, you now know how to customize and change Outlook Classic View appearance. But that’s not where it ends; you can even make your own view from scratch in this email application, and the section further lets you know how to do that.
How to Make a New View in Outlook?
Starting with a new View rather than changing an old View is sometimes easier to cater to your preferences and needs.
Well, making your own View might seem like a lot of work, but you can easily do that by going through the instructions below:
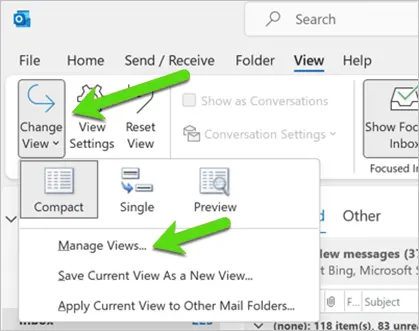
Launch the Outlook app and switch to the View tab.
Then, click on the Change View menu under the Current View group.
From the menu, select the Manage Views option.
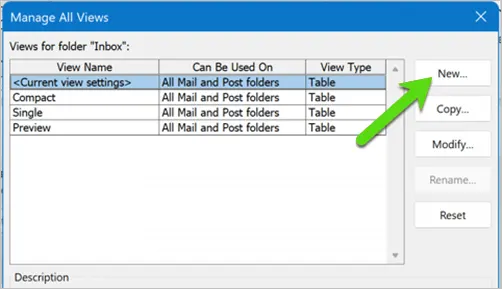
In the dialog box that opens, click on the New button.
Notes
If you wish to start from an existing View, click Current View settings > and then Copy in the Manage All Views dialog box.
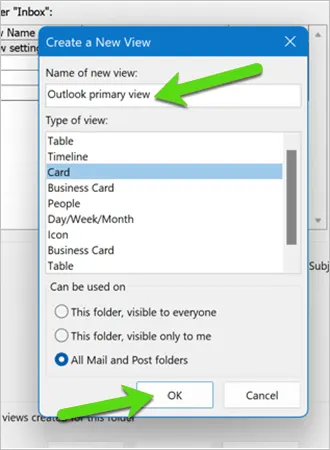
This will take you to the Create a New View dialog box, where you need to enter your View name and select the Type of View.
Accept the default configuration of All Mail and Post folders or select another option under Can be Used On, and then click OK.
Select the parameters you wish to use in the Advanced View Settings: New View dialog box, then click OK.
Select Apply View to utilize the View right away.
How to Apply the Current View to Multiple Folders
From the above section, you have learned how to make a View of your own in Outlook. But, it will only apply to the current or selected folder.
For every Outlook folder, you can create a new View according to what you like. Don’t worry. You don’t have to make the View for each folder; you just have to create it once and then apply the same to all the folders. And here’s how it’s done:
Go to the View tab in your Outlook app.
Click on the Change View drop-down menu in the Current View group.
From the menu, select the Apply Current View to Other Mail Folders option.
Next, the Apply View dialog box will open. There, select all the folders to which you want to apply the current View.
After you have selected all the folders for which you want to change View on Outlook, click OK and the changes will be applied.
If you have created your own View but do not like it now, you can permanently delete it and use the ones that are already there. In order to know how to do that, go through the steps below:
Notes
You cannot remove Views already there in Outlook, even though you have changed its settings.
In your Outlook app, switch to the View tab.
Click on the Change View drop-down menu in the Current View group.
Then, select the Manage Views option.
The Manage All Views dialog box will open. There, select the custom View that you want to remove from the Views For Folder section.
Finally, click on Delete, and then select OK to confirm the action.
With this, this guide on changing Outlook Views ends here. I hope it was helpful!