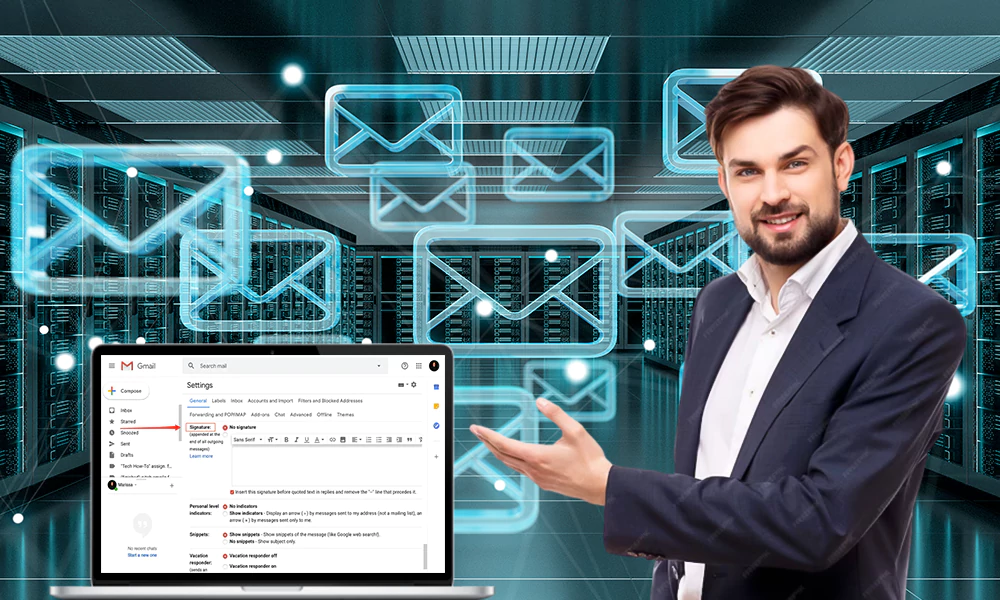
Just like you share your pictures, videos, messages via Gmail, you can similarly share emails as well. Gmail lets you forward your emails to some other email address no matter what’s the reason. Whether you are out of the city and want someone to access your emails or you want certain emails to be automatically forwarded to any other email address, Gmail allows you to forward a single message or all the messages to the email address of your choice.
Moreover, if you have several email accounts to manage and it is getting too hectic to log into each one of them and check the emails, you can simply forward your G-mails to any other email client like Yahoo, Outlook, etc.
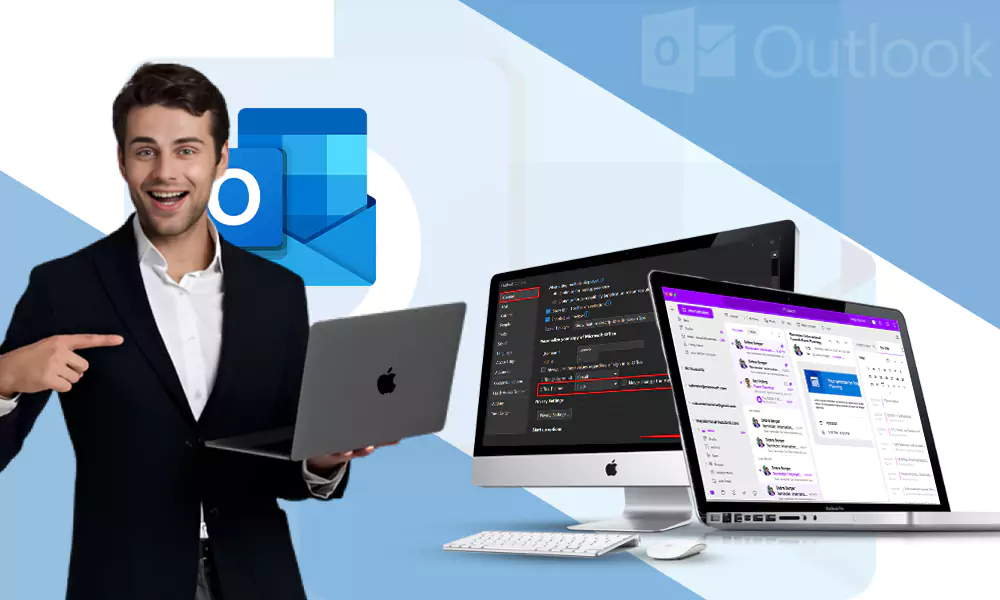
Furthermore, if you want to use email services such as Outlook to directly access your emails, you can set up Gmail in Outlook.
Gmail makes all the efforts to make it super user-friendly for you, but some things can still be confusing. So if you are a frequent Gmail user and interested in knowing more about mail forwarding in Gmail, keep on reading.
Automatic and Manual Methods to Forwarding Emails in Gmail
Method-1: Using the Three-Dots
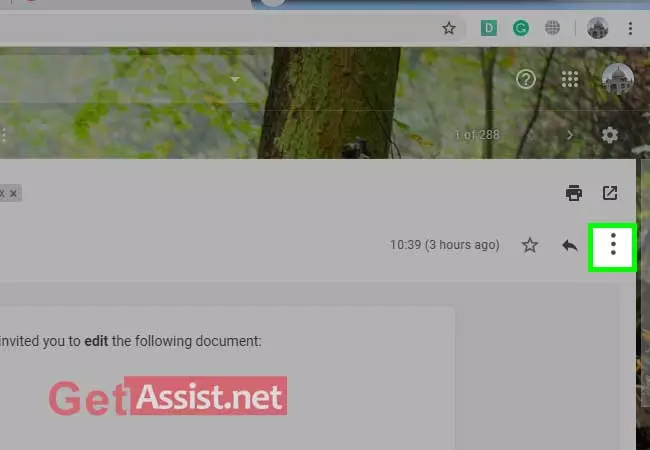
This method is simplest to use and you can use it whenever you have to forward a single email in Gmail. Here is how to use it:
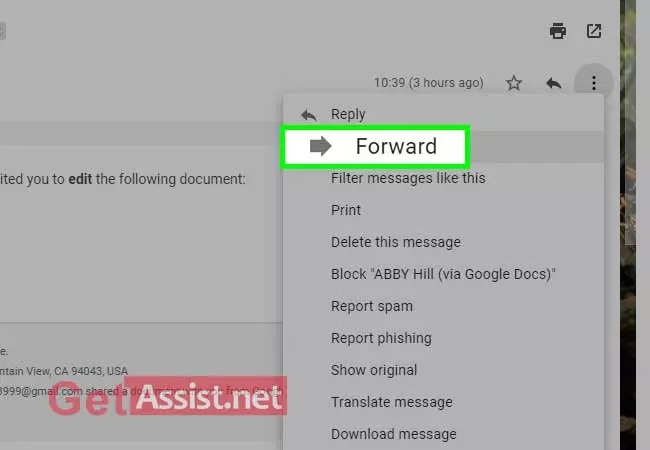
Open the email you want to forward and click on the three-dots given at the upper right corner of the email.
A drop-down appears, click on ‘Forward’.
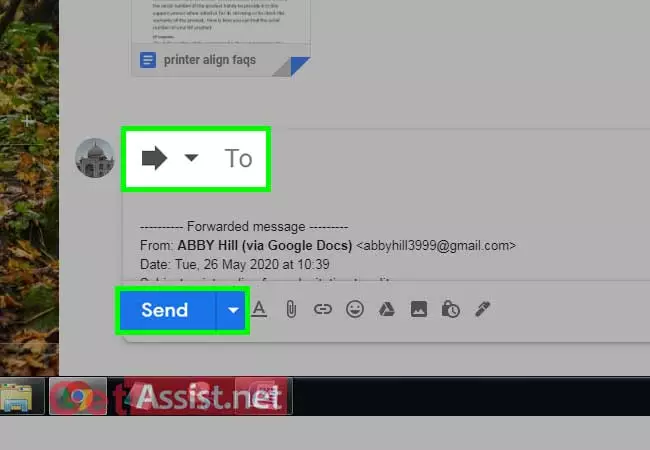
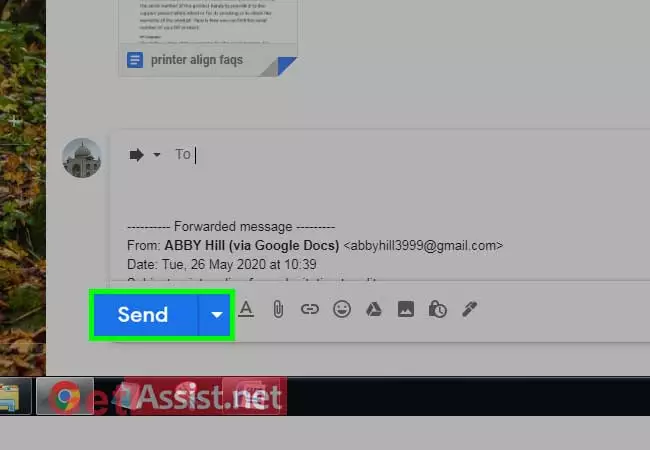
Next, enter the email address you want to forward the email at the top of the email box and click ‘Send’.
Method-2 Using Forward Button
This method is again useful when you just have to forward a single mail spontaneously and the steps listed below make it quite easy to perform:
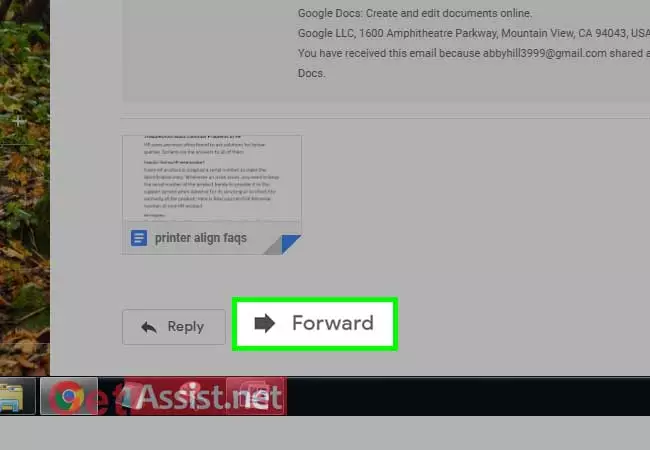
Log into Gmail.comandopen the email you want to forward and at the bottom, you will see the ‘Forward’ button.
The email box will open where you have to enter the email address in the top box and thereafter click on ‘Send’.
Method-3 Automatic Forwarding
You can set Gmail to automatically forward emails if you don’t have any specific criteria in your mind and just want to go with the ‘forward-everything’ approach. Once you have enabled the Gmail auto-forward feature, you can sit back and relax and all your emails will get automatically forwarded to your selected email address.
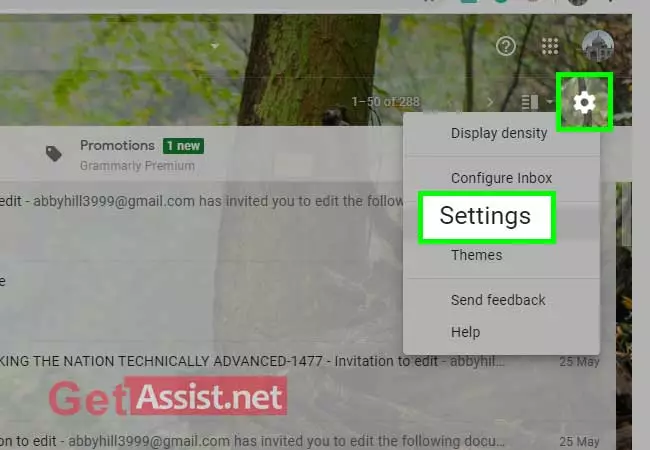
Log into your Gmail account and click on the gear icon in the upper-right corner and then click on ‘Settings’.
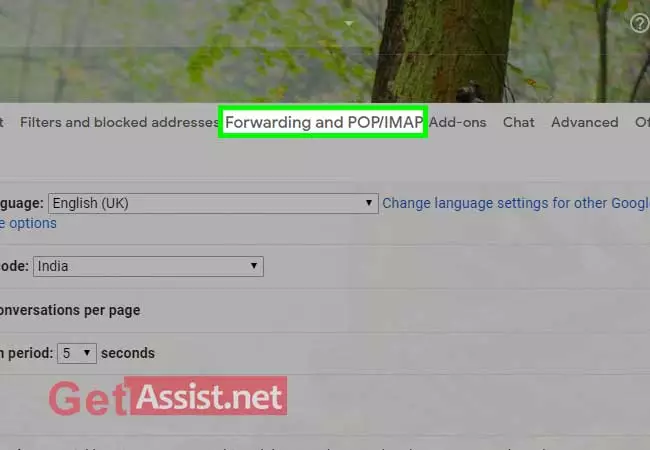
Out of the options available at the top; click on ‘Forwarding and POP/IMAP’
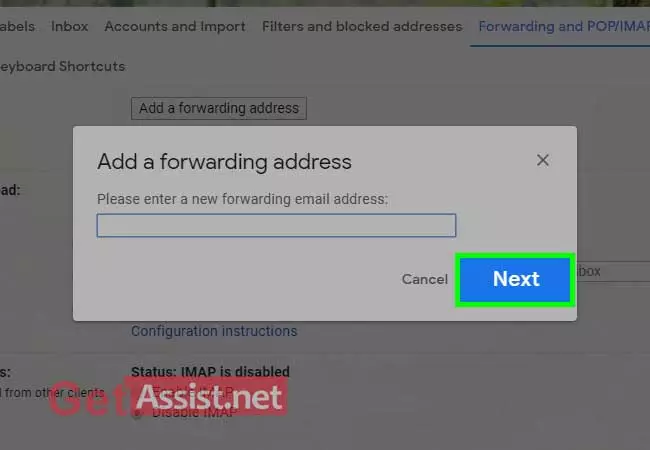
Click on ‘Add a forwarding address’.
Enter the email address where you want to forward the emails and click on ‘Next’.
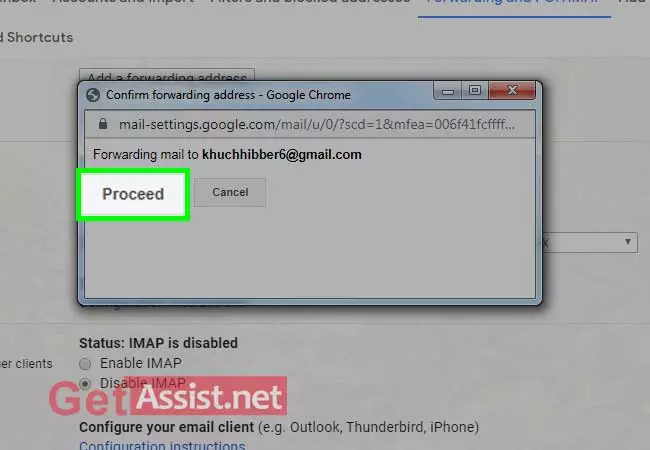
You will receive a confirmation notification, press ‘Proceed’ to continue.
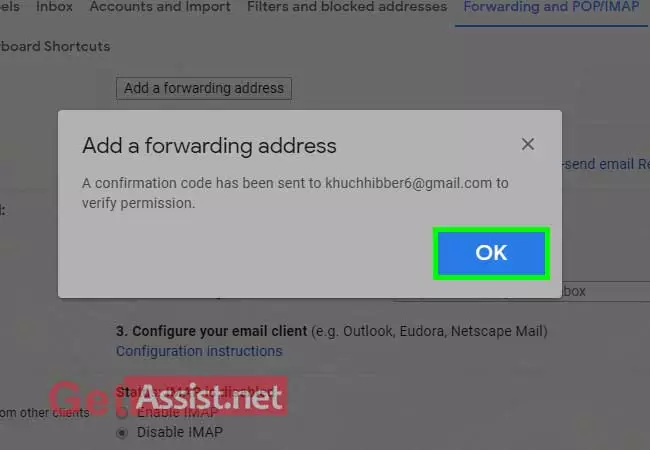
On the forwarding address, you will receive a verification code, press ‘Ok’ to proceed.
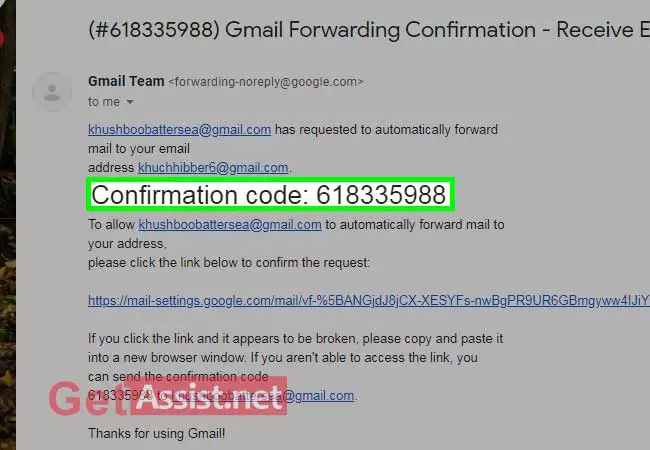
Now, log in to your other email address to get the verification code; copy the code to the clipboard.
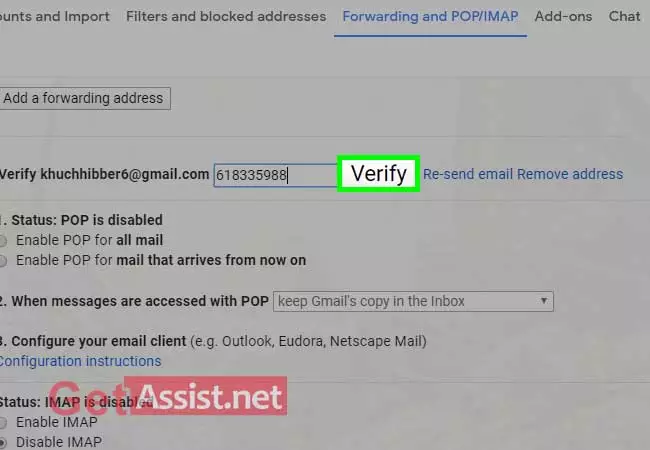
Enter the code in the given space and then click on ‘Verify’.
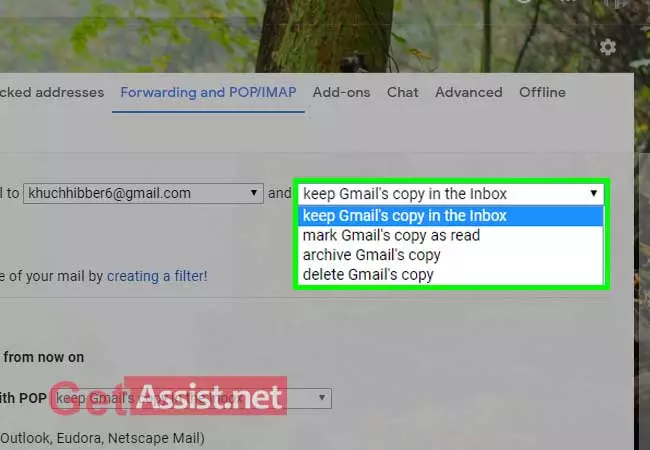
Email forwarding has been activated; you can select if you want to keep a copy of the email in your inbox or select any other option.
Next, select the box for ‘Enable POP for all mail’ and then select one option from the drop-down menu to tell Gmail what to do with forwarded messages:
Keep Gmail’s copy in the Inbox- This will leave the original email in your Gmail inbox as new and unread.
Mark Gmail’s copy as read- This will keep the message in the inbox and marks them as read.
Archive Gmail’s copy- This will mark forwarded messages as read, delete them from the inbox, and keep them archived for search and recovery.
Delete Gmail’s copy- It moves the messages to the Trash folder once they are forwarded. The emails in the Trash folder get automatically deleted after 30 days so this option is not suggested.
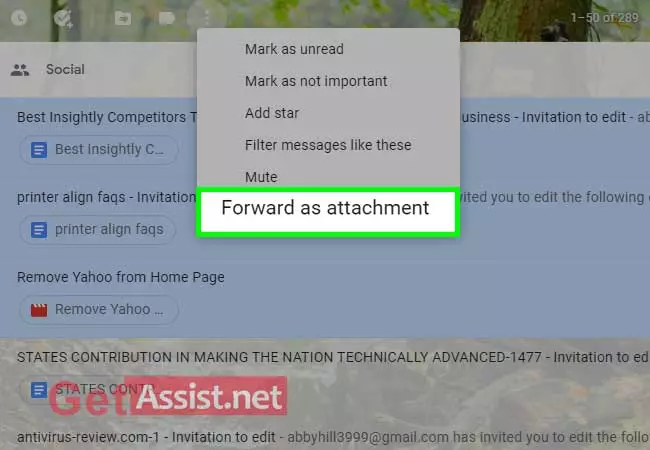
Method-4 Forward as Attachment
Using Multi-forward for Gmail, you can easily forward multiple emails within the snap of a finger. So if you don’t fall in any of the above categories, you can use this method to forward multiple emails in the form of attachments. Have a look at the steps for better understanding:
Select the emails you want to forward and click on the three vertical dots in the tab just above the email categories.
Click on the option ‘Forward as attachment’ from the drop-down menu that appears.
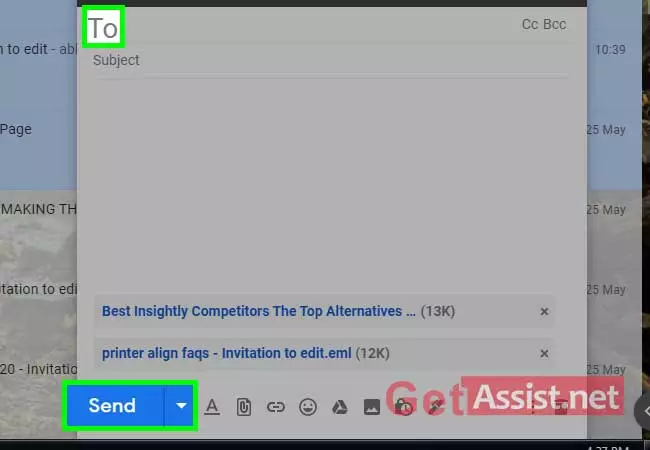
Enter the email address in the ‘To’ section and click on ‘Send’.
How to Automatically Forward Emails From A Specific Sender in Gmail?
You are in a situation where you want to automatically forward only certain emails of your Gmail account from a specific sender. In this case, you can use Gmail’s auto-forward filter settings for which you will be required to perform some additional steps in addition to the third method explained above.
Firstly, log in to your Gmail account as usual.
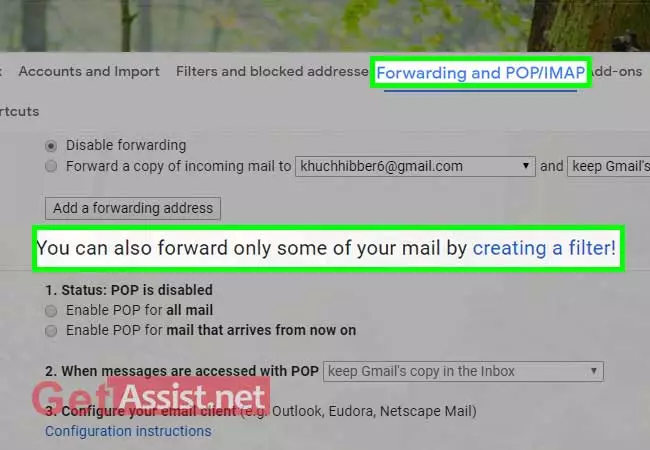
Then, you have to add the forwarding address in the Settings section under the heading ‘Forwarding and POP/IMAP’.
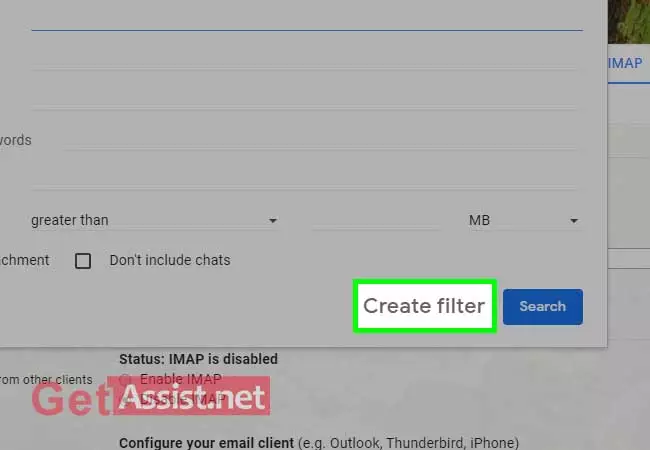
Once the forwarding address gets verified, now you have to set up an email filter using the option ‘You can also forward only some of your mail by creating a filter’ under the ‘Forwarding and POP/IMAP’ heading.
A filter menu appears where you can enter the specific email address that you want to forward the emails to and click on ‘Create Filter’.
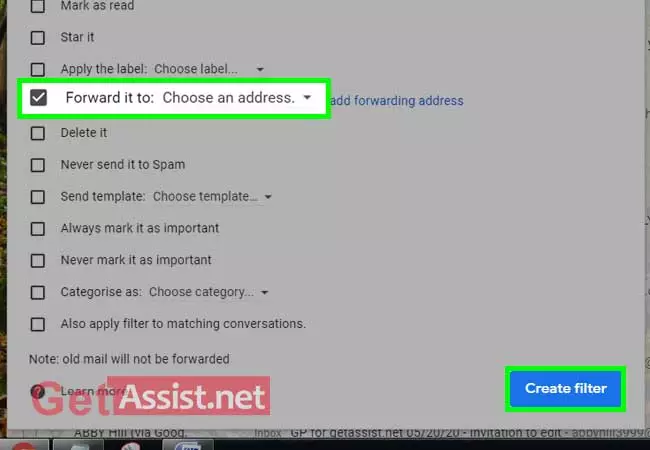
Configure the filter accordingly and then select the checkbox for ‘Forward it to:’ and enter the forwarding email address; click on ‘Create Filter’.
This will let Gmail auto-forward specific emails to another email account.
This method will not forward the old emails i.e. ones that are already there in your inbox.
You can forward the existing emails manually.
You will see a pink notice at the top of your email account as ‘You are forwarding your email to email@domain.com. This notice will end in 7 days’.
Also, make sure to test your filter so that you don’t end up losing some of your precious emails.
Disable Auto-Forwarding in Gmail
A few clicks can put a halt to the auto-forwarding feature that you have just enabled a few days ago. Here are the steps to take to disable/turn off automatic forwarding in Gmail:
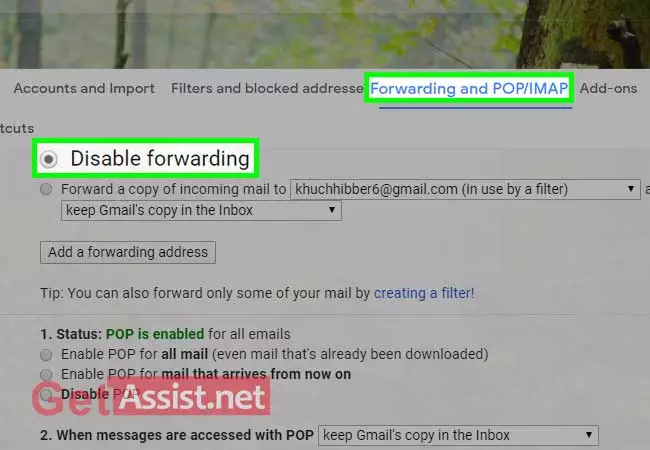
First of all go to the Settings area and under the heading ‘Forwarding and POP/IMAP’, select the option that says ‘Disable Forwarding’; don’t forget to save the changes.
So now you know when an email is sent to you that you want to share with someone else, knowing how to forward in Gmail makes things effortless.