Setting Up Gmail in Outlook- A Thorough Guide

| Updated on February 13, 2024

Gmail is a popular email service introduced by Google and if you create a Gmail account, you bequest yourself with a lot of exciting and useful features. The major highlighting features that you get are a good amount of storage for free, the ability to detect spam, undo emails, and manage your emails, applications, and meetings, all in one place. Another great feature of Gmail is that you can access your Gmail account in MS Outlook. Isn’t that great? 

With so much technological innovation, most of the businesses have started shifting towards cloud computing solutions such as Office 365. But that doesn’t mean that you have to ditch other email service providers like Gmail.

“With more than 1.5 billion active users, Gmail is one of the largely used email client.”

That’s another reason for sticking to Gmail. But if you still want to use Outlook and don’t want to quit Gmail either, there is a way out. But before knowing how to setup Gmail in outlook, you must know why configuration has to be done.

Reasons for Configuring Gmail in MS Outlook

If you are someone with multiple email accounts, setting up Gmail in Outlook could prove very beneficial for you, reasons being:

  • With Outlook, you can easily organize multiple email accounts without much difficulty but that is not the case with Gmail.
  • Gmail, it is quite inconvenient to organize messages and emails

You know the importance of putting Outlook and Gmail to work together. So let’s proceed towards the configuration process. 

Steps to Configure Gmail in Outlook

Step-1 Enable Gmail IMAP Settings

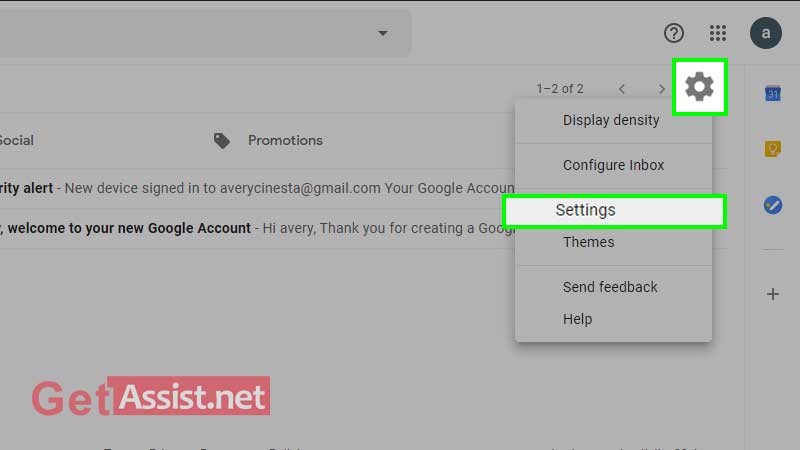
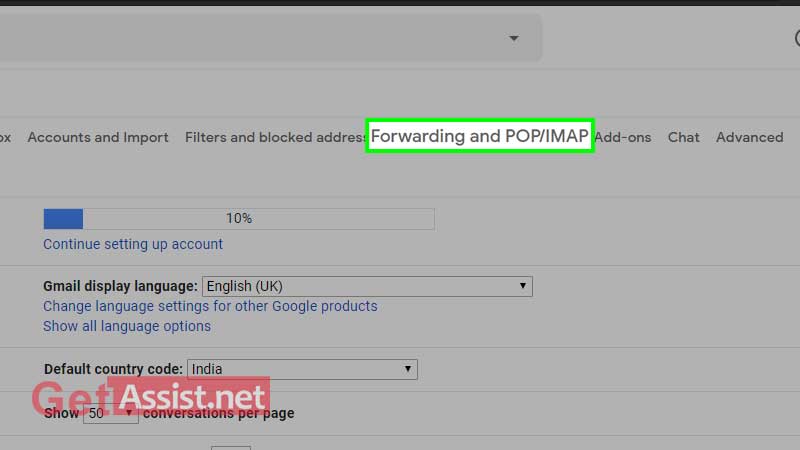
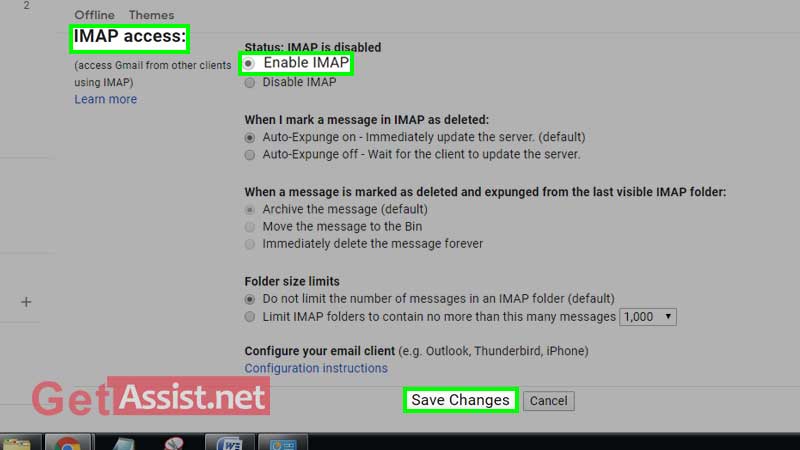
To let Outlook access your emails, the first step is to enable the IMAP settings of Gmail. Have a look at the important steps:

  • Firstly, log in to your Gmail account and navigate to the settings section by clicking on the ‘Gear’ icon and then click on ‘Settings’.
Open gmail account and go settings option
  • Next, click on ‘Forwarding and POP/IMAP’ option to access the IMAP settings.
click on forwarding and pop/imap
  • Scroll downwards and under IMAP access heading, select ‘Enable IMAP’ and click on ‘Save Changes’.
under the IMAP access, choose enable IMAP and click on save changes
  • After you have made the required changes in Gmail settings to access it in Outlook, you can exit Gmail and get ready to add it to Outlook.

If You Have Gmail’s Two-Factor Authentication Enabled

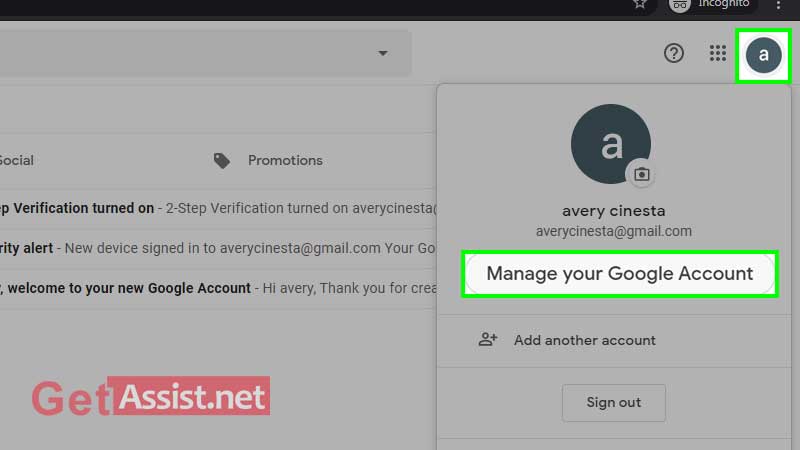
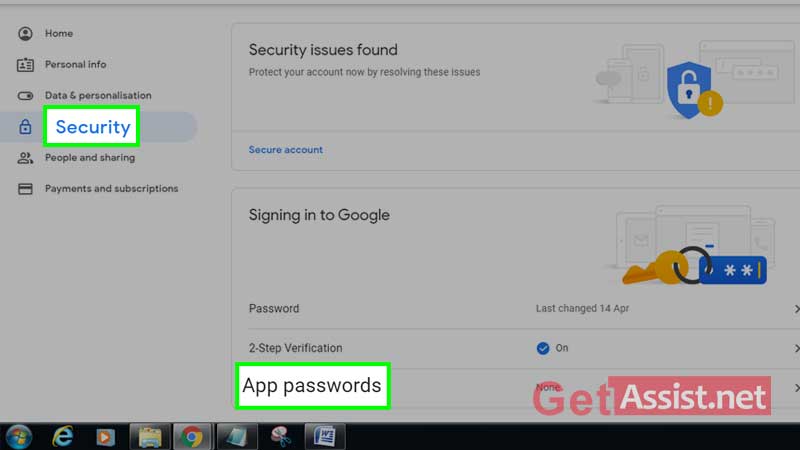
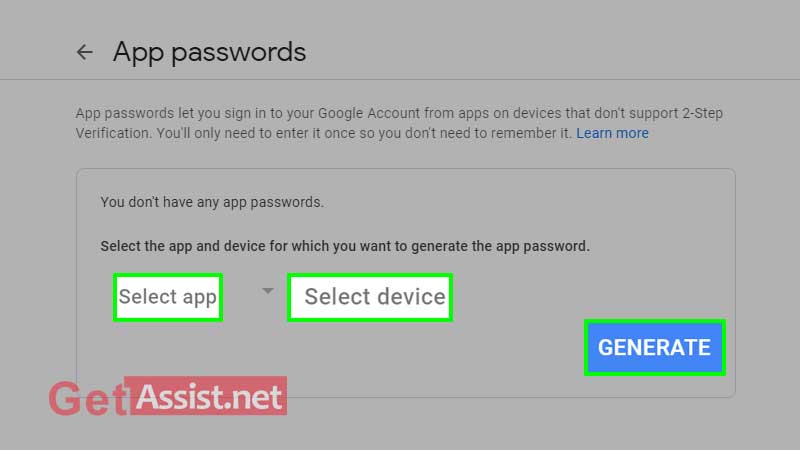
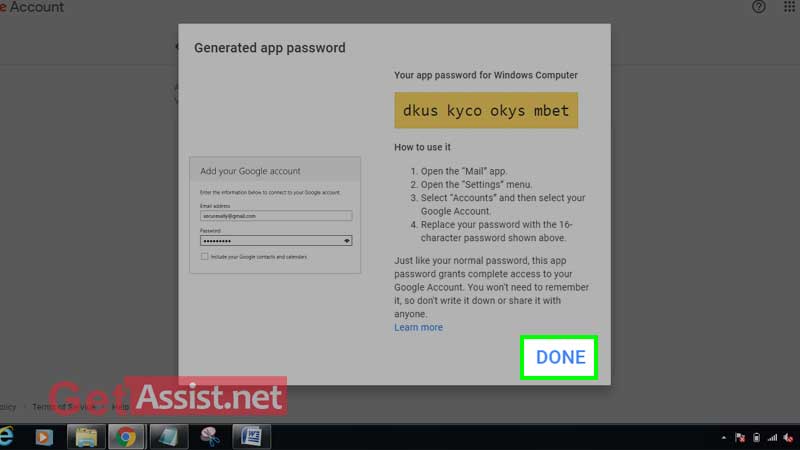
If you have enabled two-factor authentication for your Gmail account, you may need to take extra steps besides enabling Gmail server settings. As Outlook is not currently supporting two-factor codes, the connection will not establish without generating a special password in your Gmail settings.

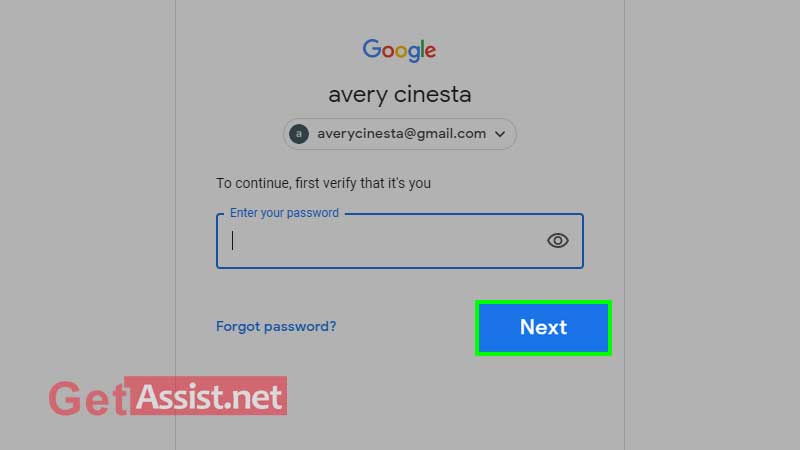
For this, here are the steps you have to apply:

  • Click on the profile picture of your Gmail account given in the top-right corner of Gmail and choose ‘Manage Your Google Account’
go to Gmail profile and click on manage your Google account
  • Click on the ‘Security’ box, and then click on the App passwords option. 
go to security and click on app passwords option
  • Enter the Gmail’s password to verify and click ‘Next’.
enter Gmail password and click on next
  • On the next page, select the app and the device for which you want to generate a password. For the app text field, enter Mail and in the device section, enter Windows Computer or whatever device you are using, click on ‘Generate’.
select the app and device or generate
  • The app password has been generated; you need to use it in the next steps so keep a note of it, after that, click on ‘Done’.
your apps password has been generated and click on done

Step-2 Add Gmail to Outlook

Automatically

After you have enabled IMAP settings, follow the given steps to configure Gmail in Outlook 

  1. Open Outlook and click on ‘File’ and then select the ‘Add Account’ option. 
  2. A dialog box will appear, enter your Gmail address, and then enter the password. In case you have enabled the two-step authentication for Gmail, you have to enter the password that you have generated in the previous process.
  3. Click ‘Next’ and Outlook will start getting the settings from Gmail and testing the connection. If everything works fine, you will receive a congratulations message.
  4. Click on ‘Finish’ and now you can start sending and receiving Gmail within Outlook.

Manually

  1. Launch Outlook and click on ‘File’ and then select ‘Add Account’.
  2. The ‘Add Account’ dialog box will open and you have to select ‘Manual setup’ or ‘additional server types’ and then click on ‘Next’.
  3. Choose out of POP or IMAP and then click on ‘Next’.
  4. Next, fill in the following details in the form:

User Information

Your Name: The name people will see on receiving mail from you

Email Address: Your Gmail address

Server Information

Account Type: IMAP

Incoming mail server: imap.Gmail.com

Outgoing mail server (SMTP): smtp.Gmail.com

Login Information

User Name: Your full Gmail address

Password: your Gmail password

  1. Click on ‘More Settings’ and then click on the Outgoing Server tab.
  2. Next, choose ‘My Outgoing Server (SMTP) requires authentication’ and thereafter click on ‘Use same settings as my incoming mail server’.
  3. Choose the Advanced tab
  4. Fill in the following details in the form:

Incoming server (IMAP): 993

Use the following type of encrypted connection: SSL

Outgoing server (SMTP): 465

Use the following type of encrypted connection: SSL

  1. Click on ‘Ok’ to exit the Internet E-mail Settings dialog box and you will be directed back to the Add Account dialog.
  2. Click on ‘Next’ and Outlook will start testing the connection. Hopefully the test will get complete successfully. 
  3. If the test is successful, click on ‘Close’ and then select Finish. You must now be able to send and receive your Gmail in Outlook.

Step- 3 Accessing Gmail in Outlook

Upon successful completion of the above process, it will successfully add a Gmail account to your Outlook account. Moreover, if you have other accounts linked to Outlook as well, you can switch among the accounts using the left sidebar. 

If you are going to reply to a message from your Outlook account having multiple accounts, you can click on the ‘From’ box to change the email address and select the one that you want to send the reply from. Make sure to not select the incorrect account while responding.

Step-4 Gmail Settings in Outlook

Now you have completely configured your Gmail account in Outlook, you might be interested in knowing some additional Gmail settings that are important to access it in Outlook.

The above process lets you sync your Gmail to Outlook and doesn’t include contacts or calendar. Moreover, if you will primarily use Gmail in Outlook, it would be better to set it as default.

For that,

  • Go to ‘File’, select ‘Info’, click on ‘Account Settings’, and then select ‘Account Settings’ from the dropdown. 
  • In the Email tab, click on your Gmail address and then select ‘Set as Default’.

Connect Gmail to Outlook Using TLS 

If you can’t connect Gmail to Outlook, using the above steps, the chances are SSL isn’t working, so you can do the configuration using TLS. 

  1. Click on ‘Close’ to exit the test dialog box and then choose ‘More Settings’ to open the Internet E-mail Settings dialog box.
  2. Next, click on the Advanced tab and make the following changes:

Outgoing server (SMTP): 587

Use the following type of encrypted connection: TLS

  1. Select ‘Ok’ to exit the Internet E-mail Settings dialog box and go back to the ‘Add Account’ dialog.

Click on ‘Next’ and Outlook will start testing the connection. This will solve the issue and you can check if you are able to send and receive Gmail within Outlook.


Kanika Singh

Webmail and Internet Expert


Related Posts
×