Want to empower collaborations among your colleagues or study together with your classmates, then for that, you need to learn how to share screen on Mac. As an Apple user, doing this is not very tricky, but to make it easier, this article by GetAssist has compiled some easy steps to learn how to screen share on mac without any hassle.
Things to Note
- Make sure that your and the receiver’s Mac systems are equipped with the latest updates and security patches.
- Ensure that both devices are connected to a stable internet connection.
- Don’t run screen sharing in low power mode, as it can create a bit of lag in your experience.
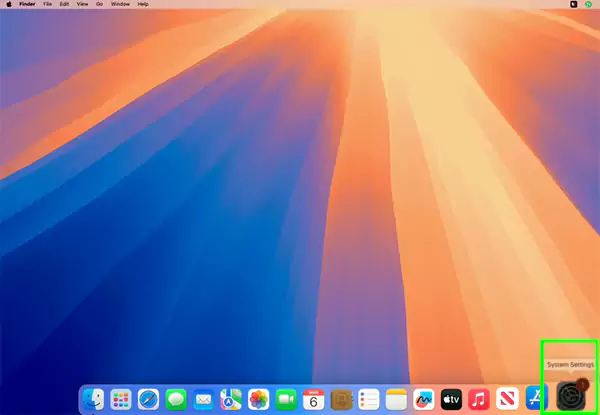
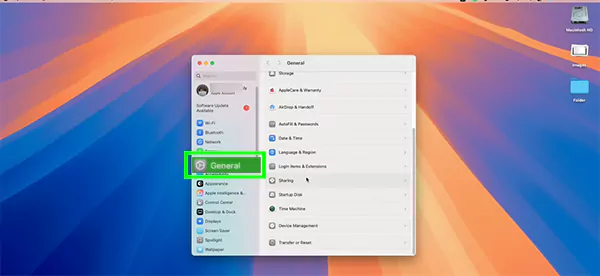
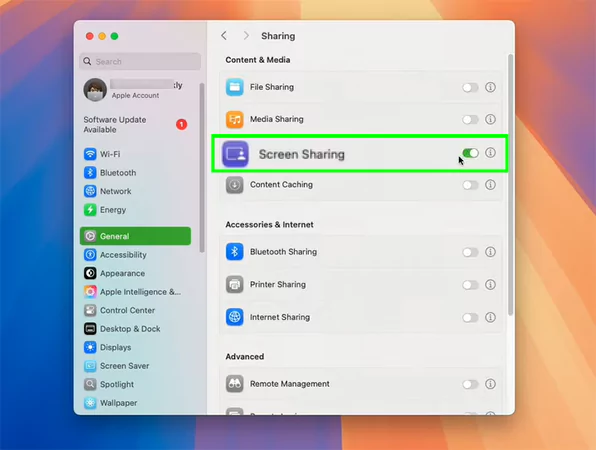
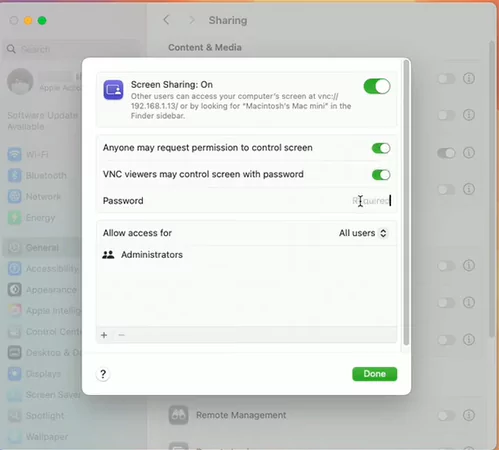
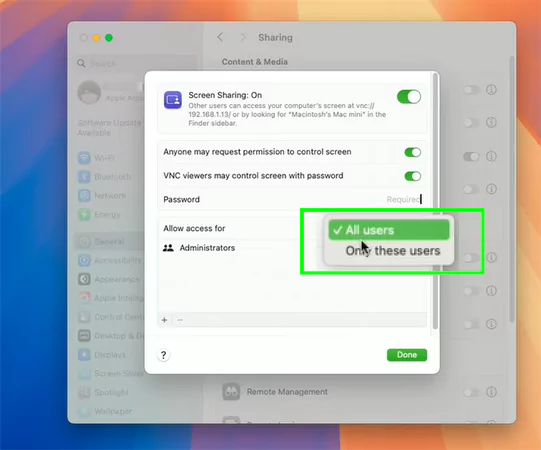
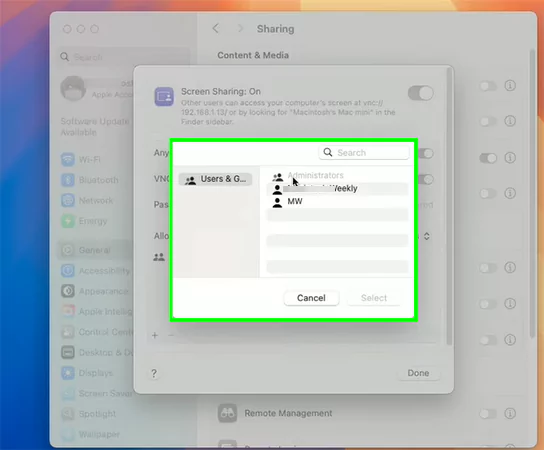
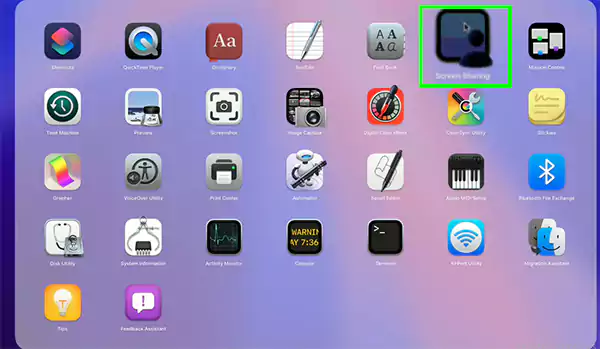
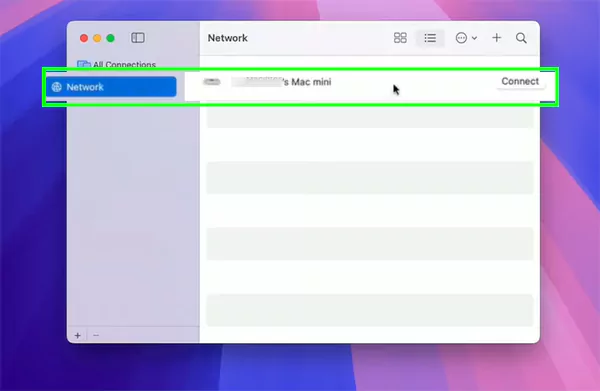
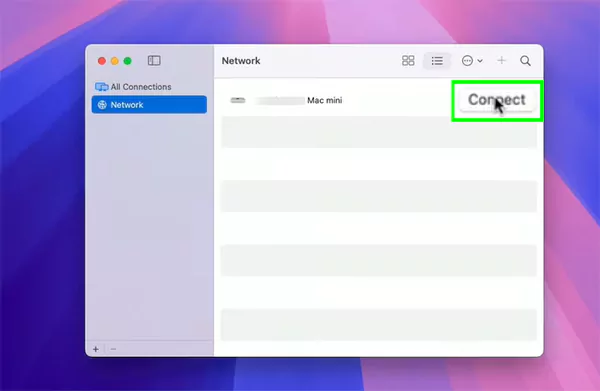
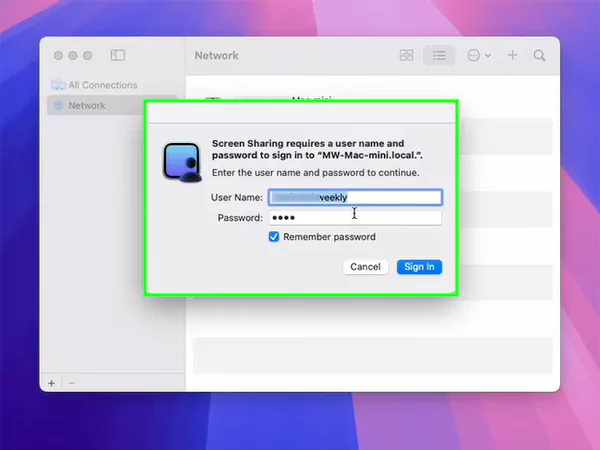
Now, to share the screen on a Mac to your other Apple desktop or laptop, like an Apple MacBook Pro, you need to follow some easy steps in proper sequence.


As you know, MacBook is full of exemplary features like this. If you want to explore them along with the latest macOS and iOS updates, then don’t forget to subscribe to the GetAssist YouTube channel and click the bell icon.
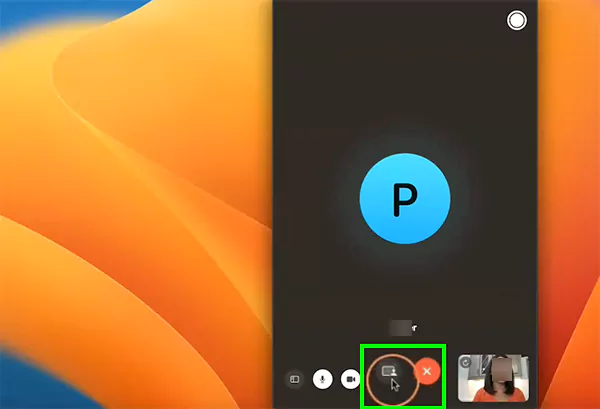
It is even simpler to share screen in Mac via FaceTime after the latest macOS update, as this can be done only in a few clicks: Let’s see how to screen share on mac via FaceTime:


To end this on a good note, we hope that you’ve learned how to screen share on mac through these detailed explanations for both conventional and FaceTime mirroring. If you are still facing some issues, then we recommend that you update your device to the latest versions or security patches. Lastly, make sure to follow GetAssist for more feature explanations and troubleshooting.
If screen mirroring (AirPlay) is not working on your Mac, first ensure both devices are on the same Wi-Fi network, restart them, and toggle Bluetooth/Wi-Fi off and on.
Well, it can happen due to two common issues, which are poor internet reception or the use of an outdated version.
Connect your MacBook to a TV wirelessly via AirPlay by selecting your TV in the Control Center’s “Screen Mirroring” option.