It is intelligent of you to have more than one email account; but don’t you find it difficult to manage them all at once? That’s why we opt for a configuration where you can merge your email accounts to access all your emails in a single place; no unnecessarily moving back and forth. Outlook is one email client that lets you configure your other email accounts. So, here I am to talk about the configuration of Bellsouth email in Outlook.
To sort the things out for you, I have penned down the complete process to set up Bellsouth email in Outlook, so keep on reading to get the things done easily.
Bellsouth Email- A Brief Introduction
Bellsouth is a popular email service that has been run and managed by AT&T since 2006. A well-known American firm, Bellsouth is known to provide its services to more than 18 countries for more than a decade now. From the time Bellsouth has become a part of AT&T, you are allowed to log in to your Bellsouth email account through the AT&T login page.
Configuring Bellsouth Email with Outlook
When it is about configuring Bellsouth email with Outlook, you need to follow a certain sequence of steps and have to enter the correct bellsouth.net settings for Outlook. So, let’s have a look at the setup process:
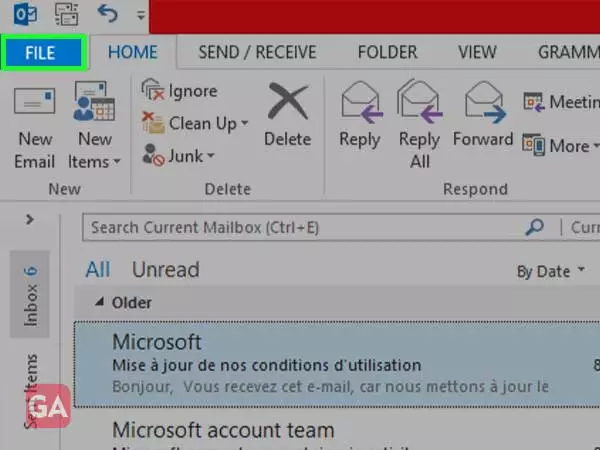
Open the Outlook app on your laptop or PC and click on the ‘File’ menu, given in the top-left corner.
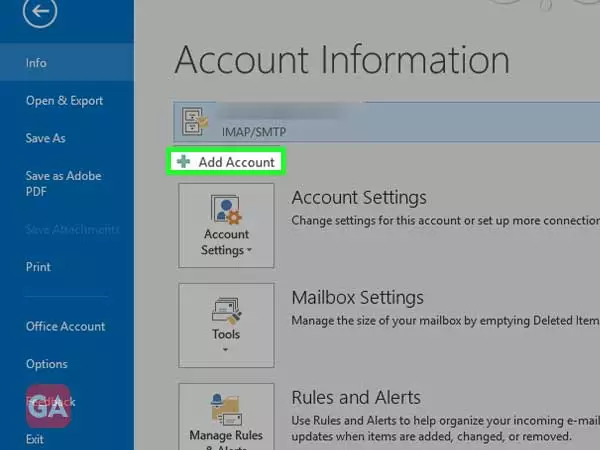
Click on ‘Add Account’
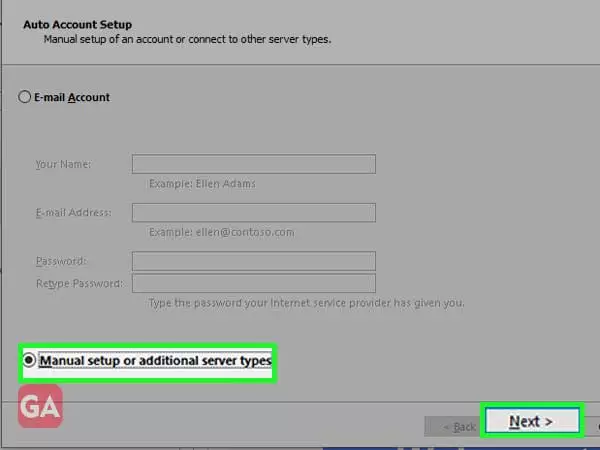
A new ‘Add Account’ window will open where you have to select the option ‘Manual setup or additional server types’ and click on ‘Next’.
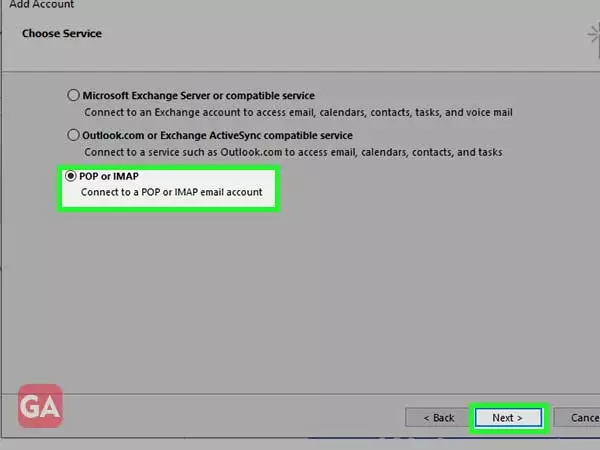
Select the option ‘POP or IMAP’ and then click on ‘Next’ to proceed.
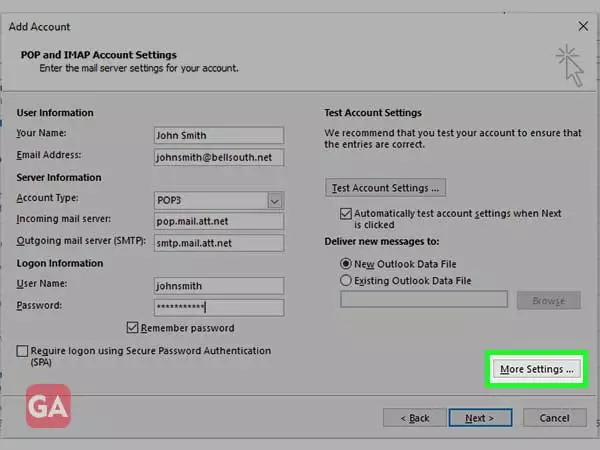
Now, enter the following information:
User Information
Your Name: your name
Email address: your bellsouth email address
Server Information
Account Type: POP3
Incoming Mail Server: pop.mail.att.net
Outgoing Mail Server (SMTP): smtp.mail.att.net
Logon Information
Username: Your Username
Password: Your Password
After filling the information, click on ‘More Settings’
Notes
The bellsouth.net email settings for most of the Outlook versions such as 2016, 2019, 2013 are the same.
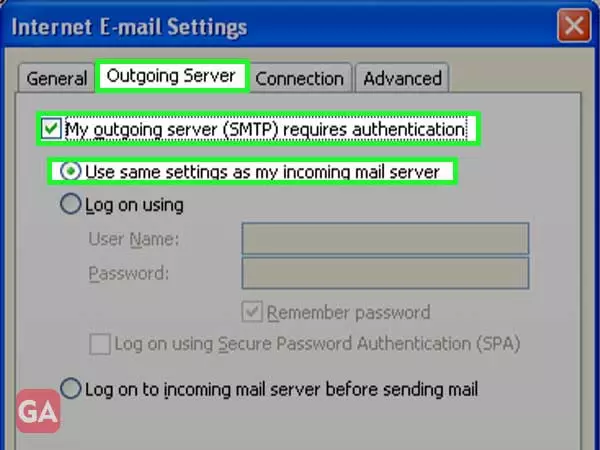
In the ‘Outgoing Server’ tab, select ‘My outgoing server (SMTP) requires authentication’ and make sure the option ‘Use same settings as my incoming mail server’ is selected; press ‘Ok’.
In the ‘Advanced’ tab, enter ‘995’ for Incoming Server (POP3) and for Outgoing Server (SMTP), enter ‘465’; also select ‘SSL’ for ‘Use the following type of encrypted connection’ and press ‘Ok’.
That was all about how to configure bellsouth.net email for Outlook using the correct settings. Make sure to use the correct server settings of bellsouth.net otherwise you may face issues while logging into your Bellsouth email account.