• Getassist
    • How to
    • Troubleshoot
    • Social
    • Internet
    • General
    • News
    • Top 10
    • Tools
    • Write for us

    Troubleshooting » Windows » All About Wsappx Process and Methods to Fix High Disk Usage in Windows 10

    All About Wsappx Process and Methods to Fix High Disk Usage in Windows 10

    Posted on November 18, 2020 | By Shinely Ainsworth


    If you are a Windows user, you must be well-aware of the term ‘High-disk usage’ that is frequently encountered with Windows no matter if you own 8, 8.1, or 10. Even after so many updates and bug fixes, Microsoft has not succeeded in getting this issue resolved. Users always find themselves stuck in a situation where they are not able to get the most out of their device due to high disk usage. Not everyone is technically efficient to deal with such things on their own. Even when I faced this problem, it took me 72 long hours to figure out the solution for WSAPPX high disk usage on Windows 10 (as I own Windows 10). So if you are sailing in the same boat or even if you use Windows 8, or any other, the following guide has been carved to help you out.

    What Exactly is ‘WSAPPX’? Is It a Virus?

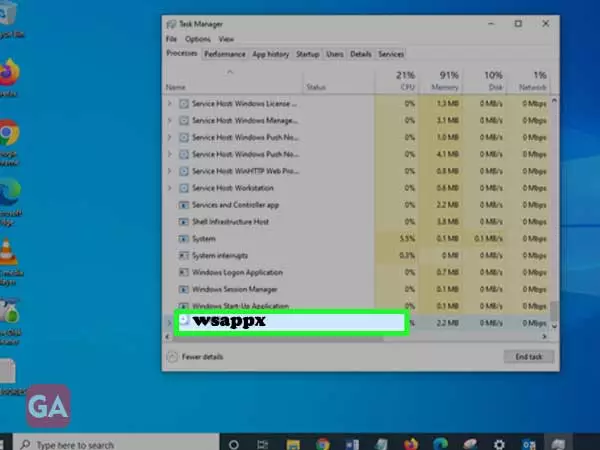
    ‘WSAPPX’ is a process responsible for handling the new Universal apps and the Microsoft Store (such as installing, updating, or uninstalling applications for Windows 10; it runs in the background and you can spot it in the Windows Task Manager. Press ‘CTRL+SHIFT+ESC’ and on scrolling downwards, you will find wsappx running as clearly shown in the image below.

    Press ‘CTRL+SHIFT+ESC’ and you’ll see ‘Wsappx’ running

    Wsappx can be further bifurcated into two separate background services i.e. AppX Deployment Service (AppXSVC) and Client License Service (ClipSVC). AppX Deployment Service (AppXSVC) is known to offer infrastructure support for deploying Store applications while Client License Service (ClipSVC) offers infrastructure support.


    It has been noticed that Wsappx leads to high disk usage as can be clearly seen under the Task Manager processes or under different processes as well. You can verify if Wsappx is really the culprit by undertaking the given steps:

    1. Launch Task Manager
    2. You will see the list of all the processes along with the percentage of memory they are consuming i.e. CPU, Memory, and Disk Usage.
    3. Right-click on wsappx and select the option ‘Go to details’.
    Right-click on wsappx and select the option ‘Go to details

    4.  You will be able to see the process that is a part of wsappx and is causing high disk usage.

    Most Windows users consider wsappx to be a virus as it does affect the smooth functioning of a device. AppX Deployment Service and Client License Service are the two major components of wsappx that do not carry any virus and are just responsible for high disk usage. You can even run an antivirus to cross-check if you are dealing with a virus or malware.

    Why ‘wsappx’ Consumes High Disk Usage?

    After knowing the culprit, it is more important to know what is causing the error or why wsappx is leading to high disk usage so that you can deal with the error in a better way.

    In most cases, wsappx is only active when you are using the Microsoft store. The process will start running in the background only when you open the store and when you will download an app or install an update, this process will consume more resources.

    You will always notice the process running in the background while the Windows store apps like Paint 3D, Mail, etc., are getting updated. Moreover, when the updates get stuck the Windows may try to repeat the update after some time which can be the reason you are seeing 100% disk usage in Windows 10.

    How to Fix High Disk Usage by Wsappx?

    If you are thinking that you can simply end the wsappx process via the Task Manager and can get rid of the issue, you may be wrong as Windows considers it an important system process and the moment you will try to end it you will get a warning message ‘Ending this process will cause Windows to become unstable or shut down, causing you to lose any data hasn’t been saved.’

    If you end Wsappx process via Task Manager you’ll get a warning message

    So ending the task may cause Windows to behave abnormally and that is not recommended anyway as this will not disable Wsappx permanently and it will start running in the background again when you launch any app.

    Let’s have a look at the available options that can help you deal with high disk usage on Windows. Also, remember that not all methods will work for everyone facing this error and you may have to figure out yourself which method to apply-

    1. Stop Store Apps from Updating Automatically

    You can prevent the high disk usage by putting an end to the automatic updating of apps. For that:

    • Open the Microsoft Store
    • Click on the Menu icon and then go to Settings.
    • There you will find the option for ‘Update apps automatically’; turn the toggle off.

    Doing this will prevent automatic app updates unless you do that manually by going to the store and selecting ‘Downloads and Updates’. Click on the ‘Get Updates’ option and if you want to install any of the available ones, do it on your own.

    2. Disable Windows Store

    Disabling the Windows store is one option that comes to everyone’s mind but this option is not as feasible as it looks. You may face bugs and lags in the Windows store once you disable it. Also, keep in mind that doing that will not disable wsappx permanently, however, it will just reduce the load to perform Windows Store related tasks and that will ultimately fix the 100 percent high disk usage issue.

    A. Using Registry Editor

    You can disable the Windows Store using Registry Editor as follows:

    • In the search box of the start menu, type ‘regedit’ and press ‘Enter’; this will launch the registry editor window.
    • Next, go to ‘HKEY_LOCAL_MACHINE\SOFTWARE\Policies\Microsoft’ folder and if you can’t find it, you can copy the specified address in the search bar of the Registry editor window and press ‘Enter’.
    • Select Windows Store and select ‘New’ after right-clicking on the right panel and further select ‘DWord (32-bit) Value’ from the menu.
    • Rename the ‘DWord (32-bit) Value’ as ‘RemoveWindowsStore’ and also give the value data as ‘1’.
    • Once done, you can restart your system.

    B. Using Group Policy Editor

    The next option is to disable Windows Store through Group Policy Editor but it is only for Windows Pro and Enterprise users.

    Follow the directions provided here:

    Computer> Configuration> Administrative Templates> Windows Components> Store

    Double-click on the option ‘Turn off the store application’ and on the right window panel, select ‘Choose Enabled’ and then click on ‘Apply’; also don’t forget to restart the device.

    3. Disable Clipsvc and AppXSvc

    • If the above method isn’t for you, you can go on disabling Clipsvc and AppXSvc to fix this as follows:
    • In the search box of the menu, type ‘regedit’ to go to the registry editor.
    • Go to ‘HKEY_LOCAL_MACHINE\SYSTEM\ControlSet001\Services\AppXSvc’ folder or else copy the above address in the search bar.
    • Next, open the ‘Start’ file and change the value data to ‘4’.·   
    • After that restart the system and doing that will disable AppXSvc; similarly, you can disable Clipsvc by navigating to ‘HKEY_LOCAL_MACHINE\SYSTEM\ControlSet001\Services\Clipsvc’ and change the value.


      Type Your Question
    • Recent Post
      • How to Get Started with Bitcoin Trading Robots
      • Banking App Testing: Strategies, Tools, and Best Practices
      • Live Chat txt.me For Websites
      • How to Choose the Right CDL Training School
      • Top 5 Benefits of Hiring Professional Cleaning Services
      • Protect Your WordPress Site from Security Threats with These Easy Fixes
      • 5 Advantages Of Hiring A Debt Relief Company
      • How the UR5e Collaborative Robot is Benefiting the Food Industry
      • Become Self-Employed as a Chauffeur
    Related Post
    • mouso core worker process
      MoUSO Core Worker Process Error Solved

      SpotlightPending updates are the most common cause of high memory issues by MoUSO Core Worker...

    • Fix Waasmedic Agent Exe High CPU Usage
      How to Fix Waasmedic Agent Exe High CPU Usage?

      Spotlight The issue of “Waasmedic Agent Exe” for taking up all the storage is giving...

    • Windows Error
      Are you facing “Windows Error 0x0 0x0” on your PC? Just follow this Help book

      You might see an error out of the blue while using your PC or Computer,...

    • fix-error-code-0xc0000005-in-windows
      Troubleshooting Guide to Fix Error Code 0xc0000005 on Windows 7, 8 or 10

      In This Guide, You Will Read: When Do the Windows Error 0xc0000005 Occur? What Causes...

    • api-ms-win-crt-runtime-l1-1-0-dll-file-is-missing
      Quick Fixes to ‘api-ms-win-crt-runtime-l1-1-0.dll is missing’ Error

      Are you struggling with ‘api-ms-win-crt-runtime-l1-1-0.dll is missing’ error on Windows? If yes, there is nothing...

    • cursor disappears in chrome windows
      9 Working Solutions to Fix ‘Mouse Pointer Disappears in Chrome’ Error

      Are you facing issues with your mouse cursor while working with Google Chrome? You might...

    Disclaimer : The information available on the site is only available for informational purposes at the user’s sole risk. We take no guarantee of the accurateness, value, or completeness of the information and shall not be held responsible or liable for any errors, omissions, or inaccuracies in the information or if any user is solely relied on the information. User is himself responsible for verifying the information as being appropriate for personal use. We don’t claim to be officially related to any brands, products or services mentioned on the website and have no right to them. We only offer support guides and the images, names, media or links used on the website are just for the reference and informational purpose only.

    Getassist

    • Important Links

      • Home
      • About Us
      • Contact Us
      • Privacy Policy
      • Terms Of Use
    • Get in Touch

    • Address: Wireless Revolution LLC., 7800 harwin dr houston texas 77036 United States

      Mail Id: [email protected]

    Copyright © 2022 Getassist.net All Rights Reserved.
    Developed by Battersea Web Expert