We all know what importance does ‘Antivirus’ hold in today’s Internet world and that’s why we consider installing antivirus programs on our respective computers to keep it as safe as possible, right!
In regard to the same, there’s this name called ‘Avast’ that everyone has heard about. It’s one of the top-notch antivirus software that aims to protect computer operating systems from all sorts of viruses, malwares, worms, trojans, etc.
In fact, the most amazing thing about Avast is that it is compatible with all the operating systems so no one has to worry about the compatibility of Avast with their respective systems.
That’s all about the positives. Hence, on the contrary of this, the only downside of Avast is that sometimes users can face Avast Antivirus not installing on Windows O.S. especially Windows 10.
But, irrespective of this, Avast is considered as one of the best antiviruses available free on the internet for protection of PC/Laptops. Thus, many still want to install it on their respective computer system no matter how!
So, like many other users, if you also have encountered the Avast Antivirus problem of not installing on Windows PC then, this guide is all what you need today. After reading this, you’ll be able to fix and successfully install the Avast antivirus on your respective Windows PC.
With that said, let’s straightaway begin—
Before anything else, make sure whether you’ve installed the Avast antivirus on your computer in the correct manner or not. For that, look at the below-mentioned procedure of—
How to Install Avast Antivirus on your Windows 10 Computer System?
You can install Avast antivirus via either of the following two ways:
Regular Installation
Step 1: First of all, log in to your Windows 10 O.S. with all the administrative permission.
Step 2: Then, launch your preferred web browser and visit the Avast website using it. There on the official website of Avast, what you simply have to do is, click on the ‘Download’ button. In doing so, you’ll be able to download the avast.exe file from the website and save it in a familiar location, which you consider easy to access.
Step 3: Following that, you’ve to perform the right-click action on the downloaded setup file to select ‘Run as Administrator’ from the contextual menu that appears.
Step 4: As you do so, a dialogue box will pop up in front of you to ask whether you want to continue the Avast installation setup or not! So, in that you’ve to click the ‘Yes’ button to continue the process.
Step 5: After that, move on to click on ‘Options’ for simply changing the default language of the on-going setup. Once done, click on the ‘Install’ button to make sure the installation process continues.
Step 6: Now, you’ll have to wait until and unless the installation of the Avast antivirus setup gets completed on your Windows 10 system.
Step 7: In the end, when the installation gets complete, just click on the ‘Continue’ button and in doing so; the privacy policy of Avast will appear on the screen for your review. So, make sure you go through it well.
Step 8: Once you finish reviewing the policy of Avast antivirus, you can click on the ‘OK’ button to finally run the first complete scan of your Windows 10 system to check if it will be able to detect the viruses or malware which threatens your system (if there’s any).
This is one way with the help of which your Avast antivirus will be activated to protect your Windows 10 system from unwanted online threats of viruses and malwares.
But, if you cannot install Avast using this way, then on the contrary you can install the antivirus in a custom mode.
Custom Mode Installation
Step 1: Here also, you’ve to execute the same steps of the above procedure till you select ‘Run as Administrator’ for the setup file you’ve downloaded from the official Avast website.
Step 2: After that, you’ve to select the ‘Customize’ option simply for the custom installation.
Step 3: Following that, click on the ‘Change’ button to select your favorable location where you want to save the program files of the Avast antivirus.
Step 4: Then, right before clicking ‘Install’ you’ve to either select or deselect the components from the Avast program.
Step 5: Once you’re done with your selection, you’ll then have to wait until and unless the installation of the Avast antivirus setup gets complete.
Step 6: Now, when the installation of Avast is complete, simply click on the ‘Continue’ button which is listed right below the message ‘You’re protected.’
Step 7: In the end, don’t forget to ‘Review the Privacy policy’ of Avast Antivirus and click on the ‘I agree’ button to run the first scan of your Windows 10 system.
Now, using the above mentioned correct installation procedure also, if you fails to install Avast antivirus on your Windows 10 PC then, here’s some course of actions you can take to get rid of the issue—
Basic Measures to Try when Avast Antivirus Is Not Installing On Windows!
If you’re trying hard to install Avast on your system but getting failed then, maybe because your Windows 10 is preventing it from installing. So, considering that as a reason, here’s all what you can do to fix it—
First of all, you must ensure that your Windows 10 PC should be able to match with the minimum system requirements that Avast antivirus needs for installation.
Then, you need to be double sure that the setup file of Avast Antivirus that you’ve downloaded is not corrupted. However, if it is, then you’ll have to again download the correct one.
Also, remember to check your computer Windows version because it must be up-to-date for installing Avast software.
Next, you must remove problematic applications using uninstaller software. Well, because you never know when the available third-party applications such as System Mechanic on your PC start interfering with other programs and features of your system and cause problems including the one you’re currently experiencing.
Following that, you can clean your Windows 10 O.S. to remove temporary files as they are capable enough to cause this issue on your PC. To do so, you can either use a dedicated tool like Disk Cleanup which is already embedded in Windows or, you might want to try a more complex tool like AVG TuneUp.
Other than this, if malware and viruses are available on your PC then they can also prevent you from installing Avast antivirus. So, in that case, it’s necessary for you to create a rescue disk on a separate PC and use the same to remove the malware and viruses present on that particular PC where you want to install Avast.
Last but not least, you can give a quick restart to your system and then, you can once again attempt to install the Avast antivirus on your Windows PC
Now, even after trying these basic actions, if still, you’re unable to get rid of this issue, then you must consider fixing it with these below-mentioned 6 effective solutions—
Notes
You may not have to try them all. You just work your way down the list until one of the solutions is able to help you fix the encountered issue.
Solution 1: Temporarily Turn off Windows Defender & Other Antivirus
You must ensure no other antivirus program has been installed or running on your Windows 10 O.S. Well, because two antiviruses don’t function well together.
So, if you’ve already installed some other antivirus or it’s by default available on your system like Windows Defender then, you’ve to immediately remove/disable it before you try installing the Avast again.
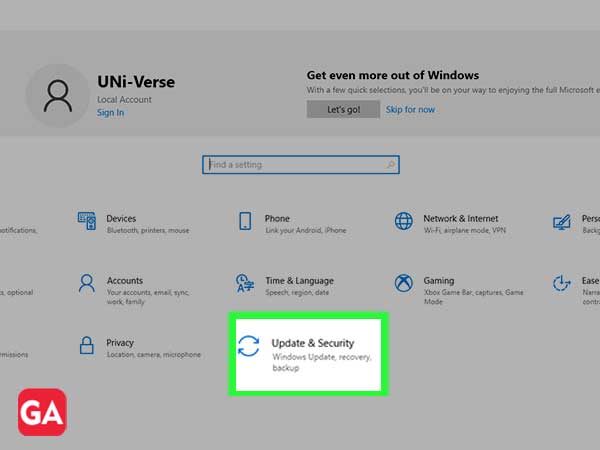
Step 1: To do so, first go to ‘Windows Settings’ by pressing ‘Win + I’ shortcut on your keyboard.
Step 2: Then,click on the ‘Update and Security’ option from the rest of the available ones.
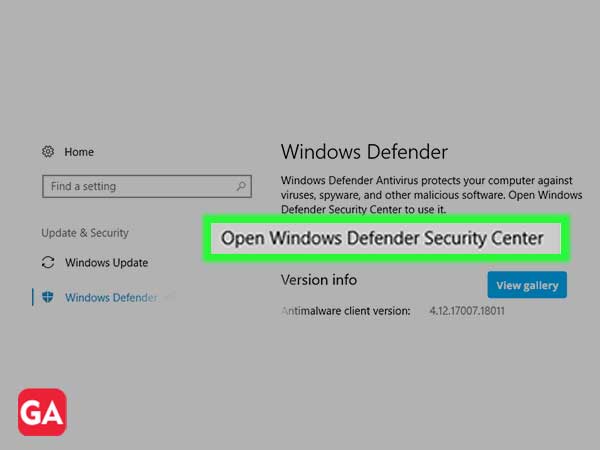
Step 3: Inside it, go to the ‘Windows Defender’ tab and from there, click on ‘Open Windows Defender Security Center.’
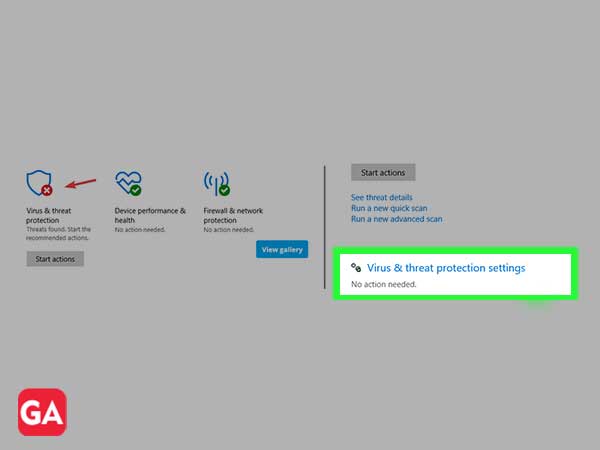
Step 4: Next, you’ve to navigate to the ‘Virus & Threat Protection’ to select ‘Virus & Threat ProtectionSettings.’
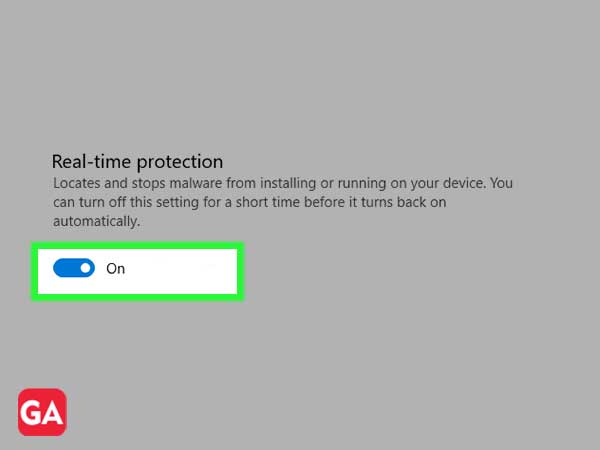
Step 5: Now, inside the virus & threat protection settings, you’ve to simply uncheck the ‘Real-Time Protection’ radio button of Windows Defender.
In regard to the above solution only, let’s acknowledge the fact that you sometimes aren’t aware of other antivirus programs you have on your computer. Wondering how?
Well, because it maybe came as a “Bloatware”— a program that can be preinstalled with another software you’ve purposely installed on your computer system.
So, you should check about the same as well. For that—
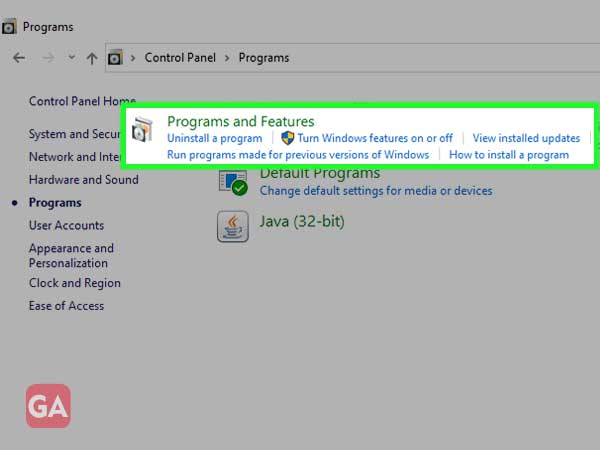
Step 1: Open ‘Control Panel app’ using Windows search feature.
Step 2: Then, inside the control panel window, you’ve to click on the ‘Programs and Features’ option.
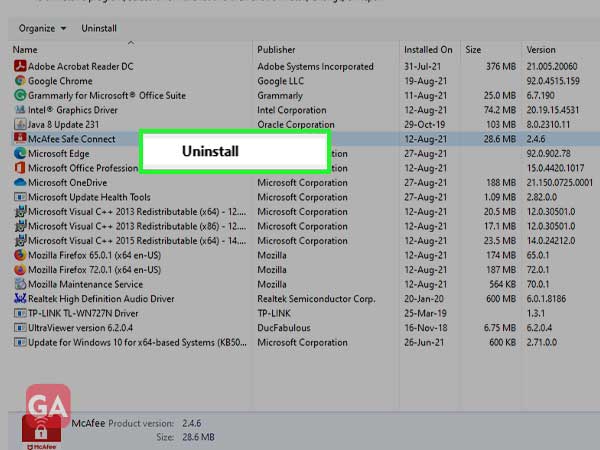
Step 3: In doing so, a list will open and you’ve to thoroughly check it to ensure whether you’ve any other antivirus installed or not. And, if yes then, simply right-click on it to select ‘Uninstall’ option from the appeared contextual menu.
Now, you can try to install ‘Avast’—your desired antivirus again on your Windows 10 PC.
Solution 2: Run Both SFC and DISM Scans
In some cases, Avast antivirus won’t install on Windows PCs due to file corruption. So, if that is the case with you also, then you can fix this problem simply by running SFC and DISM scans.
Steps to Run SFC Scan—
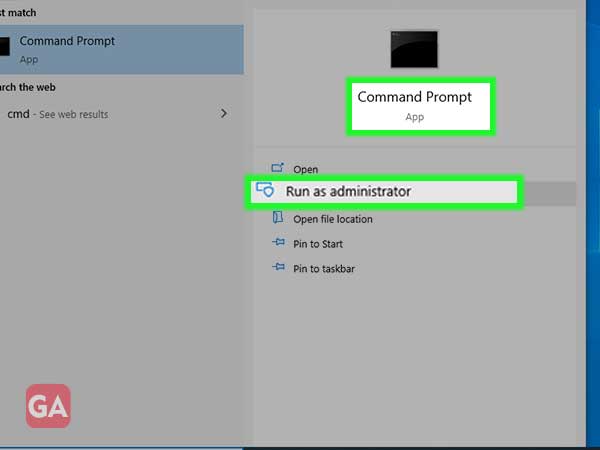
Step 1: Press ‘Win + S’ keyboard shortcut to open the ‘Windows Search’ box.
Step 2: In its search bar, type “cmd” and then, click on ‘Run as Administrator’ from the search result that appears. As you do so, you’ll be able to open ‘Command Prompt’ as administrator.
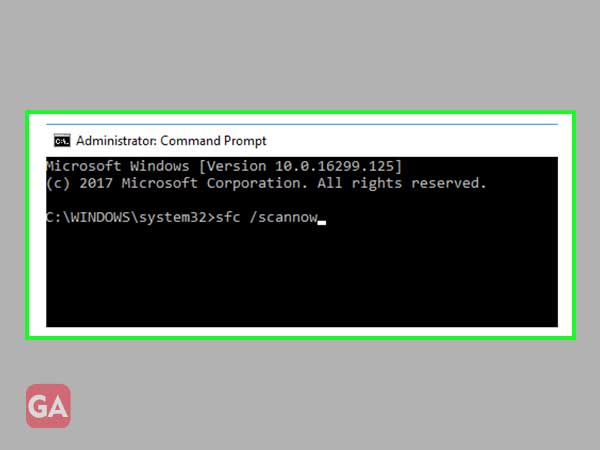
Step 3: Now, when command prompts start, what you’ve to do is enter this “Sfc/scannow” command there and simply hit the ‘Enter’ button to run it.
Once you do so, SFC scan will start and the whole scanning process will take around 15 minutes. So, in those 15 minutes make sure to not interrupt it at all.
Notes
If in your case, Command Prompt isn’t available then, in spite of this you can also use PowerShell (Admin).
Steps to Run DISM Scan—
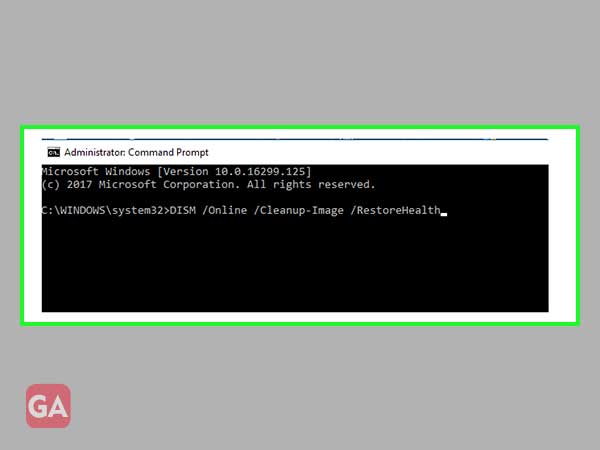
Step 1: To run DISM Scan also you need to open ‘Command Prompt’ as administrator as shown in the first part of this solution.
Step 2: Once the Command Prompt starts, you’ve to simply enter this “DISM /Online /Cleanup-Image /RestoreHealth” command line there.
Step 3: After entering the command, you need to just press the ‘Enter’ button and run it.
Step 4: Now, as the DISM scan will start, you’ve to wait patiently (without interrupting it) for more than 20 minutes because this DISM scan can take 20 or more minutes.
Once both the scan finishes you can check whether the encountered issue has been resolved or not because SFC and DISM scans are mainly designed to repair a corrupted installation in Windows 10.
Solution 3: Disable Fast Startup
This interesting feature of Windows 10 merge both shutdown and hibernation into one for allowing your operating system to boot faster. However, it has been reported by a few Windows users that it sometimes can prevent your Windows PC from installing certain applications including your antivirus.
So, considering this as one of the reasons why you won’t be able to install Avast antivirus on your Windows 10 PC; it is recommended that you should disable the Fast Startup feature via executing these given steps–
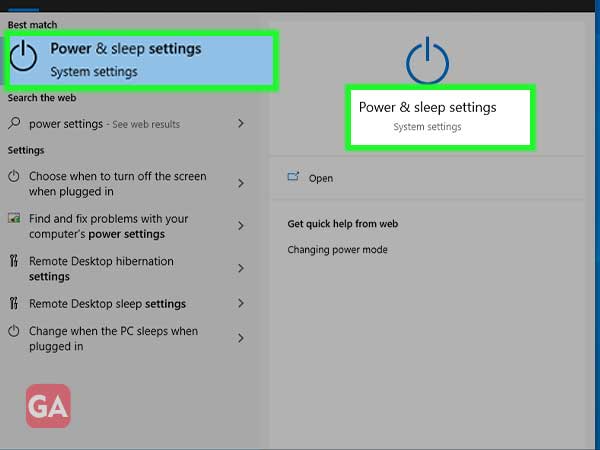
Step 1: For disabling Fast Startup, press ‘Win + S’ shortcut on your keyboard.
Step 2: In doing so, ‘Windows Searchbox’ will pop up in front of you and inside its search bar, you’ve to type in “Power Settings” and click on the ‘Power & Sleep Settings’ option from the list of results that appear.
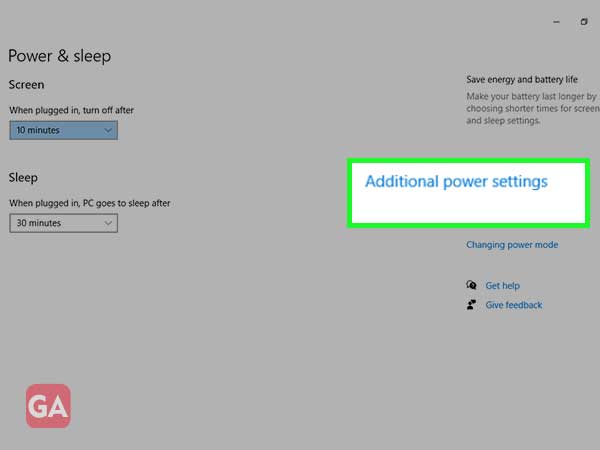
Step 3: Then, click on ‘Additional Power Settings’ to open the same.
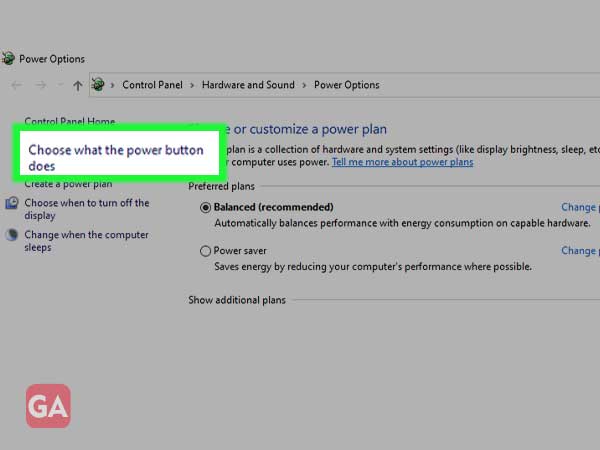
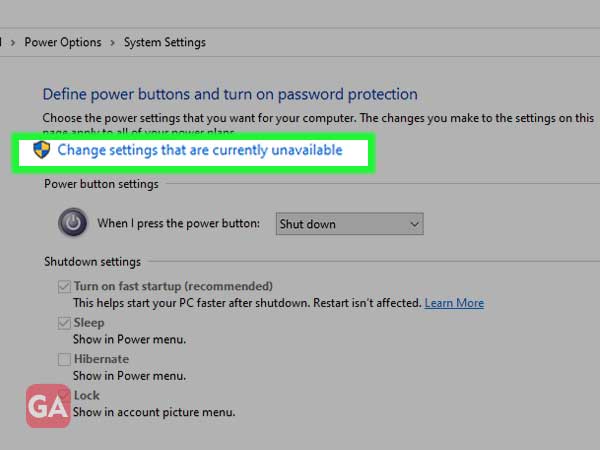
Step 4: Following that, you’ve to select ‘Choose what the power button does’ from the menu which is available on the left of the screen.
Step 5: Next, you need to just click on ‘Change settings that are currently unavailable.’
Step 6: Inside it, locate the ‘Turn on fast startup (recommended)’ option and uncheck it before you click on the ‘Savechanges’ button.
Once the Fast Startup feature gets disabled, you can try installing Avast on your system to check if this solution works in your favor or not!
Solution 4: Restart Your Windows Audio Service
Reported by many users, Windows Audio service is another common cause for the ‘Avast won’t install’ problem that you’re encountering. Therefore to fix this issue, you need to locate and restart Windows Audio service via following these steps—
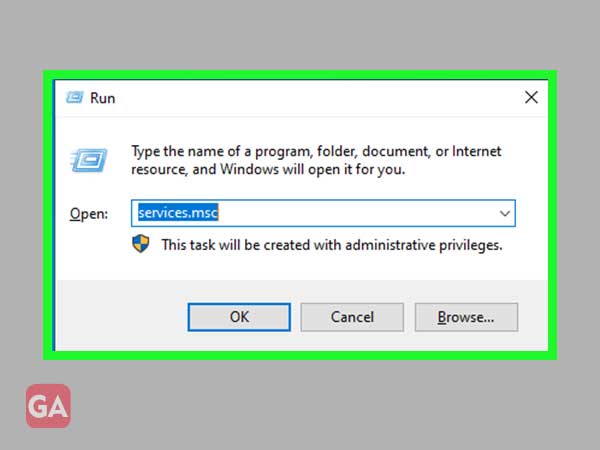
Step 1: In order to restart your Windows Audio service, first open ‘Windows Run Utility Box’ using the ‘Win +R’ shortcut from your keyboard.
Step 2: Inside the same, type in “services.msc” and click on the ‘OK’ button to let the ‘Services’ window open in front of you.
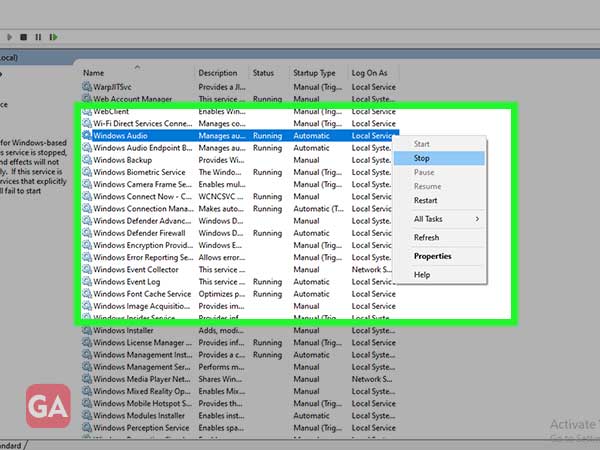
Step 3: There on the services window, you’ve to simply locate the ‘Windows Audio’ service. And, once you’re able to locate, perform a right-click action on the same to choose the ‘Stop’ option from the contextual menu that appears.
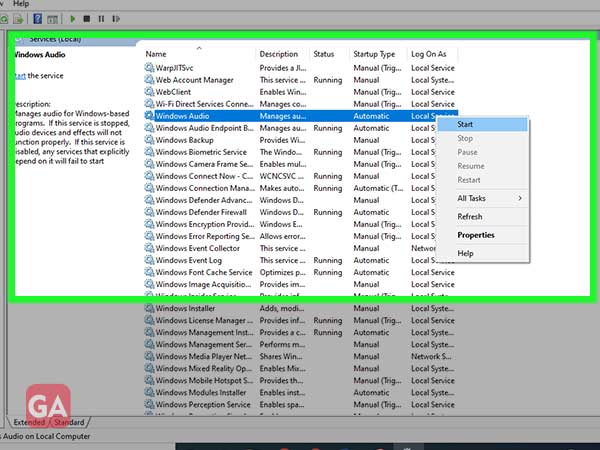
Step 4: After doing so, just wait for a few minutes and then, perform a right-click action on the service again to simply choose the ‘Start’ option this time from the appeared contextual menu.
In the end, right after restarting the Windows Audio service, you can try to install the Avast antivirus again on your respective Windows 10 O.S.
Solution 5: Perform a Clean Boot
If the above-mentioned solutions won’t be able to help you fix the Avast installation error then, what best you can consider doing is perform a clean boot on your system. And, you can do it easily if you follow these below steps correctly—
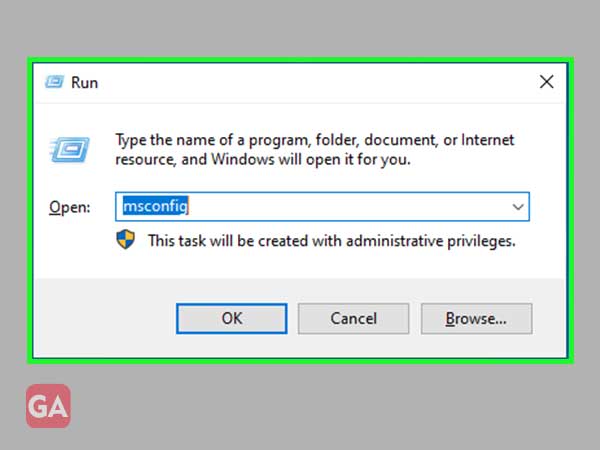
Step 1: To clean boot your system first press ‘Windows Key + R’ together on your keyboard.
Step 2: In doing so, ‘Windows Run Dialogbox’will appear in front of you and inside it; you’ve to type in “msconfig” before you hit the ‘OK’ button.
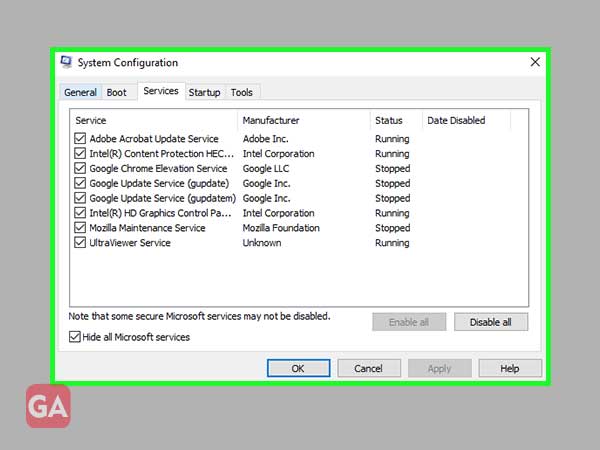
Step 3: Now, the System Configuration window will open in front of you where you’ve to navigate onto the ‘Services’ tab to simply tick ‘Hide all Microsoft services’ checkbox followed by clicking the ‘Disable All’ button.
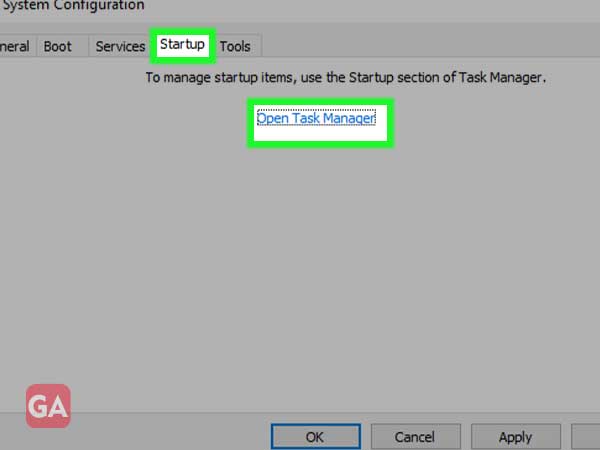
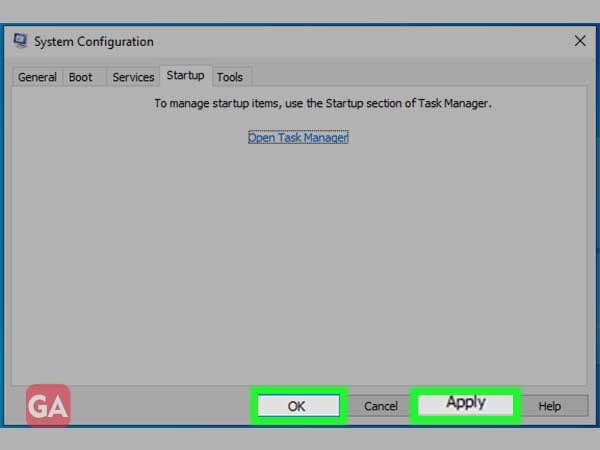
Step 4: Following that, navigate to the ‘Startup’ tab to click on the ‘Open Task Manager’ link.
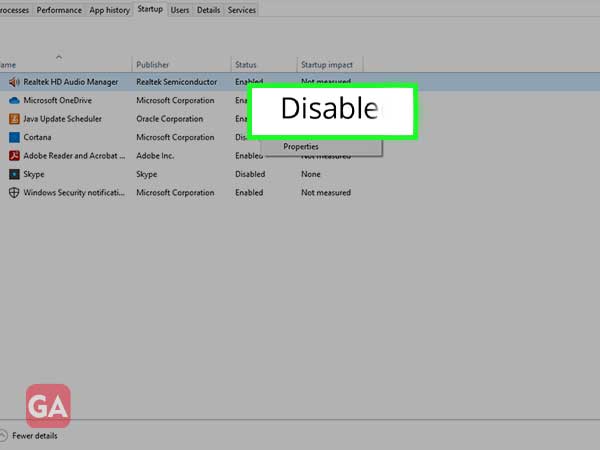
Step 5: On clicking the link, a list of startup applications will appear on the screen and you’ve to simply right-click on the first item of that list to choose the ‘Disable’ option from the appeared contextual menu.
Step 6: Once you finish doing so, you’ve to repeatthis procedure for all the startup applications available on the list.
Step 7: Now, when you’re done with disabling all startup applications on the list, close the ‘Task manager’ window to return back to the ‘System Configuration’ window.
Step 8: There, click on the ‘Apply’ followed by ‘OK’ button to save the recent changes you’ve made.
Once done, do not forget to restart your PC and check if the encountered problem has been resolved or not.
Bottom Line
That’s it! Using solutions of this guide, we hope that you’ll be able to solve “Windows 10 is preventing Avast Antivirus from installing” issue.
However, if nothing works in your case, you can contact the technical support team of Avast at any time of the day and they’ll surely help you in resolving the encountered “Avast Antivirus won’t install problem on your Windows 10 PC.”