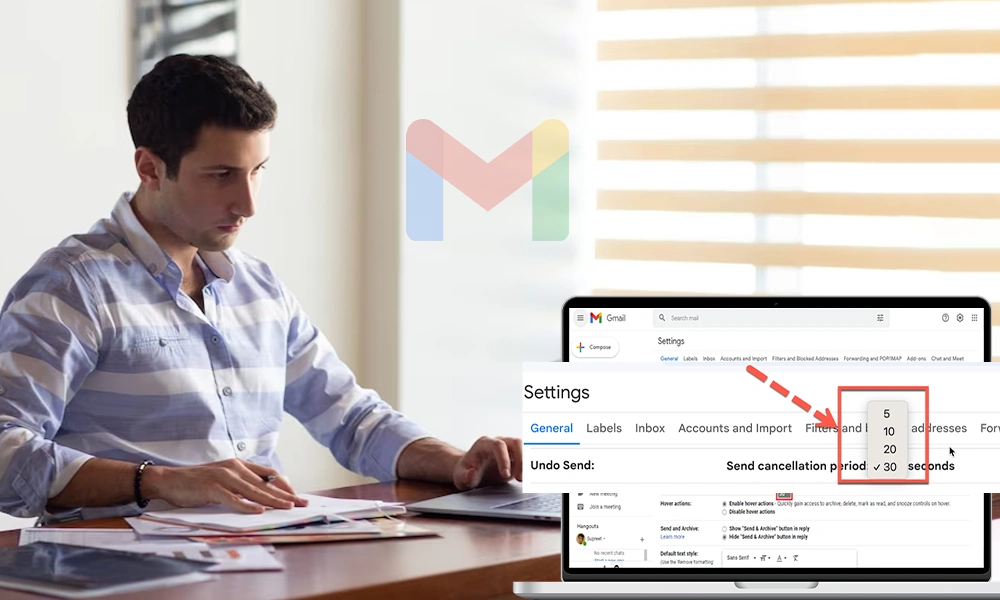
With approx 1.8 billion active users, Gmail bags the top position in the rundown of popular email services. But what is still holding people back from forming an association with Google is the compulsion of providing the phone number. Though it helps users on various occasions during their period of use, not everyone is willing to share their confidential details like a personal mobile number.
Earlier phone number verification was an optional measure, but over time Gmail made it an inclusive step for new registrations. Eventually, it became a massive repulsion, thus users started an expedition to find ways of creating a Gmail account without a phone number. If you are part of a tribe that wants Gmail to not ask for their phone number, check out all the below-listed methods.
But……………..
Google needs your phone number to identify that you are not a spammer or fraudster, apart from this, it is used:
“Protection” in the realm of web services is ensured by phone numbers or email addresses, but a contact number is always the strongest shield. Gmail, the giant, uses your phone number to make sure the account is in the right hands and is being accessed by the authorized owner.
But, the phone number is quite a personal detail that not everyone is interested in sharing. And, thus there are a large number of searches on “how to create a Gmail account without a phone number”. You may find a number of options for the same, but make sure you choose the efficient one. We have curated some of the most workable ways to create a Gmail account without adding a phone number while registering.
There are numerous apps available on the internet that offer you duplicate phone numbers to skip the phone number verification. Though phone number verification is a great way to keep intruders at the bay and preserve the account’s security, it’s always your choice to share it or keep it private. If you want to go with the latter, we advise you use an app like Burner, Google voice phone number, textverified, hushed and more.
These randomly generated phone numbers can help you verify your identity on Gmail without sharing your actual phone number. Here is when a phone number generator can help you:
Gmail is primarily used on mobile devices, whether the platform is Android or iOS and thus it offers the account creation option through Smartphone’s mobile app. You can enter your full name and date of birth along with a little more information and you are set. You will get the option to skip the phone number and create an account without it.
Here are the steps for creating a new Gmail account on your mobile phone
For iOS:
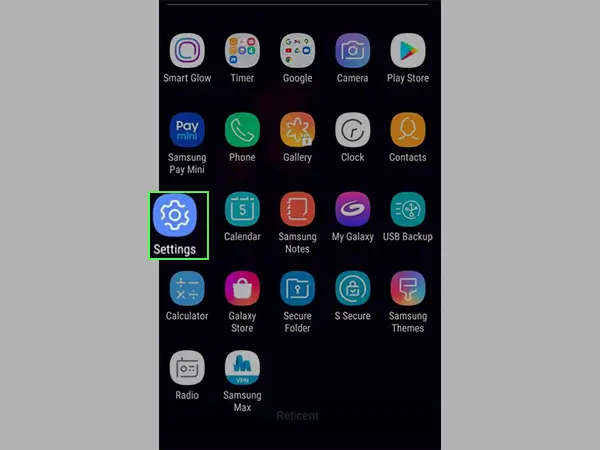
Step 1: Navigate to your home screen and tap on “Settings”.
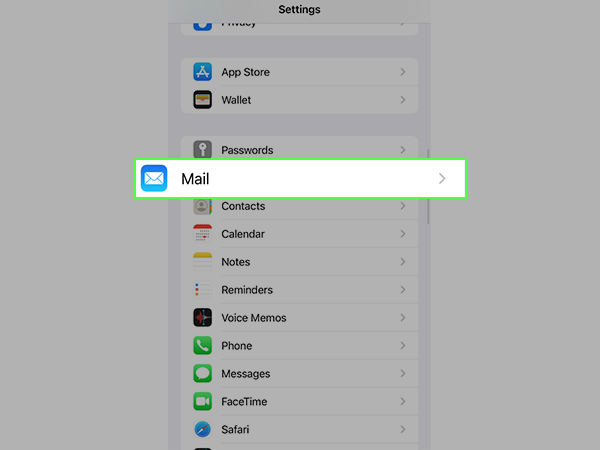
Step 2: Scroll down to find the “Mail” section.
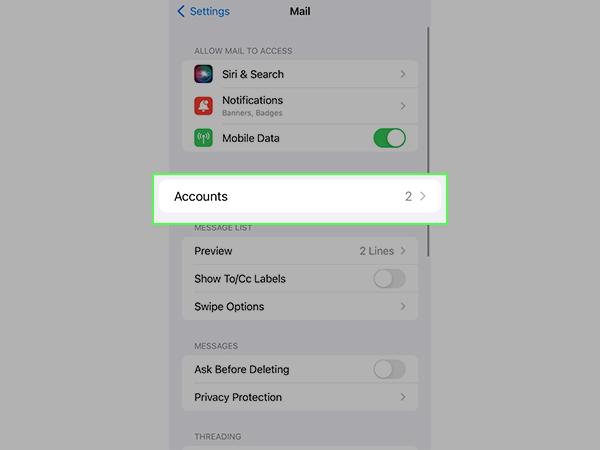
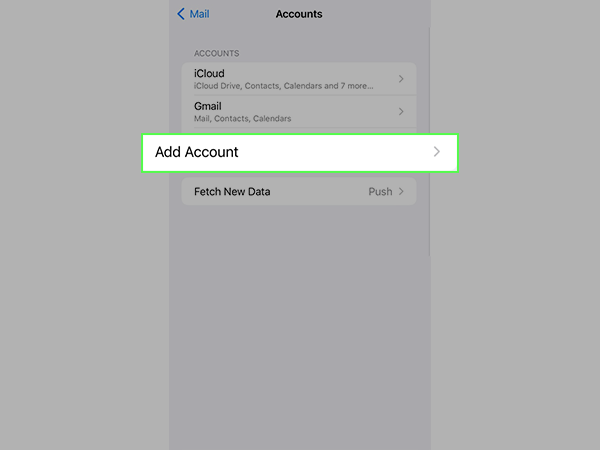
Step 3: Click on “Accounts”.
Step 4: Then, select “Add Account”.
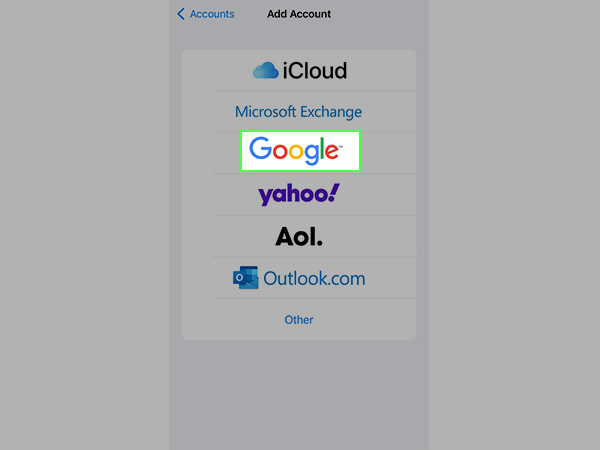
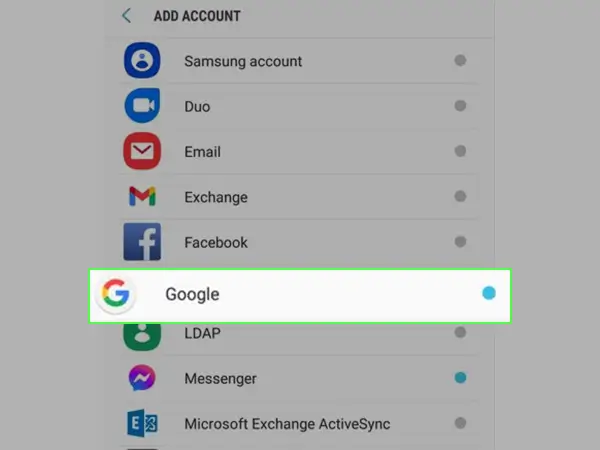
Step 5: Click on “Google” and then “Use another account” if you already have an account.
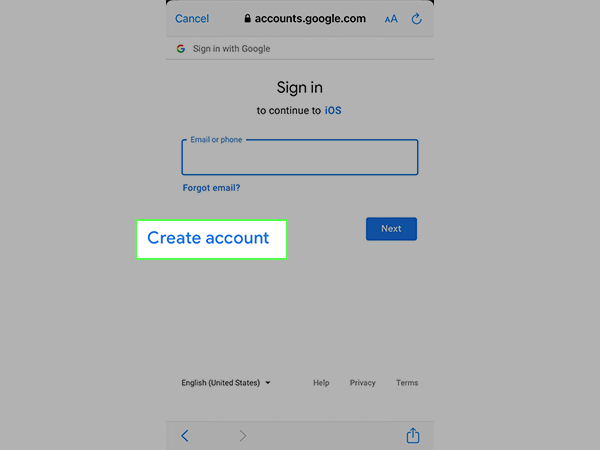
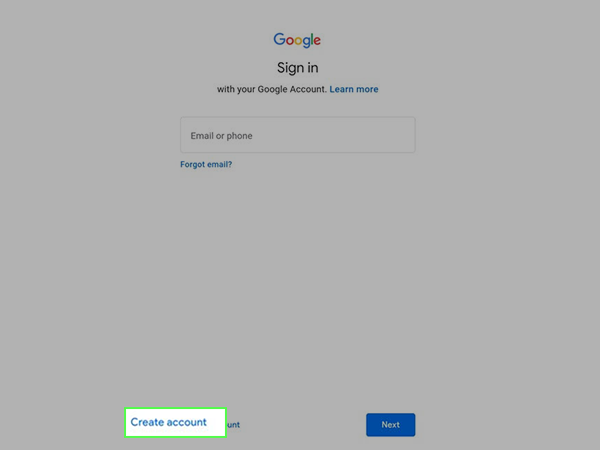
Step 6: Then, click on “Create New Account”
Step 7: Follow the on-screen prompts and enter your details. When the field for phone number appears on the screen, leave it blank.
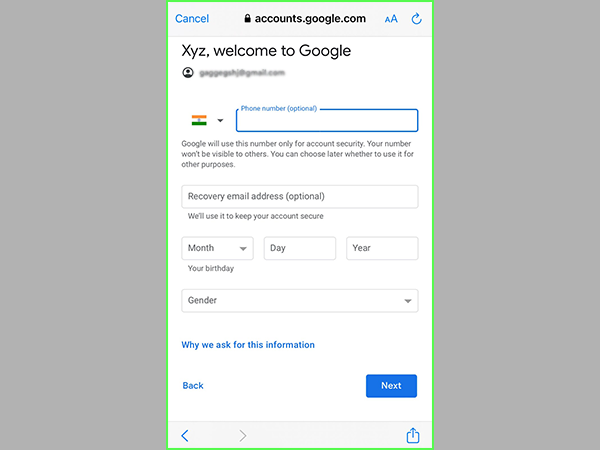
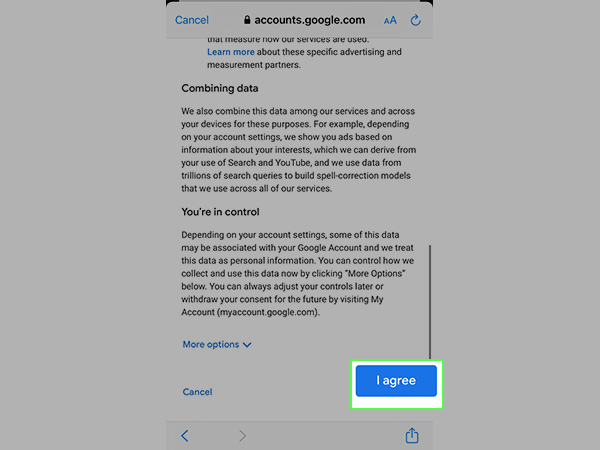
Step 8: Then, review your account information, and enter the details that are required. Click “Next” and finish it by clicking on “Accept” to accept the terms and conditions.
For Android:
It is not as easy as it is with iOS, due to the complexity of the process. The phone number is not optional when creating a Gmail account in Android. Here are the steps:
Step 1: Click on “Settings” and tap “Accounts” or “Accounts & Backups”
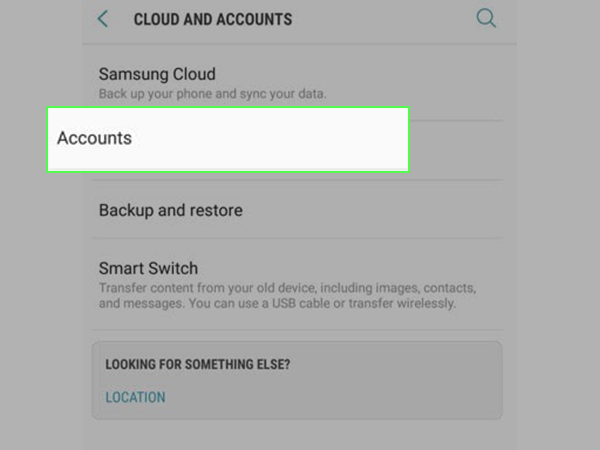
Step 2: Select “Manage Accounts” and or simply go to Step 3.
Step 3: Tap on “Google”.
Step 4: Click on “Create Account”.
Step 5: Then, enter your Full Name, Date of Birth, and Gender. Click “Next”.
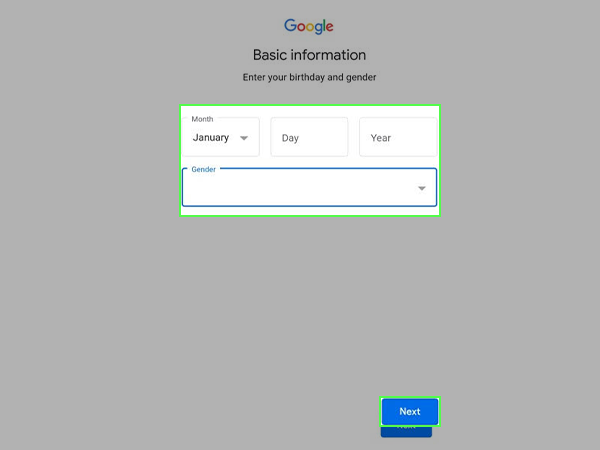
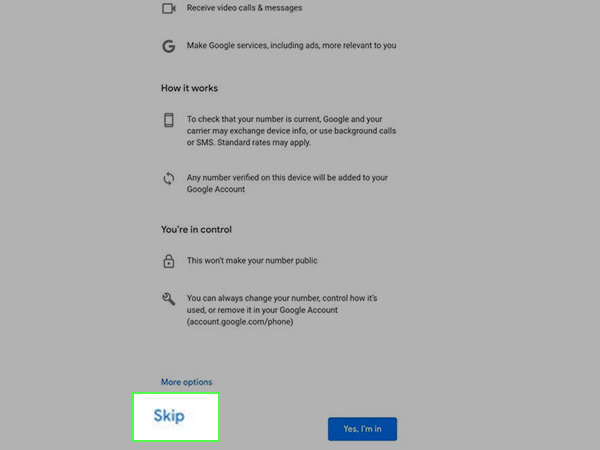
Step 6: Now, scroll down to find the “Skip” button to avoid inserting the phone number.
Step 7: Accept the Terms & Conditions and click “Next” to finish the setup.
Step 8: Now, there will be no phone number available in the “Account Settings” section of your device.
Step 9: In case you want to verify your email account, you can use a secondary email address.
This is another trick to bypass phone verification while creating a new Google account. Users below 15 years of age or who are 15 years old are allowed to proceed without entering their phone numbers because Google assumes that kids or young users might now own a phone. Thus, simply just create an account using a different birth year than your actual one.
Step 1: Open any of your favorite browsers.
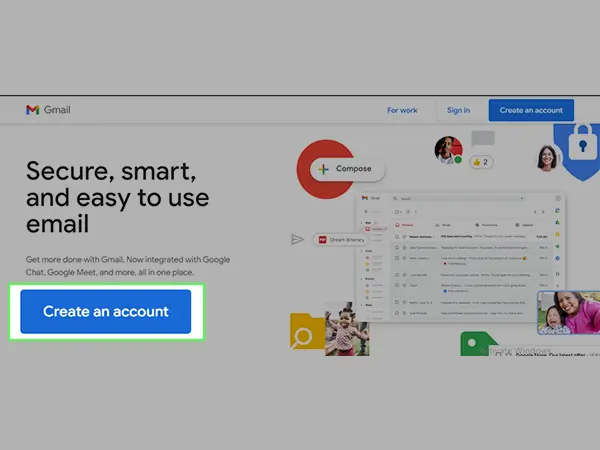
Step 2: Now, go to the Gmail signup web page.
Step 3: Tap on the “Create account” option from the bottom of the page.
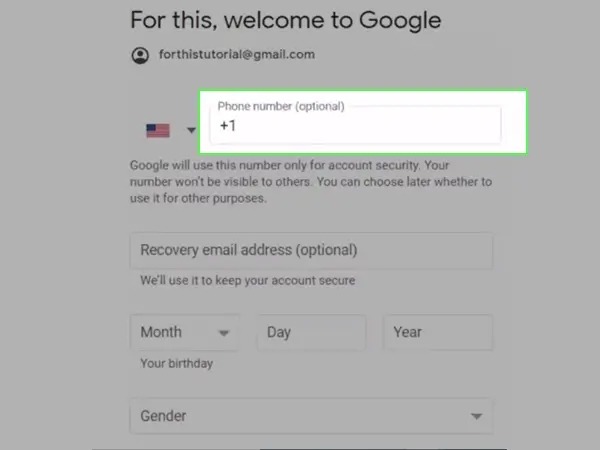
Step 4: Type in your account information, and a new email address of your choice and click “Next”.

Step 5: Leave the field for “Phone Number” blank and choose your date of birth, from 15 years back to the present date. To exemplify, if it’s 2022, you can add any date from 2006/2007. Click “Next”.
Step 7: Click “Agree” on the terms and conditions page and finish the process.
Yes, of course! If you are using an actual number for signing up, you can use it for multiple accounts. But, if you are using a spoofed or duplicate phone number, there is no way you can use it multiple times as Gmail will detect the deception of the number.
Though, adding a phone number to your Gmail account is basically a way to add a protective layer, still, if you are opting for any of the above-given methods, we assume you are not willing to share your phone number. But, to mention, not all methods may work for everyone, thus in case you are unable to skip adding the phone number and you have to add it, you can try these steps to remove the already added phone number from your Gmail account.
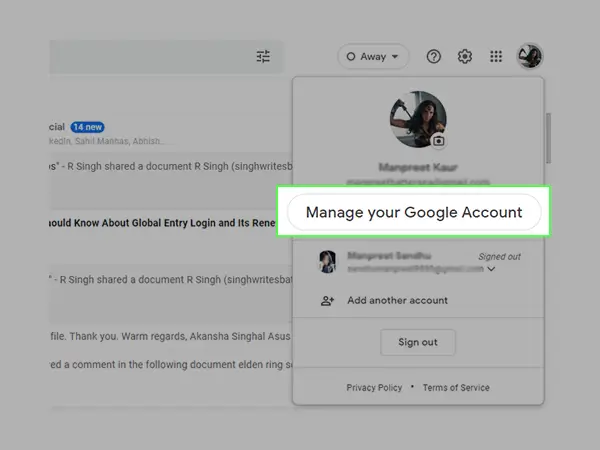
Step 1: Click on your “Profile icon” and tap on “Manage Your Google Account”.
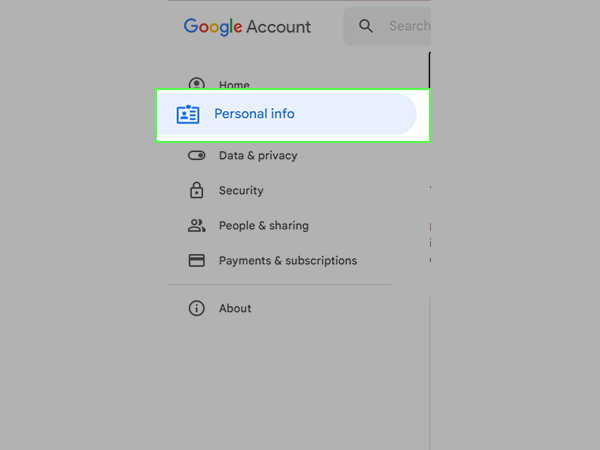
Step 2: Then select “Personal Info” from the left-side menu.
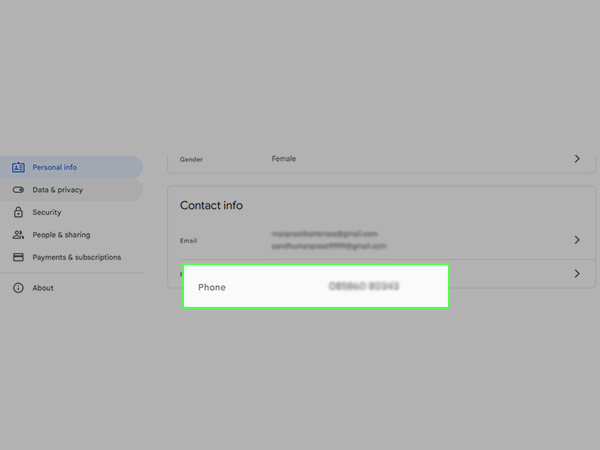
Step 3: Go to “Contact Information” and click on the “Phone” option.
Step 4: Now, on the “Phone number” page, click again on the number.
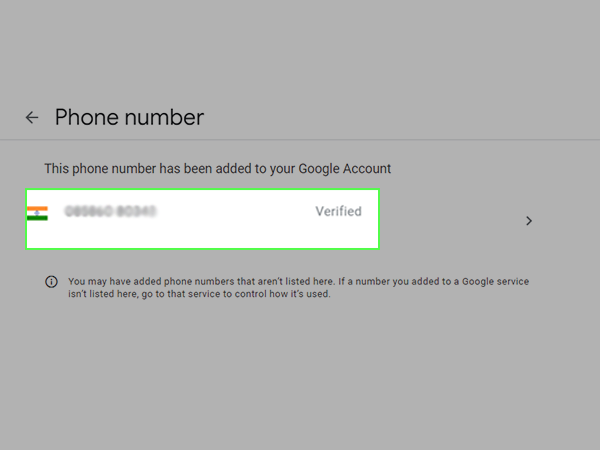
Step 5: Click on the “Trash” icon against your phone number to delete the number that is attached to your Gmail account.

Google is strictly against bots/robots and spammers. Therefore, it takes every important measure to stop spammers from creating accounts. Consequently, choosing usernames such as Imarobot420 or similar can prevent you from performing the above-given tactics and bypassing phone verification in Gmail.
No. Google does not ask for phone numbers from users who are younger than 15 years old. But, you need to have an alternative email address for verification codes to ensure account protection. You can even add the email address or phone number later if you change your mind, through the “Settings” of your account.
Yes, there are methods to secure the Gmail address and one such way is to add an alternative email address on which you can request verification codes and store them to log in while using unknown devices. In other words, if you are using a new device to log in to your new Gmail account, you will receive a verification code on the alternate email address since there is no phone number attached.
There are different methods available on this page that cater to different sets of users, if none of them is working for you, make sure you are following the steps in the right manner. Another reason why you might not be able to use these methods can be an active VPN. Because a VPN can make you look like a bot and a spammer.