Understanding AT&T mail server settings can be a mind-stressing task sometimes, and after the AT&T and Yahoo tie-up, things become fairly unclear about what setting is to be used. But the worst phase of the story arises when there is a breakup between the two service providers; it leaves the users in utter confusion about the correct AT&T email settings.
Many of you may not be aware of the proper AT&T email settings, which is apparent when you are trying to do so for the first time and bearing in mind the scenario mentioned above. The procedures outlined below will undoubtedly assist you in determining the correct AT&T email settings and properly setting up your account on various devices and email applications.
AT&T General Mail Server Settings
AT&T mail server settings that can be generally used in any of the email service providers or devices are stated down below.
For IMAP Account Type
Following are the AT&T IMAP and SMTP mail server settings (to be used when you choose IMAP as account type):
INCOMING MAIL SERVER
OUTGOING MAIL SERVER
Server Hostname
imap.mail.att.net
smtp.mail.att.net
Server Port Number
993
465 or 587
Authentication Required
Yes
Yes
SSL/ TLS Required
Yes
Yes
Username
AT&T email address
AT&T email address
Password
AT&T email account password
AT&T email account password
For POP Account Type
Following are the AT&T POP mail server settings (to be used when you choose POP as Account type):
INCOMING MAIL SERVER
OUTGOING MAIL SERVER
Server Hostname
inbound.att.net
outbound.att.net
Server Port Number
995
465
Authentication Required
Yes
Yes
SSL/ TLS Required
Yes
Yes
Username
AT&T email address
AT&T email address
Password
AT&T email account password
AT&T email account password
When the AT&T email account is added on different platforms, some setting titles are used differently which tends to confuse users, but the setting to be entered remains the same. Listed further in this article are the processes to do att.net IMAP, POP, and SMTP settings on variant devices and email accessing platforms.
AT&T Email Server Settings on iPhone
Listed below are the steps for configuring AT&T mail server settings on your iPhone:
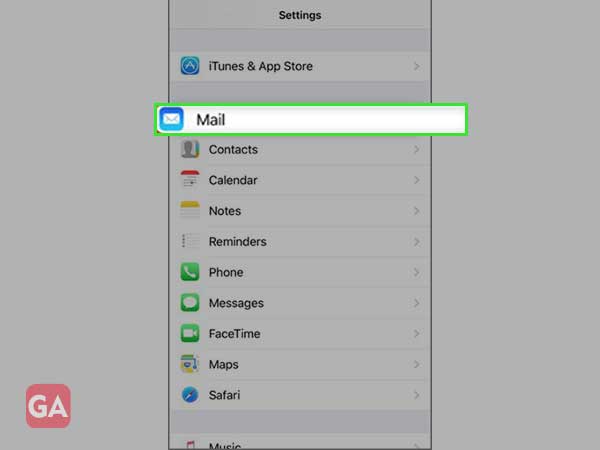
First, you have to open your phone Settings app.
Inside Settings, locate the Mail option and tap on it.
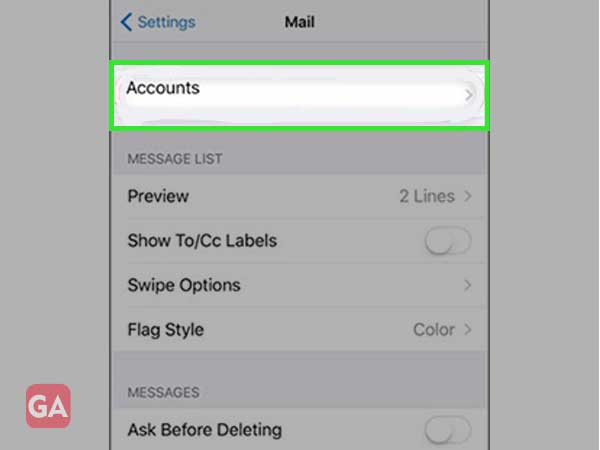
Within Mail, tap on the Accounts section.
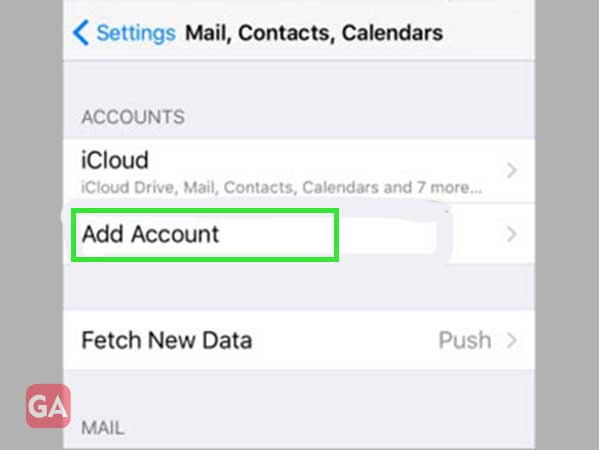
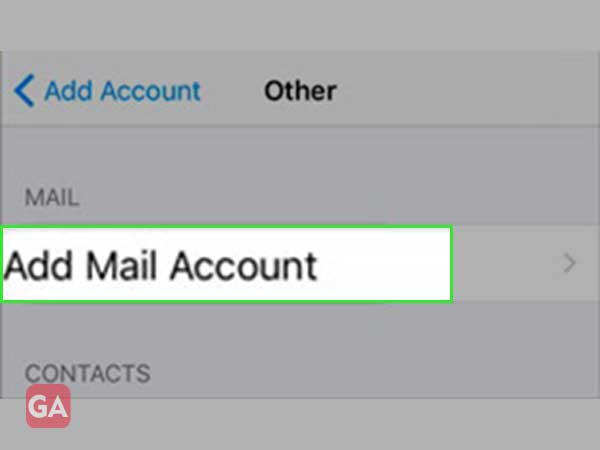
Thereafter, select the Add Account option.
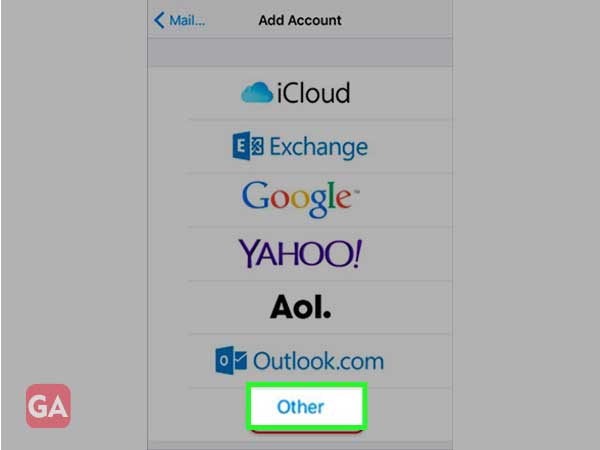
The next page will show you a list of email service providers. Tap on AT&T, if you see its name in the list, otherwise, tap Other.
Then, again, select the Add Mail Account option.
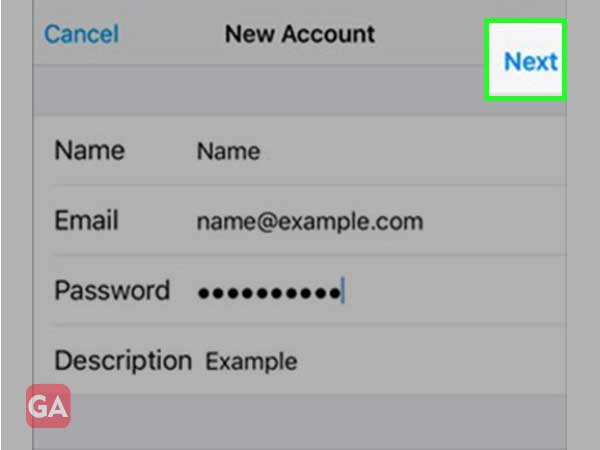
On the next page, you are required to fill in your AT&T email address, its password, your name, and a small description of your email account. After filling in the required info, tap on the Next button.
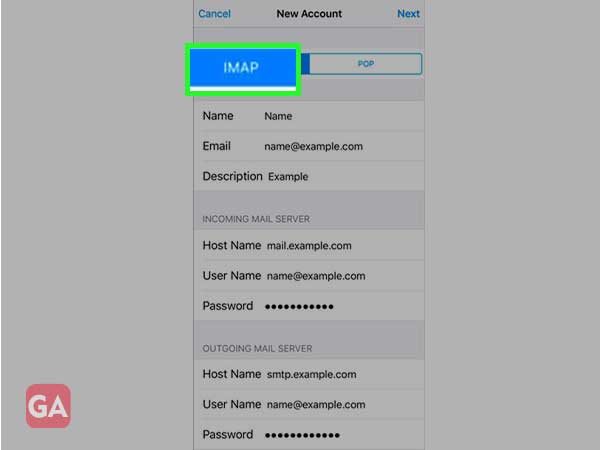
Then, select the IMAP tab, you can also select POP if you want to use it instead of IMAP (refer to the AT&T General Mail Server Settings for att.net POP settings).
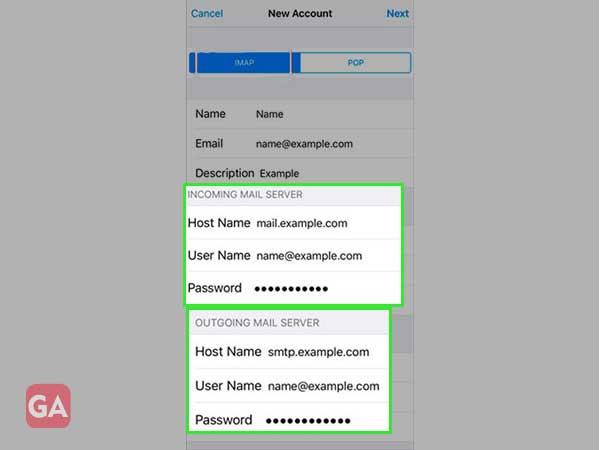
Now, you are required to fill in the AT&T IMAP and SMTP settings using the following information and tap on the Next button, afterward:
INCOMING MAIL SERVER
OUTGOING MAIL SERVER
Host Name
imap.mail.att.net
smtp.mail.att.net
Username
AT&T email address
AT&T email address
Password
Above-mentioned email account password
Above-mentioned email account password
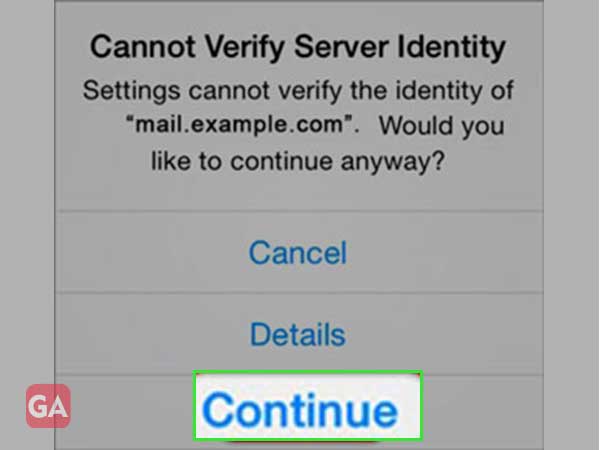
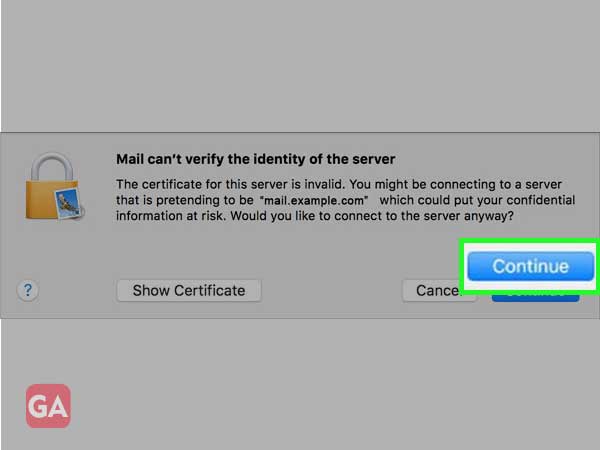
It may happen that you are prompted with the ‘Cannot Verify Server Identity’ message, but you have to choose the Continue option from it.
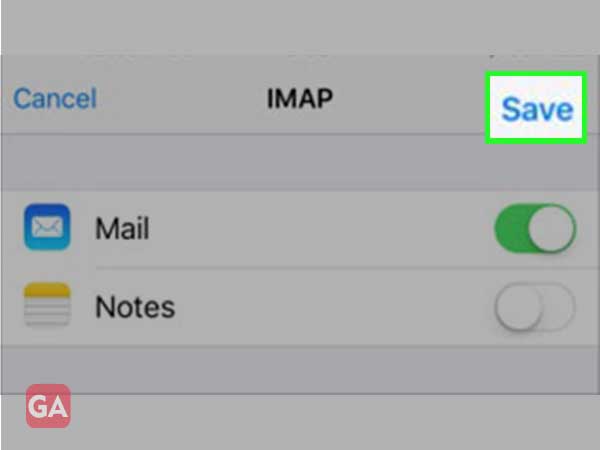
On the next screen, tap Save, and you are done with AT&T email server settings on your iPhone.
If you want to check if you have correctly configured the AT&T email server settings on your iPhone, then you have to select the newly added account, go to its advanced settings and select the Outgoing (SMTP) server or Incoming (IMAP) server, and you will see all its settings.
AT&T Email Settings on Android Phone
Following are the steps to set up AT&T email on your Android phone, along with configuring its mail server settings:
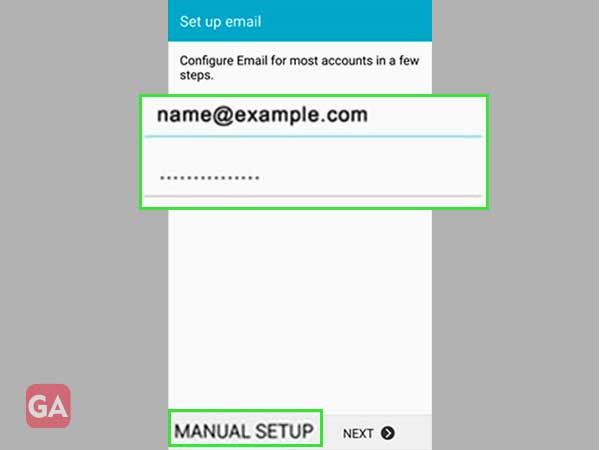
To begin with, open up the Mail app on your phone.
Fill in your AT&T username and password and click on the Manual Setup option at the bottom of the screen.
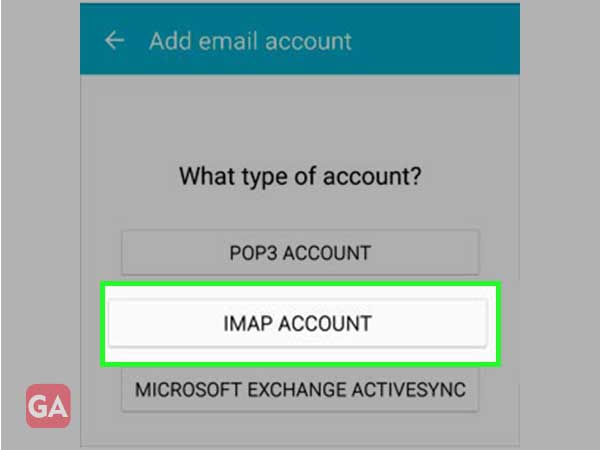
From the next page, select the IMAP Account option.
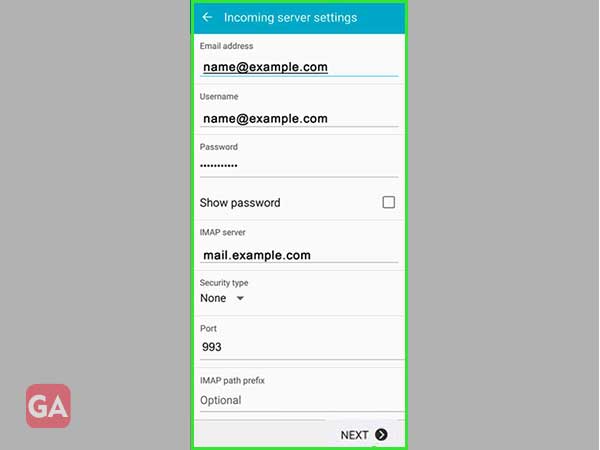
Thereafter, you have to fill in the following att.net email IMAP settings:
Email address and Username: Your AT&T Email address
IMAP Server: imap.mail.att.net
If Secure Port: 993, then Security Type: SSL/TLS
If Insecure Port: 143, then Security Type: None
After filling in all the information, tap on the Next button.
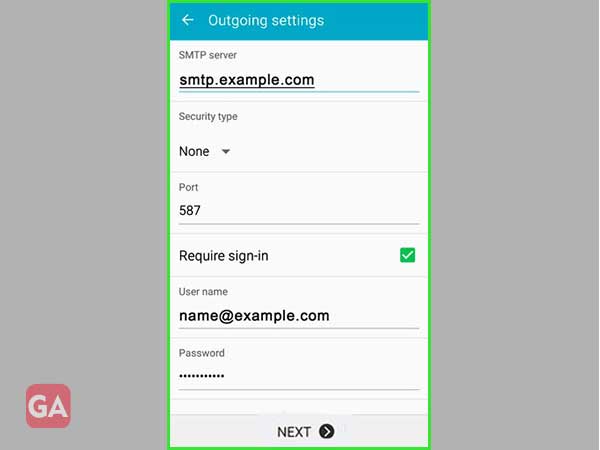
On the next page, you are required to do the AT&T SMTP server settings, for which the following information is to be filled in their designated fields:
Username: Your AT&T email address
Password: Your AT&T email account password
SMTP Server: smtp.mail.att.net
SMTP Port: 465 or 487
Security Type: SSL/TLS
Tap on the Next button, and you are done with AT&T mail server settings on your Android phone.
AT&T Email Settings on Outlook 2016
Jotted down are the steps for configuring AT&T email settings in Outlook 2016:
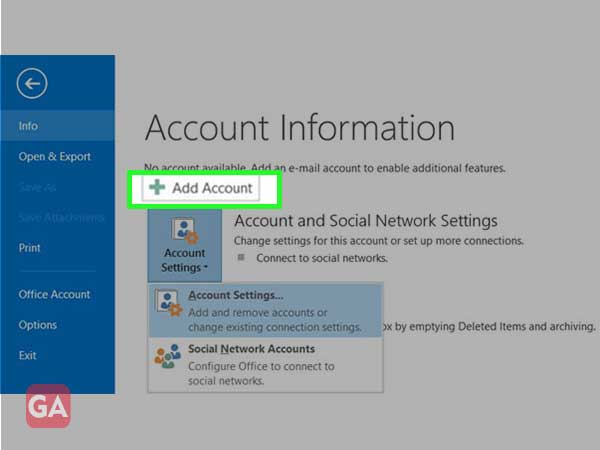
On your desktop, launch the Outlook application and select the File option.
Then, click on the Add Account button.
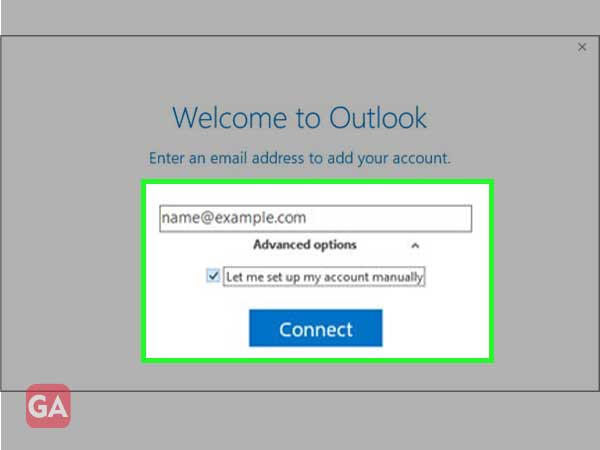
On the next screen, fill in your AT&T email address, click Advanced options and check the Let me set up my account manually option for executing AT&T mail server settings.
Click on the Connect button.
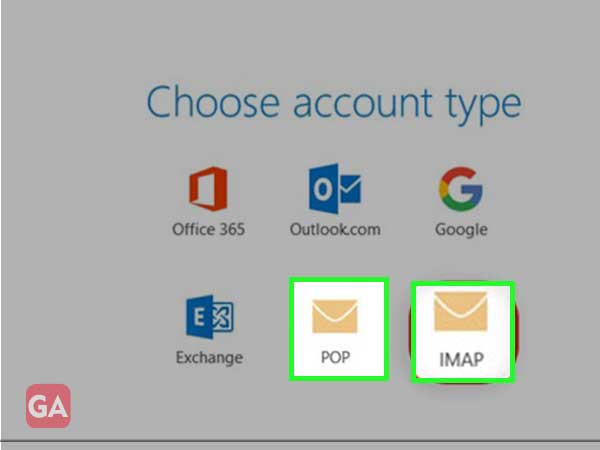
Now, you are required to select the Account Type. In most cases, IMAP is preferred, however, you can also select POP and do the AT&T email server settings accordingly.
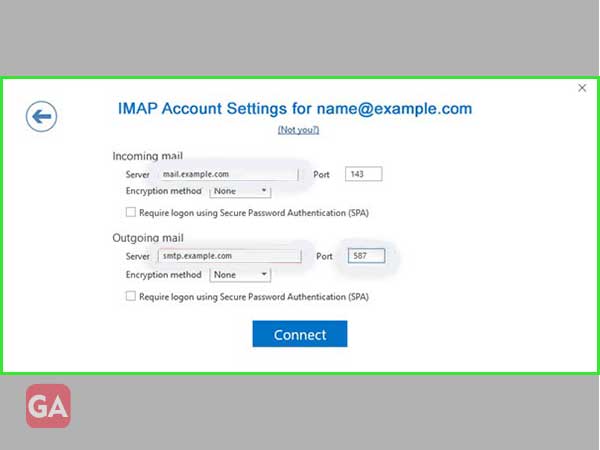
Thereafter, the Account Settings screen will appear which will be, most probably, prefilled with all the required information. However, if you still want to recheck if all the AT&T mail server settings are correctly filled, then refer to the ‘ATT General Mail Server Settings’ section.
Click on the Connect button.
Fill in your AT&T email account password and click Connect.
And with that, you are done with AT&T email settings in Outlook 2016. However, if you are using an older version of Outlook, then the steps for applying AT&T email settings in that Outlook version would be slightly different from the others. Therefore, you are required to follow a precise method, specific to the edition you are using.
AT&T Email Settings in Apple Mail on Mac
Stated below are the steps to apply AT&T email server settings in your Apple Mail on your Mac:
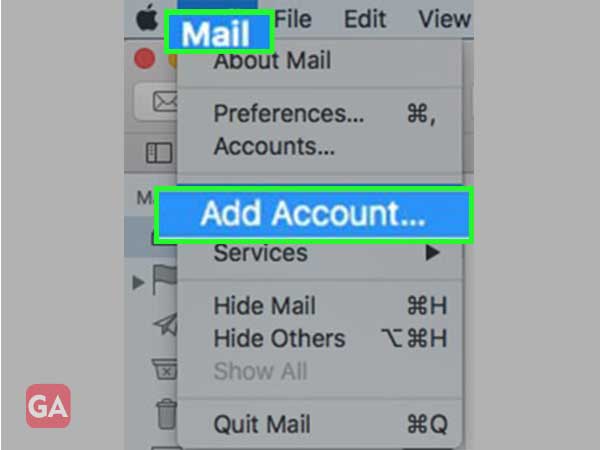
Open the Mail app on your system, and click on the Mail option from the top toolbar, and then select Add Account from the expanded menu.
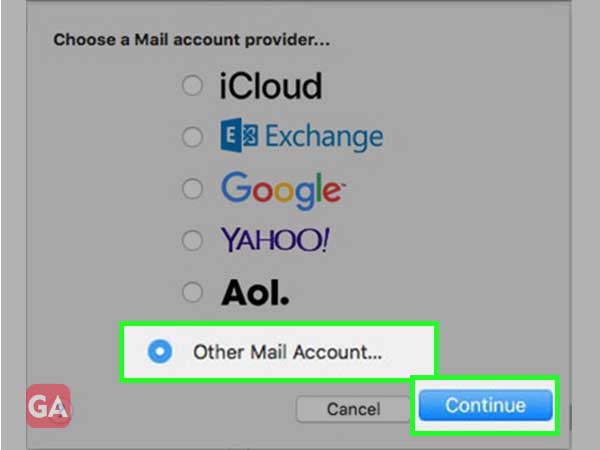
Then, you will be shown a list of email service providers. Select AT&T from it, if it is there, otherwise select the Other Mail Account… option, and click on the Continue button.
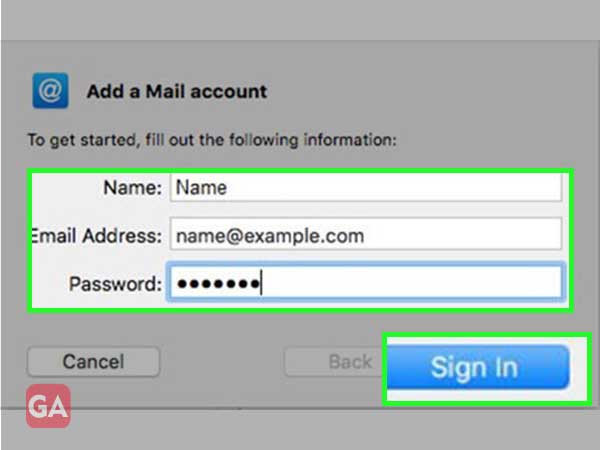
On the next screen, you are required to enter your name, AT&T email address, and password and then, click on the ‘Sign In’ button.
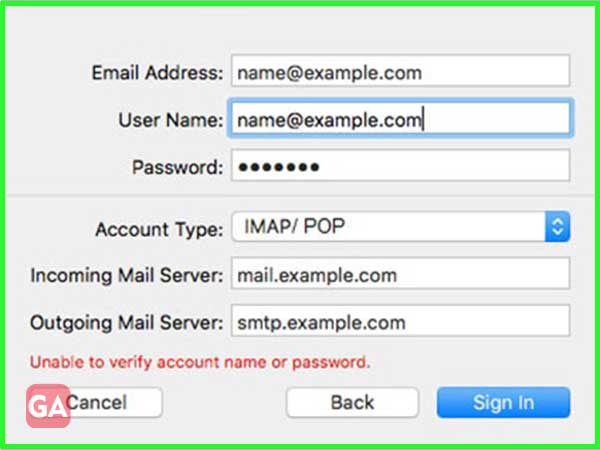
Thereafter, you are required to fill in the following AT&T mail server settings on the next page: