If you are starting as a creator and thinking it’s going to take expensive equipment or a complicated studio. But the truth is, a phone, a clear idea, and a handful of useful free tools can help you plan, make, edit, and share content. You simply have to choose tools that solve real problems.
DataReportal’s Digital 2025 report stated that there were 5.24 billion social media user identities worldwide at the start of 2025. The report also indicates that these are user identities, not necessarily unique people. This guide covers free tools and simple workflows for beginners, including idea planning, writing, design, video editing, captions, audio, and file management.
Every successful post starts with an idea that serves a particular audience. You do not need a special app to find one. A basic notes tool, spreadsheet, or document can become a helpful content planner.
Begin by keeping a running list of questions people ask about your topic. Add ideas you notice in everyday life, common beginner errors, useful tips, and subjects you could explain from personal experience. Then organize the ideas into a few themes. For instance, a cooking creator might use “quick meals,” “kitchen basics,” and “ingredient swaps.”
A simple planning sheet can include:
| Field | What to write |
| Topic | The main idea of the post |
| Audience | Who the post is meant to help |
| Format | Short video, tutorial, photo, or longer guide |
| First line | The opening that gives people a reason to keep watching |
| Next step | What you want the viewer to learn or do |
| Status | Idea, in progress, ready, or published |
You can also use search and trend features available within the platforms where you publish. Look for recurring questions and topics related to your subject, then add your own better perspective. Do not treat a trending topic as an automatic content plan: it still has to fit your audience and your expertise.
A practical rule: collect ideas throughout the week, then select one or two to develop. This is easier than trying to think of a new topic every time you sit down to create.
A script does not have to be formal. For a short video, it can be just three lines:
For instance: “Your houseplant’s leaves are turning yellow? Check the soil before adding more water. If it is still wet, let it dry before watering again.”
A document or notes app is sufficient to write and edit this. Read your draft aloud. If you stumble over a sentence, shorten it. If one line tries to make many points, split it into smaller ones.
Before recording, evaluate your script for:
Writing tools can help you outline or simplify a draft, but they cannot confirm every claim or replace your judgment. Review any suggested facts, mostly when the subject involves health, money, safety, or legal decisions.
You do not need advanced editing skills to make a video feel complete. A beginner-friendly editor should help you cut mistakes, arrange clips, add titles or captions, adjust the frame, and export a file that looks good on the platform where you plan to post it.
One option to explore is CapCut free video editor no watermark. Its page explains browser-based editing for arranging clips on a timeline, making basic corrections, adding captions, and exporting clean videos. It also explains 1080p output as a practical balance between detail and file size. The page advises users to check current upload, processing, export, template, and asset conditions before starting a project or publishing a finished video.
A simple editing workflow looks like this:
“Without a watermark” explains the appearance of an export; it does not automatically settle usage rights. Before publishing a video for a client or commercial project, evaluate the current terms for the editor, music, templates, fonts, effects, and other assets you have used. Also verify the export settings you need. Features and conditions can change.
Higher resolution is not always good for every project. A clear 1080p export can suit many tutorials, demonstrations, and talking-head videos, but the best pick depends on your source footage, destination, and file-size needs. If your original clip is blurry, exporting it at a higher resolution cannot restore details that were never captured.
After export, check small text, faces, movement, and dark scenes. Compression can make an image look different from the editing preview. A quick review on a phone is helpful when your audience will mostly watch on phones.
Captions help people follow a video when they cannot hear it clearly, choose to watch without sound, or find it easier to read along. They can also make instructional content simple to revisit. Automated captions can save time, but they are not always accurate. Names, specialist terms, background noise, and accents can lead to mistakes.
A review article by Gernsbacher, Video Captions Benefit Everyone, explains evidence from more than 100 studies displaying that captions can support comprehension, attention, and memory for many viewers. This does not mean captions guarantee more views or better performance for every post. It does support making captions a normal part of a thoughtful video workflow.
The Web Content Accessibility Guidelines (WCAG) include a success criterion for captions on prerecorded synchronized media. For creators, the everyday lesson is straightforward: when spoken words carry essential information, make that information available as text too.
Before publishing captions, check:
Captions should support the video, not compete with it. Keep them readable, use solid contrast, and avoid placing important text too close to the edge of the frame.

Creators usually need more than video: a cover image, a simple diagram, a quote card, or a post announcing a new project. A free design tool can help you make these assets without making every post into a full design job.
Begin with a few reusable choices: one or two type styles, a small color palette, and a consistent way to place your name or topic label. Repeatable design makes a series easier to see and speeds up production. It is also easier to update one template than to begin from a blank page every time.
Keep the design simple:
A thumbnail should accurately represent the content. A dramatic image that promises something the video does not deliver might earn a click, but it can damage trust.
Viewers may ignore a plain background more readily than speech they cannot hear. A quiet room, a phone placed close to the speaker, and a short test recording can make a bigger difference.
Before recording, turn off nearby fans or appliances if you can, and shift away from echoing walls. Record ten seconds and listen back with headphones. If the voice feels distant, move the microphone closer. If the room echoes, try a calmer space with curtains, rugs, or other fabric.
An audio tool may help minimize steady background noise or balance volume, but use these features lightly. Strong noise reduction can make a voice sound dramatic. Always listen to the cleaned version before exporting.
For videos with music, keep speech easy to hear. Check that the music is licensed for the way you plan to use the video. A sound available inside an editing tool might still have conditions for use, so review the relevant terms instead of assuming every track is cleared for every project.
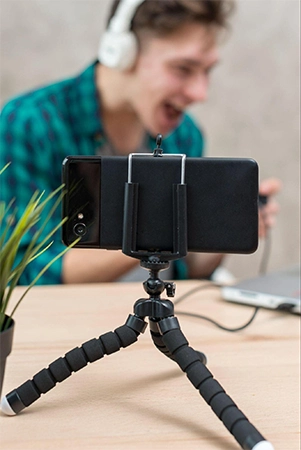
If your content describes a website, app, workflow, or presentation, a screen recorder can capture the steps. You might already have a built-in recording option on your device. Before recording, close private messages, hide personal information, and turn off unwanted notifications.
A useful screen tutorial often does one thing at a time:
Record at a size that makes interface text readable. If the screen is crowded, zoom in or crop the final video. Do not move the pointer too often, and avoid showing personal data or confidential information.
Large files take longer to upload and can be hard to share. A converter or compressor can help prepare video for a platform or minimize file size when you need to send a draft. Use it only when needed: every extra conversion can affect quality.
Keep an untouched copy of your original footage. Export a separate working version, then evaluate the converted file for audio sync, image sharpness, color changes, and cropping. If a service asks you to upload private or client material, check its privacy and retention terms first.
A sensible folder structure can avoid lost work:
Use clear filenames that include the subject and date. This small habit helps when you want to revise a video weeks later.
Analytics tools can show whether people are searching for and watching your content. You do not need to study every number. Begin with a few questions:
Use the answers to make one improvement at a time. If viewers leave before the explanation starts, make the opening more direct. If people ask the same question repeatedly, think about making a follow-up video. Do not treat one post as a final verdict on your ability. Performance can differ for many reasons, and a small set of posts is not sufficient to establish a reliable pattern.
Feedback is also information. Look for repeated, specific comments instead of reacting to every opinion. If someone says a tutorial was confusing, ask which step was not clear. That can help you improve the next version.
Here’s a beginner guide to the free-creator toolkit:
| Need | Useful free tool category | What to check |
| Planning | Notes app or spreadsheet | Can you sort ideas and track progress? |
| Writing | Document or script editor | Is the draft clear when read aloud? |
| Video editing | Timeline-based video editor | Export quality, watermark conditions, and asset terms |
| Accessibility | Captioning tool | Accuracy, timing, contrast, and readability |
| Graphics | Design tool | Font and image permissions; mobile legibility |
| Sound | Recorder or audio-cleanup tool | Voice clarity and realistic sound |
| Tutorials | Screen recorder | Privacy, text size, and notifications |
| Sharing | Converter or compressor | Quality after conversion and data management |
| Improvement | Platform analytics | Which metric answers your real question? |
The best tool is the one that helps you finish and publish important work. Try this beginner workflow:
This process is intentionally easy. You can add more steps as your needs grow, but you do not need a complex setup to learn the basics.
Some of the common mistakes new creators should avoid are:

Free creator tools are most useful when they delete friction: a planner helps capture ideas, a writing tool shapes the message, an editor organizes footage, and captions make speech simpler to follow. Design, audio, screen recording, and file tools can support specific projects without becoming requirements for every post.
Select one idea, make one useful piece of content, and review it before sharing. A simple, repeatable workflow will teach you more than a folder full of unused apps. Over time, allow your audience’s questions and your own experience to guide which tools you keep.
Not necessarily. A free editor can be enough for trimming clips, arranging a basic timeline, adding titles or captions, and exporting a finished video. Consider paid features only when a clear need arises.
Yes. A phone, decent light, a quiet space, and a clear idea are enough to begin. Good framing and understandable audio often matter more than adding expensive gear at the start.
Captions are especially useful when spoken words matter, when viewers may watch without sound, or when accessibility is important. Review them for accuracy and readability before publishing.
No. It can be a practical option for many projects, but choose a resolution based on the original footage, the destination, and the file size you can manage. Always review the exported result.