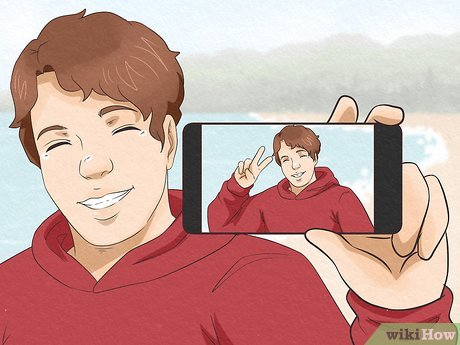
Have you ever come across a situation where you uploaded your selfie and it got rejected, although it appeared fine to you?
The frustrating part is that the picture often looks perfectly fine, and even after multiple attempts, the results remain the same – Rejection
Small details – camera distance, shadows, background texture, even portrait mode – can be enough to trigger a rejection.
So if you are willing to take an accurate selfie, read on further to determine how..
Key Takeaways
- Understanding the factors leading to your selfie rejection
- Your DIY setup to have the perfect selfie
- Step-by-step guide for taking the right shot
- Learning how to edit your selfies
- Mistakes to avoid while taking a selfie
Selfies often get rejected even when they are clear and appear good enough to be accepted due to the following reasons :
In everyday photos, it’s normal; in ID photos, it can look “non-standard.”
Another common issue is a “clean” background that still has a visible corner line, doorframe edge, or shadow behind the head.
One lamp from the side makes one cheek brighter than the other. Glasses often reflect a bright rectangle that hides the pupils.
Many ID checks expect: straight-on face, level head, eyes forward, neutral expression.
If the site does automated checks, these are frequent failure points.
If you only fix three things, fix these:
This removes the two biggest selfie problems: angle and blur. It also makes it easier to keep your head level.
In order to take the right shot, it is very important to consider the necessary factors such as background, lighting, distance, etc.
Some of these important criteria are discussed as follows:
If you don’t want to worry about the background, you can use an online tool such as IDPhotoDIY.com. It helps remove the background and outputs a correctly sized file for upload.
Quick check: if your nose looks slightly bigger than real life, you’re too close.
If glasses aren’t required, removing them often saves time because glare is hard to control.
Don’t aim for one perfect photo. Take 10 -15:
Choose the one with sharp eyes, even lighting, and a clean background.
A lot of photos fail after capture because of formatting:
You can use an online photo tool to output a correctly sized file for upload.
A passport/visa photo is sensitive. Before you upload it to any website, check how long uploads are kept and how deletion works.
As one example, IDPhotoDIY.com says it automatically deletes uploaded and generated photos within half an hour.
Quick “Don’t Do This” List (The Usual Selfie Traps)
When clicking a selfie, here are some usual traps you need to avoid to prevent your selfie from getting rejected:
In a nutshell, following just a few simple steps, managing the editing well, and having a basic setup is all you need to have the right selfie that doesn’t get rejected by platforms.
Further, avoiding the selfie traps and having knowledge of factors that lead to a rejected selfie can help you to take an accurate one yourself, avoiding any frustration and unsuccessful attempts.
So, now your selfie is just a click away!
Capturing a selfie for identity verification typically begins with a user-facing application or platform prompting the user to take a live self-portrait. The user is guided, often with on-screen instructions, to ensure optimal lighting, angle, and expression.
In order to take selfies safely, you must take pictures on a steady ground, avoid ledges, ensure your footing is strong, and also make sure you avoid any potentially problematic areas.
Selfie identification is a system that uses biometric facial recognition and machine learning technologies, it is further followed by an identity document.
Another name for a selfie is “self-portrait”, from which the word selfie is derived. And it was born by accident in 2002 on an American forum.