Key takeaways
- Tap to Pay works as a card reader that can be accessible on your iPhone, or apple watch that can accept payments via contactless cards conveniently.
- You do not need third-party hardware; you just need an iPhone XS or later model, a payment application that supports Tap to Pay, and a business account only.
- It works for single payments only. If you want to accept payments all month long, consider purchasing the application’s subscription instead of using the free version.
- Apple does not offer Tap to Pay service worldwide, so check the application’s availability before planning to use it.
If you sell at a market stall, fix boilers, cut hair, or run any business where people pay you face to face, you’ve probably had this moment.
The customer is ready to pay with his card in the hand, but you have left your card reader somewhere in your home. In these situations, the payment can be delayed for days, or sometimes it can cause you a loss.
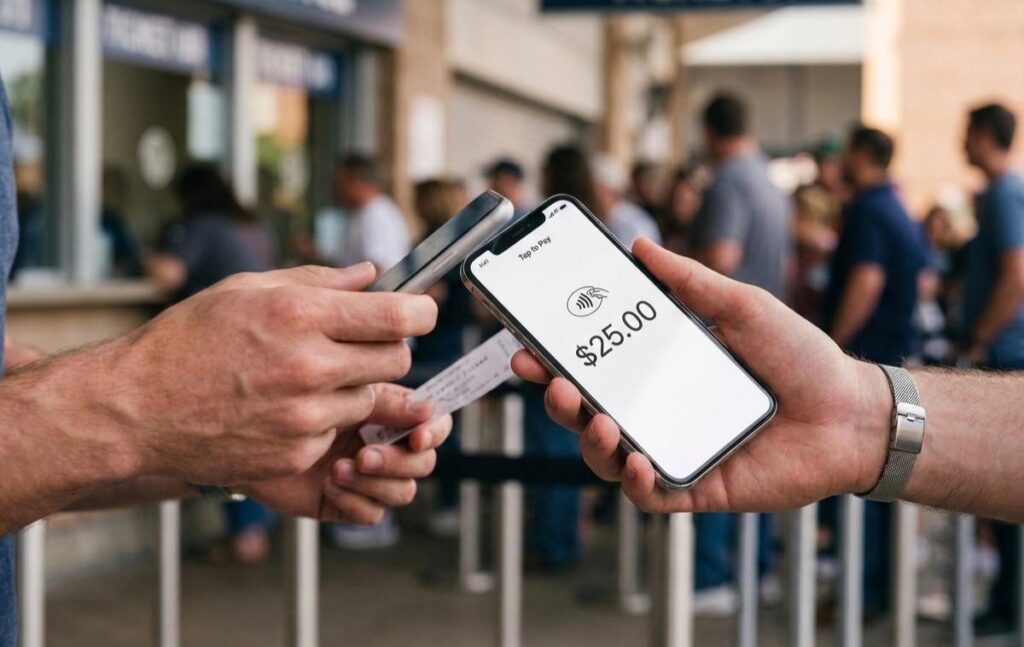
Tap to Pay on iPhone removes the reader from that story. Your iPhone directly reads the card and accepts the payment just like a card reader.
This article will let you know how this technology works, how you can set it up, what the cost of the application that supports it is, and everything you need to know about this.
Every iPhone from the last few years has an NFC chip; it is the technology that has made contactless payments possible in cards and now in mobile phones.
Apple opened that chip to payment apps, so a supported app can accept a tap the way a terminal does.
The sequence is short. You open the payment app and choose what you’re charging for.
The customer has to open the application on their mobile phone or watch and place it at the top of your iPhone; then the app sends the card details to the payment provider, the bank approves the payment, and both of you see the results on screen in real time. All it takes is just a few seconds.
The card details never sit on your phone. The encryption technology secures the card information right after the tap, this is the reason it allows the payment without a certified terminal. Your application just sees a token, not the card number or details.
It accepts what a normal contactless terminal accepts: physical debit and credit cards with a contactless chip, Apple Pay, Google Wallet and other phone wallets, and wallets on watches.
Tap to Pay supports payments from physical debit and credit cards with a contactless chip and Apple Pay. Google Wallet and other payment methods that include NFC. The NFC in smart wearables trend means more customers are paying from their wrist, and that works too.
Apple gates Tap to Pay on three things, and no app can get around them.
This is the minimum requirement you should have to use the NFC features. Any older device does not support Tap to Pay. But if you are facing any problems with the latest models, you can update your device to the latest version for a smooth experience.
Remember that the iPhone does not transfer your money by itself, so you have to include a banking application to maintain your business account. You can consider one from Apple’s own list, which includes Square, Shopify, PayPal, Venmo, Whop, Clover, and Chase for business, with some booking applications like GlossGenius, StyleSeat, and Mindbody for salons and studios.
Tap to Pay by Apple does not work for every country; check the availability of the application and services. If it is not available for your country, no other application can support it.
Which app should you use? Begin with where your money is already available. For example, if your business is relying on Whop, you can take Tap to Pay in the Whop app from any checkout link you’ve created: A Tap to Pay button will be available there under the link’s QR code. Press it, make the tap, and the money lands in the same balance as your online sales.
Whop states plainly that this covers one-time payments only, so a monthly client gets a subscription link instead, and that availability follows Apple’s country list.
If clients book you through a salon app, take the tap there. If you mostly send invoices or payment links, pick the app you already send those from. The card rates are close enough between apps that convenience usually matters more than a tenth of a percent.
Two smaller things. Keep the phone charged, because reading cards uses the battery. And when the app asks for permissions on first use, grant them, or the tap won’t register.
Every app does this slightly differently, but the steps are the same.
Do a test on your own card first. Charge yourself a dollar and refund it.
If everything is running smoothly, then you are ready to accept and return payments successfully.
Also set up the receipts when you are testing. Most of the payment applications send a text or an email right after the transaction.
Tap to Pay is not the answer for everyone. Here’s the honest comparison.
| Tap to Pay on iPhone | Dedicated card reader | |
| Hardware cost | None | Usually $50 to $300 |
| Accepts | Contactless cards and wallets | Contactless, Chip, and Swipe |
| Recurring Payments | No | Depends on the provider |
| Things to keep charged | Your Phone | Your phone and the reader |
| Receipts | Email or text from the app | Printed on some models, or the same email and text options |
If many of your customers still insert a chip card, or your business runs on a separate till, a reader is still the better tool.
No matter what your work is or where you have left your card reader, if you have your mobile, your payment will be collected with just a single tap.
If you have a recent iPhone, a supported payment app, and customers who already tap, you can start taking card payments today with nothing to buy.
Consider checking Apple’s country list and try to run a payment with your own card. Always keep a subscription link for people who always pay you monthly.
No. The iPhone’s built-in NFC chip reads the card. You need a compatible iPhone on the current iOS and a payment app that supports Tap to Pay. There’s no reader to buy, pair, or charge.
Contactless debit and credit cards from the major networks, Apple Pay, Google Wallet and other phone wallets, and wallets on watches. Cards without a contactless chip won’t work, so a customer who has to insert their card still needs a reader.
No. Tap to Pay handles one-time payments only. For a customer who pays weekly or monthly, set up a subscription in your payment app so their card is saved and billed automatically.
The usual reasons are an older iPhone, an out-of-date iOS, a country Apple hasn’t enabled yet, or an app that hasn’t built the feature in. Check Apple’s device and region lists first, then update iOS, then check whether your app supports it.