Printers and scanners are technical devices and it is common to face errors or issues with them now and again. Even when a renowned brand like HP introduces any of its devices it never guarantees that you are not going to face any technical glitches.
If you are questioning why my scanner is not working, let me tell you that you are not alone in this. Most of the scanner users have been left scratching their heads wondering the same thing. But like every other issue, this is again a regular concern that can be easily fixed if the troubleshooting is done properly.
You might be facing any of the issues like:
In this guide, I have shared some troubleshooting methods that will accommodate in fixing all sorts of scanning related issues with your HP device and if you have any other brand, you can still try them.
Before you begin to scan using the HP scanner, make sure it is turned on and ready. Next, check if your device is connected to the network and there is no visible issue with the internet.
If you are dealing with a USB scanner, check the ports and the cables to make sure there are no errors.
For network scanner, you need a strong internet and the scanner must be connected to the computer through the internet.
If you are using a computer with a VPN, disconnect VPN from your PC and then try scanning the document.
After trying all the above tips, if still there is an issue with your HP scanner, move to the next solution.
Another possible cause for which your HP printer is not scanning can be the missing or outdated scanner driver. It is important to update the driver from time to time to avoid potential errors. Most of the manufacturers keep providing updates for their scanning devices. In case your device doesn’t get the update automatically, you can simply visit the official website and get it
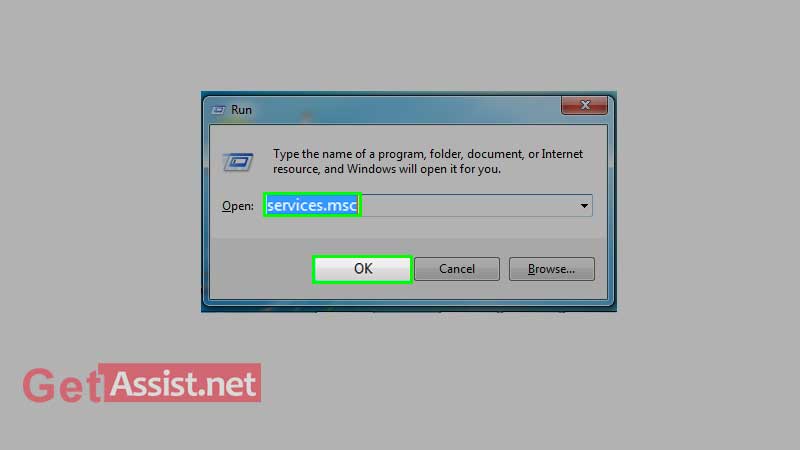
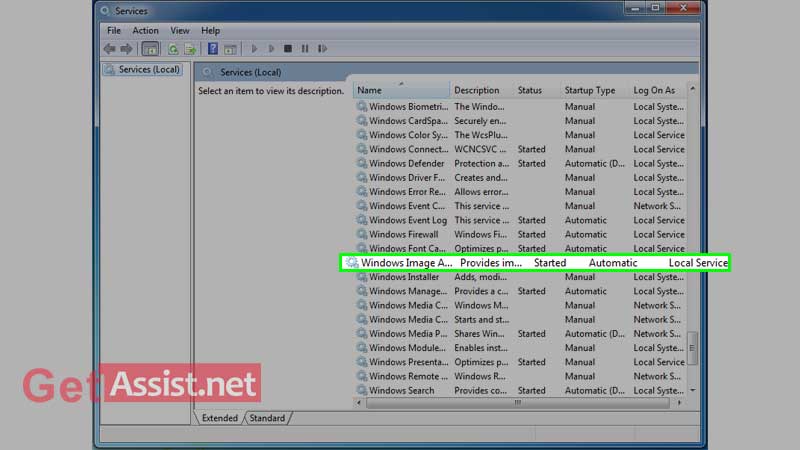
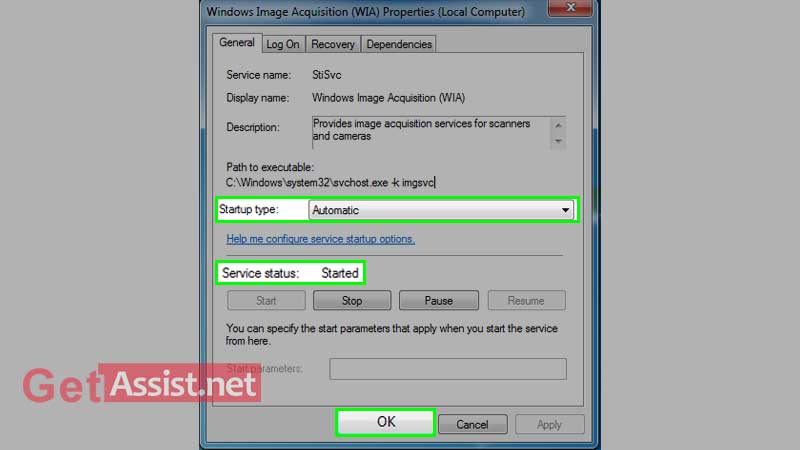
downloaded and installed on your computer. Look for the model you have and if there is an update available for it. Download the same on PC, run the downloaded file and follow the given instructions to install it for your scanner.Windows Image Acquisition Service is Microsoft’s service that lets graphics software to contact imaging hardware i.e. scanner and cameras. So if your HP scanner is not working, enable the WIA service on your PC and if you don’t know how to do it, here are the steps:
If your HP scanner is still not working but the printer is connected, next you can run a troubleshooter to fix the problems with the scanner using the steps listed underneath:
It is a built-in feature of Windows that proves helpful when the HP scanner is not working on Windows 10 or even any other versions of Windows. The scanner might not be working due to some corrupted files, so you can try this method to fix it. Here are the steps to be applied to run this utility:
Hopefully, any of the above methods has proved helpful in fixing the scanning problems with your HP device.
There might be some problem with the installation, so you should try reinstalling the HP scanner on your computer to fix the issue.
The scanner might not able to scan due to the firewall settings. The firewall may not let a program work if it doesn’t recognize it. So make sure to enable the scanner in the firewall settings and then retry scanning.
There should be sufficient memory available to get the scanner to do its job. You can also set the scan resolution to low, set the paper size to normal or change the scan setting to normal to fix the problem.
You can also use HP Print and Scan Doctor, the tool provided by the manufacturer to fix printing and scanning issues instantly. Run the tool and it will automatically detect and fix the errors found.