Whether you need it to upload it on an online application form, or just to make it your perfect Facebook cover photo, there can be different scenarios where you need to resize images in kbto match them with the certain specifications. That time you will need a tool to meet your requirements without much hassle. If you are lazy enough to find one on your own, not an issue as I have done the complete research. This guide will save you from the annoyance of downloading a bunch of tools and realizing that your efforts went into vain.
It is quite straightforward to increase or reduce image size in kb on your desktop, Android, Mac, or iPhone. There are several in-built apps that can be used to increase image size in kb. There are online tools that even let you increase image size in kb without changing pixels. Moreover, you can easily convert or compress your photo to 20kb or resize the image to 100kb whenever you want.
So if you are technically-deficient, keep this guide handy and just follow the instructions step-by-step as provided for your device.
On Windows
To resize an image on Windows, the ‘Paint’ program found in-built in all the Windows devices is all you need.
We all have used it to paint useless things but to your surprise, you can even use it to increase or reduce the size of your images not only in JPEG format but also in several other popular formats.
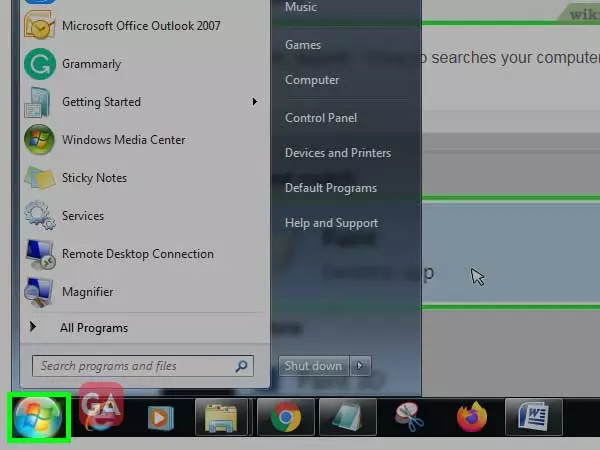
Click on the Windows Start menu icon placed at the bottom left corner of the screen, a list of programs will appear.
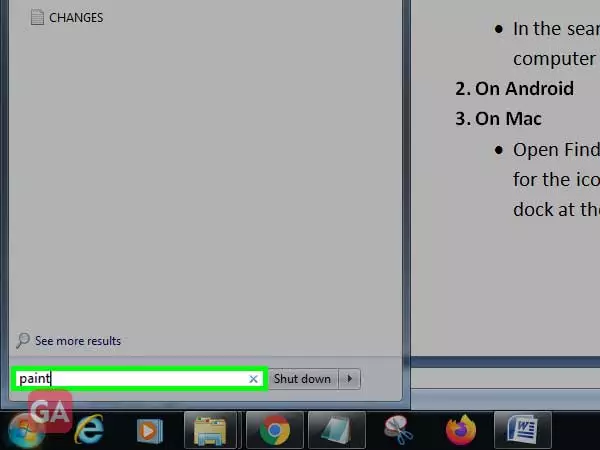
In the search bar type ‘Paint’ and your computer will start searching for the program; click on the first search result to open the Paint program.
Now, you have to open the image you want to resize using the given steps:
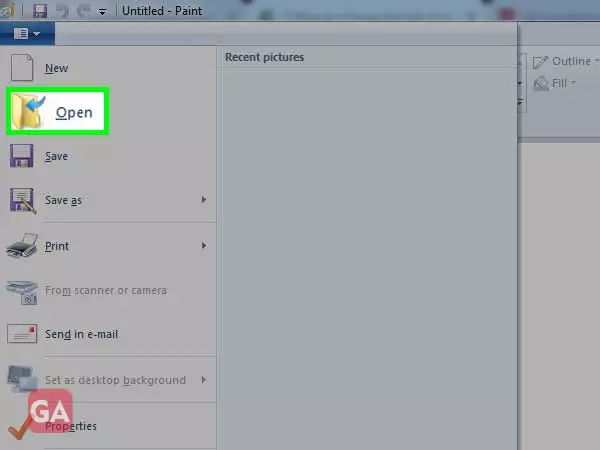
Click on the drop-down icon given at the top-left corner of the screen and then click on ‘Open’.
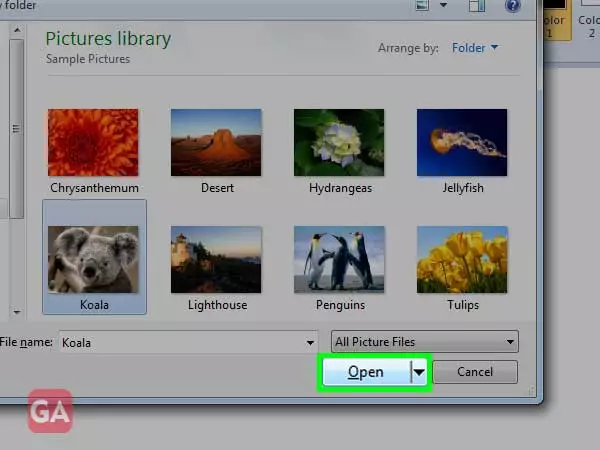
Next, look for the photo you want to open and click on ‘Open’ at the bottom of the file browser.
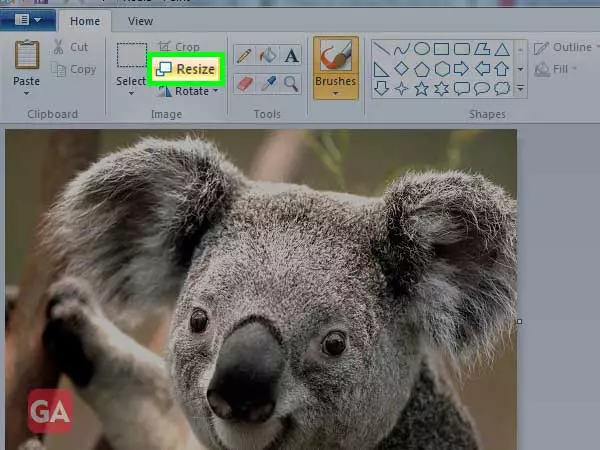
Now, click on the ‘Resize’ option in the ‘Image’ section of the toolbar.
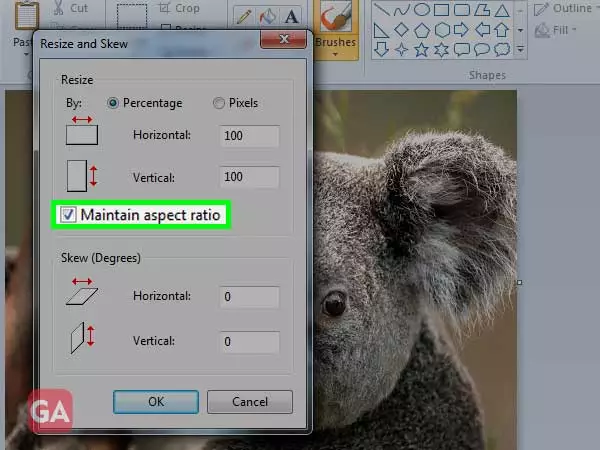
The ‘Resize and Skew’ dialog box will appear. Make sure you have selected the checkbox for the ‘Maintain aspect ratio’. This will confirm that the picture doesn’t get distorted when resizing it.
Now, you can set a new size for the image using these two options:
Percentage- Enter by what percent you want to resize the image horizontally and vertically.
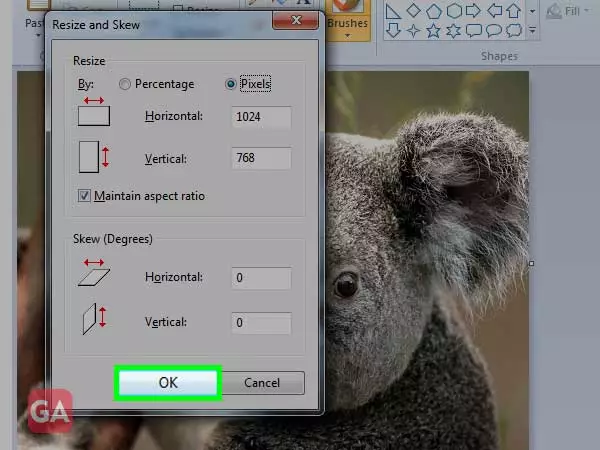
Pixels- Enter the desired pixels in the given text fields.
Once you have made the changes, press ‘Ok’ given at the bottom of the screen.
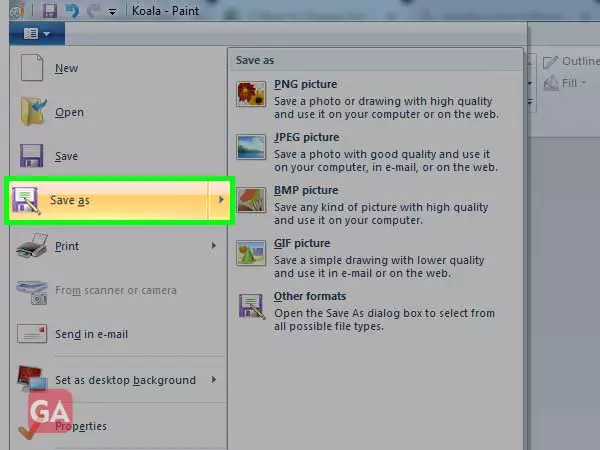
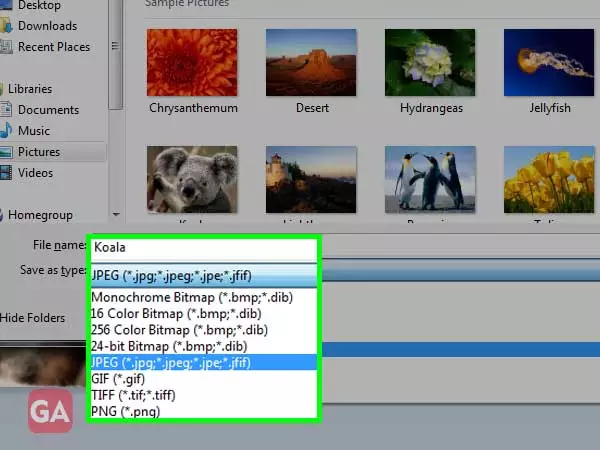
To save the file, again click on the drop-down icon given at the top-left corner of the screen and click on ‘Save as’. You have to choose a format for the image from the given options:
PNG- for graphics and small Web files and high-quality images
JPEG- for good quality photos to use in email or on the web
BMP- for web graphics
GIF- for web graphics
Other Formats- to get all other formats available, you have to click on ‘Save As’.
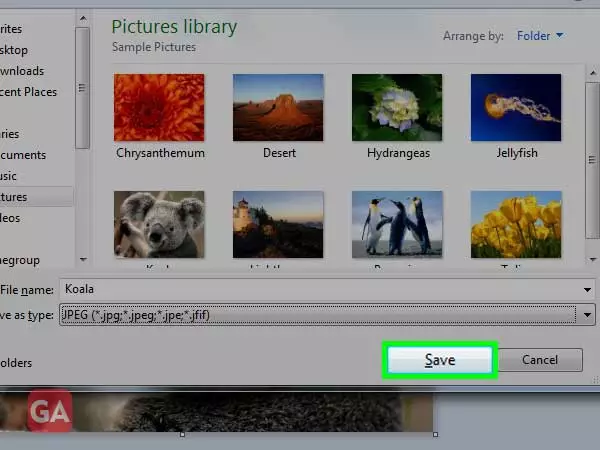
After that, you can change the ‘File Name’ if you want or use the ‘Save as type’ drop-down to select the format.
Finally, click on ‘Save’ as the last step.
On Android
I am an Android user and recently found a useful app to get the resizing done quickly. Here is the quick tutorial:
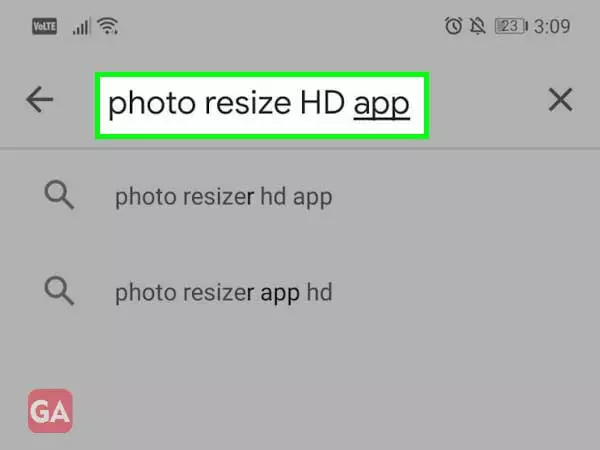
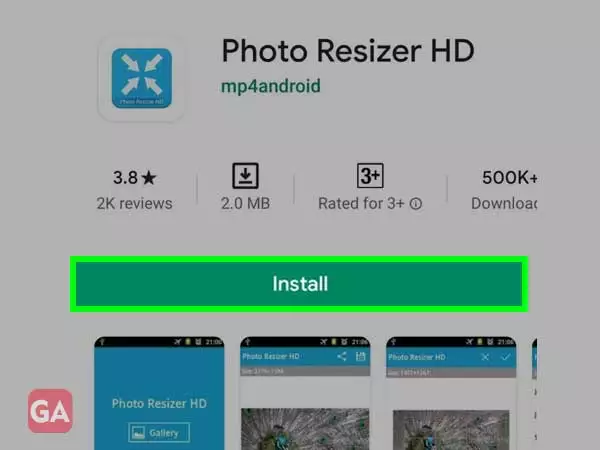
Go to the Google Play Store on your Android device and in the search box type Photo Resizer HD app and tap the search icon of your phone’s keyboard.
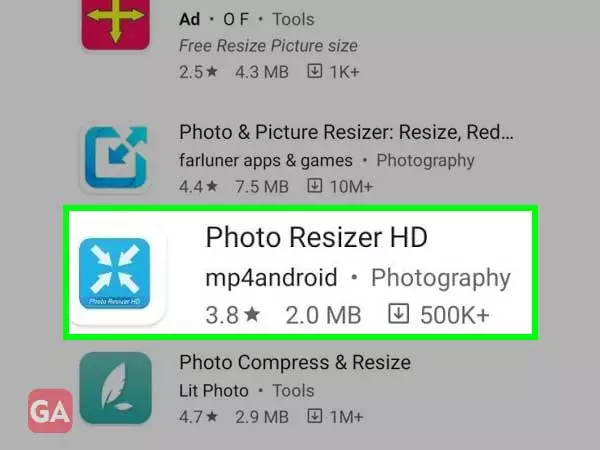
Tap on the ‘Photo Resizer HD’ app from the search results.
Next, tap the ‘Install’ button and further press ‘Accept’.
The app will start downloading and once the installation is over, tap ‘Open’.
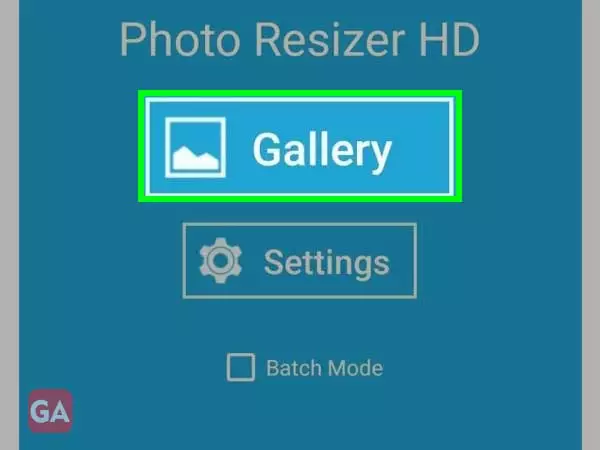
To go to your phone’s gallery to select the photo, tap the ‘Gallery’.
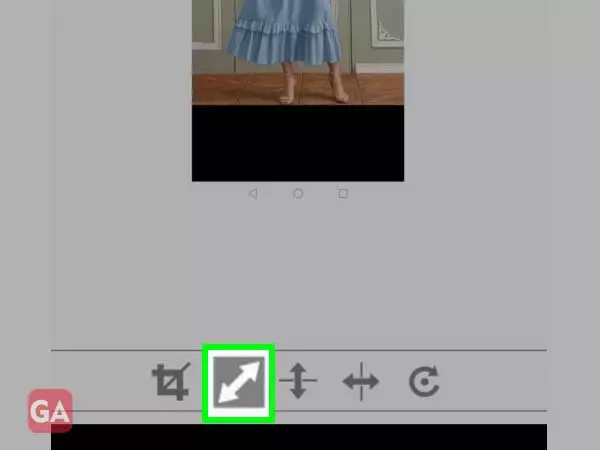
In your phone’s gallery, look for the picture you want to resize and tap it to open. The picture will open in the app; press the ‘Diagonal Arrow’ icon given at the bottom to resize.
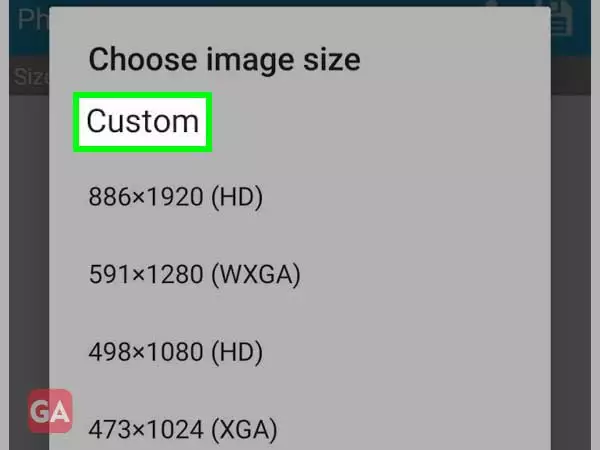
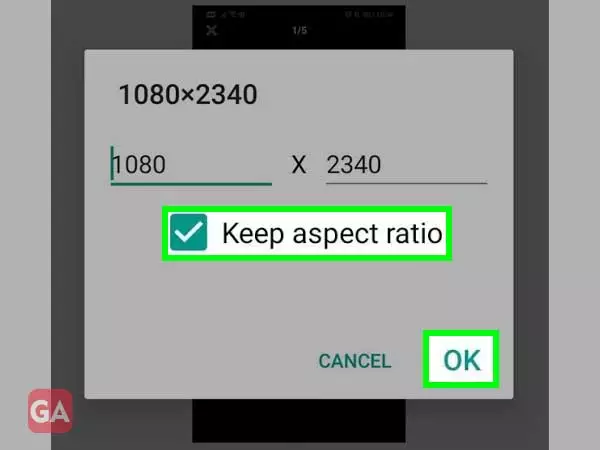
A menu will appear showing different image resolutions; select the ‘Custom’ option at the top. Or if the resolution you want is mentioned in the list, you can directly select that instead of choosing custom.
You will see two text fields for horizontal and vertical dimensions; edit the number as you want. This is how you can increase or reduce the size of the image/picture. Also, make sure to select the ‘Keep aspect ratio’ checkbox; press ‘Ok’ to proceed.
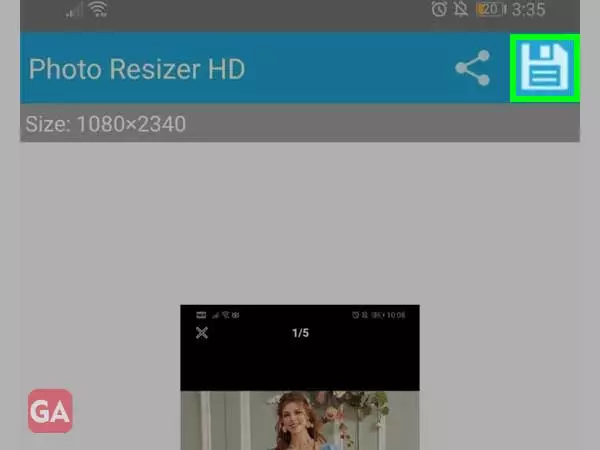
Press the ‘Save’ icon in the top-right corner of the screen to save your resized image on your phone.
On Mac
If you own a Mac device and want to resize an image, go with the given directions:
Open Finder on your Mac device. Look for the icon that is a blue and white face in the dock at the bottom of the screen.
Using Finder, look for the image you want to resize. Browse through the folders on your Mac to find the photo.
Now, you have to open the image using Mac’s default image viewing app i.e. Preview. To view your image in the Preview app, you can simply double-click it.
From the menu bar at the top of the screen, click on ‘Tools’.
From the drop-down menu of ‘Tools’, click on ‘Adjust Size’.
Using the menu given next to ‘Height’ and ‘Width’ boxes to define the percentage for the picture. You can further define the measurement of the image in ‘pixels’, ‘inches’, ‘cm’, and more.
Next, you have to enter a number in the ‘Width’ or ‘Height’ box depending on the increase or reduce you want in the image size in kb.
Entering ‘Percentage’ will let you mention the image size you want in %age. Enter the units in the ‘pixels’ or ‘inches’ you want for the resized image.
Select the checkbox for ‘Scale Proportionality’ to ensure there is no distortion in the image.
To quickly resize the image, you can select an image size from the drop-down menu given next to ‘Fit into’.
To save all the changes, press ‘Ok’ in the lower-right corner of the screen.
Now, click on ‘File’ from the menu bar and select ‘Save’ in the drop-down menu to save the resized image on your device.
You can even change the format of the file by clicking on ‘Export’ in the ‘File’ menu and then click on ‘Format’. You have the following choices:
JPEG- for photos on the web and compact files
JPEG-2000- for high quality smaller files
OpenEXR- to compress video files
PNG- for graphics and small Web files
TIFF- for editing and storing images
On iPhone
iPhone users need to follow the given steps to resize the image they want:
Begin by downloading the free Resize Image App from the App Store using the given instructions:
Go to the App Store and tap on the search bar.
Type ‘Resize Image’ and then tap ‘Search’.
Look for the app and Tap ‘Get’ to install it on your device.
Open the Resize Image app and follow all the prompts.
Next, tap the ‘Photos’ icon given in the bottom left corner of the screen.
A prompt instructing you to select the source of the photo will appear; tap ‘Photo Library’ to access your phone’s photos.
Choose the photo you want to resize from the album and this will open the image in the Resize Image window.
Tap the ‘Settings’ icon displayed as a grey image with slide bars and a window will appear.
Now, to resize the image, drag the ‘Width’ or ‘Height’ slider to the left or right to reduce or increase the image size respectively.
Make sure the ‘Keep aspect ratio’ is showing green so that the image stays proportional when you adjust its size.
To do a quick resize of the image, you can choose any of the ‘Standard Sizes’ given at the top of the window.
Tap ‘Resize’ to make the final changes and tap the ‘Save’ icon given at the bottom of the screen.
To save the resized image to your iPhone’s gallery, Tap the gallery icon and then tap ‘Ok’.
Using Online Photo Editor
Earlier, I discussed the offline methods that you can use on Windows and Mac devices. If you are more into online image editing apps, this is for you:
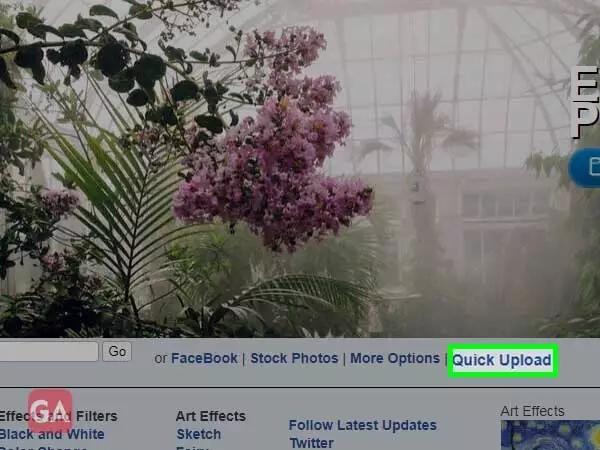
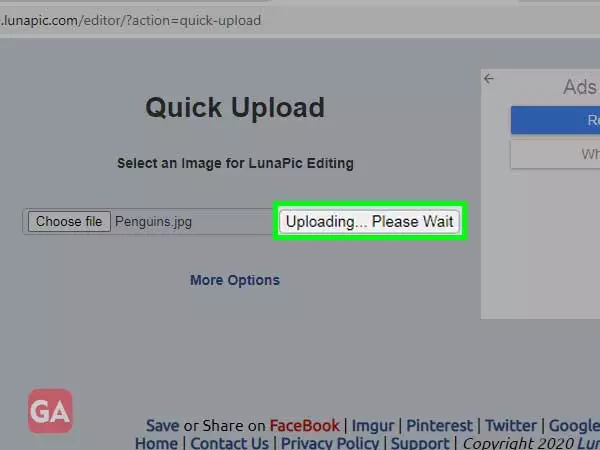
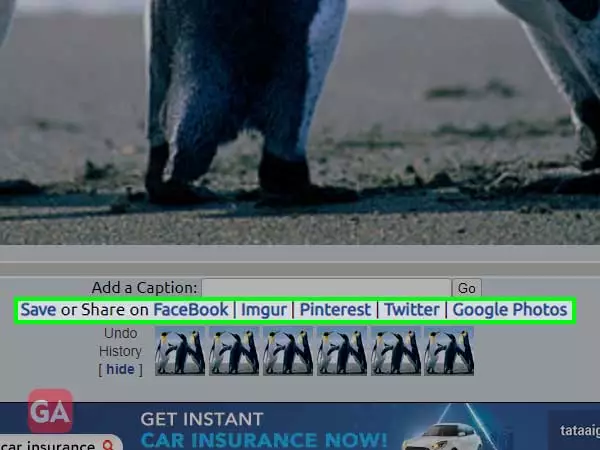
Go to the LunaPic Editor using your browser and click on ‘Quick Upload’ given below the image banner.
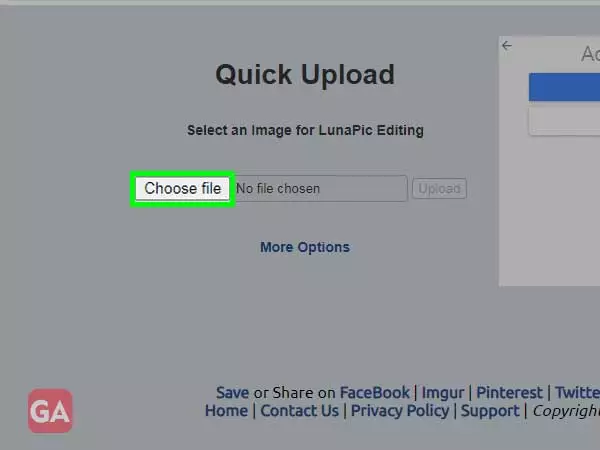
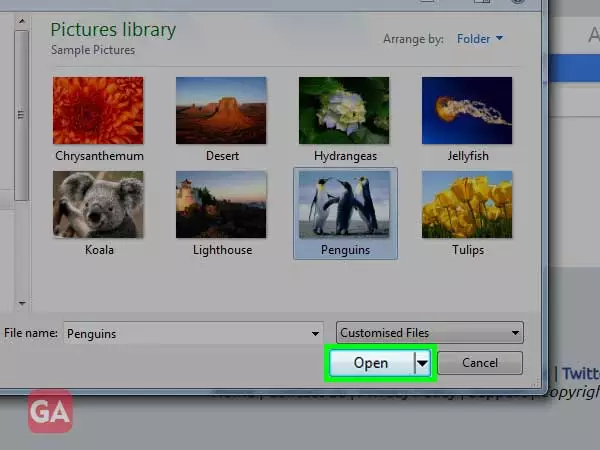
Next, click on ‘Choose File’ to select an image from your computer that you want to resize.
Select the photo and then click on ‘Open’.
The picture will start uploading; wait a while till it uploads.
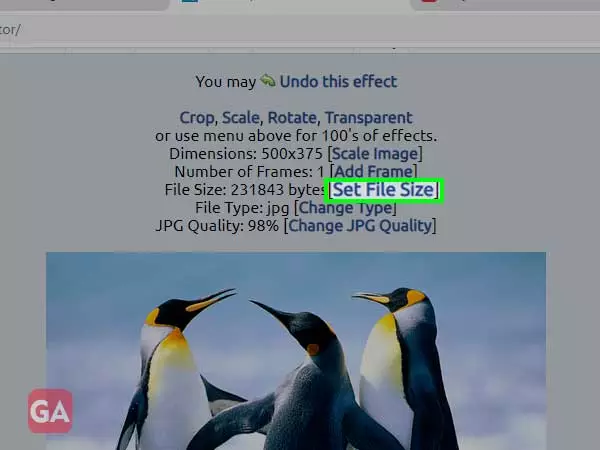
Next, click on ‘Set File Size’ to change the dimensions of the image.
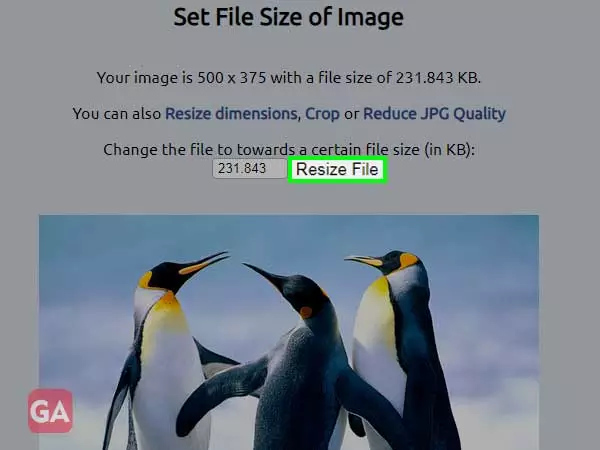
In the text box, enter the dimension for the image and click on ‘Resize File’.
After resizing the image, you can save it on your computer or share it on any of your social media such as Facebook, Twitter, Pinterest, etc.
There are other online image editors available as well that you can use for resizing the image such as Resizeimage.net, Pic Resize, etc.
I hope all the above methods will help you in quickly resizing or compressing images the way you want.