Insulation helps maintain indoor comfort and energy efficiency, but when it is missing or damaged, heat can escape or enter easily, leading to higher energy costs and uneven temperatures. An infrared camera, or thermal imaging camera, allows you to quickly detect insulation problems by revealing hidden heat loss areas without opening walls or ceilings.
Insulation problems occur when a building’s insulation cannot effectively control heat transfer. This may happen when insulation is missing, damaged, compressed, or poorly installed. Even small gaps can weaken the building’s thermal barrier and reduce overall energy efficiency.
When insulation fails, it can lead to higher heating and cooling costs, uneven indoor temperatures, and potential moisture issues. A thermal imaging camera helps identify these problems early by revealing hidden heat loss areas, allowing you to locate insulation gaps without opening walls or ceilings.
Infrared cameras work by detecting infrared radiation emitted from surfaces and converting it into a thermal image. A thermal imaging camera does not capture visible light; instead, it displays temperature differences using color variations. Warmer areas usually appear in brighter colors, while cooler areas appear darker.
When insulation is missing or ineffective, heat moves more easily through the affected area. As a result, the surface temperature of the wall or ceiling changes slightly. Although these temperature differences may be invisible to the human eye, a thermal imaging camera can easily detect them.
For example, a section of wall with missing insulation may appear warmer than the surrounding area during winter because indoor heat is escaping through that spot. Similarly, cold air entering through gaps around windows or doors may create cooler patterns that show up clearly when viewed through a thermal imaging camera.
Thermal inspections work best when there is a clear temperature difference between the inside and outside of a building. In most cases, a difference of at least 10°C (18°F) helps an infrared or thermal imaging camera produce clearer thermal images and detect insulation issues more easily.
Winter is usually the ideal time for inspections because indoor heating creates a strong temperature contrast with the colder outdoor environment. Early morning or evening is also recommended, as surfaces are less affected by direct sunlight, which can otherwise distort the readings captured by a thermal imaging camera.
Using a thermal imaging camera for insulation inspection is relatively simple, but following a systematic process can help you obtain more reliable results.
Ensure that there is a noticeable temperature difference between the interior and exterior of the building. This can be achieved by running heating or cooling systems for several hours before the inspection.
Power on the thermal imaging camera and allow it to stabilize. Adjust settings such as temperature range or color palette if needed.
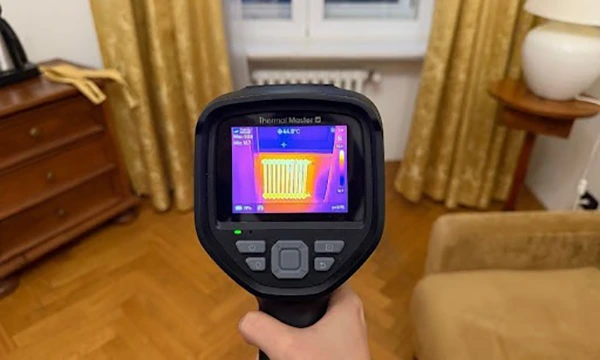
Slowly scan walls, ceilings, windows, doors, and floors using the thermal imaging camera. Keep the camera steady and maintain a consistent distance from the surface to capture clear images.
Pay attention to hot or cold spots that differ from surrounding areas. These patterns often indicate insulation gaps, air leaks, or structural thermal bridges.
Use the thermal imaging camera to record suspicious areas. Comparing multiple thermal images can help confirm whether a thermal anomaly is caused by insulation problems or other factors.
A thermal imaging camera can reveal several common insulation problems in residential and commercial buildings.
Although a thermal imaging camera is a powerful diagnostic tool, following a few best practices can help you obtain more reliable insulation inspection results.