“Forgive your enemies!!
But keep their screenshots!!”
Just kidding, Or am I?
Using screenshots, you can record exactly what’s on your screen for later sharing or reference. We’re going to show you how to take a screenshot on Android because they may be quite useful for taking, saving, and sharing.
It sounds easy to take a screenshot on an Android cellphone as the screen is stored on your phone with a few simple button presses. But the methods can vary based on the device brand and OS version you’re using on Android devices because they are not as standard as iPhones.
Built-in screenshot features are available on phones from Samsung, Google, Motorola, and OnePlus. Even more, functions are available if you are using the latest Android operating system version.
It can be difficult to sort through the alternatives and choose the best way to take a screenshot on an Android phone. Let’s examine the most popular ways to screenshot on Android.
The top ways to record what you observe on Android phones, such as Samsung Galaxy, Google Pixel, Motorola, and the OnePlus phone, are listed below.
On Android; this is the most popular and widely applicable way to take screenshots. To capture a screen, all you need to do is open the desired screen, then simultaneously press the Power and Volume Down keys on your device.
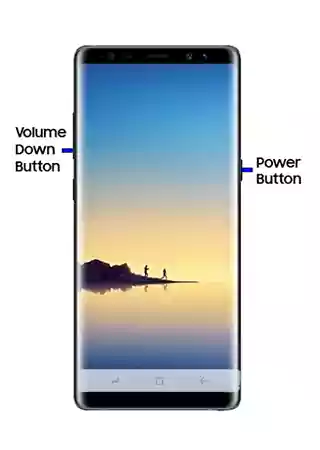
The first step is to find them on your Android handset. Today’s Android smartphones typically have two buttons stacked on top of one another on the right edge.
It takes a certain talent to get the timing just right. If you press the power button too quickly, your smartphone screen will lock. But if you tap the volume button too quickly, the volume will end up altering.
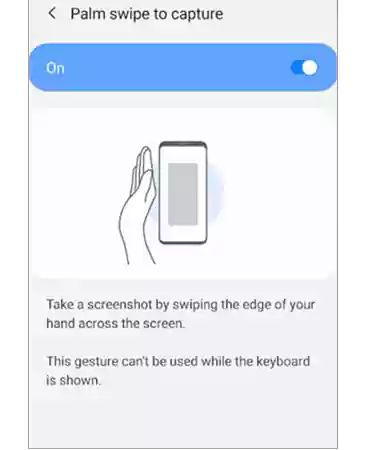
Today, you can snap screenshots on many Android devices without pressing any buttons by using gestures. For instance, you may enable Palm Swipe to Capture on Samsung smartphones by going to Settings > Advanced Features > Motions and Gestures. Now, taking a screenshot only requires a 90-degree swipe of the hand over the screen.
Similar functionality is available from Motorola; tap the screen three times to take a screenshot when active.
By asking Google Assistant to take a screenshot on your Android device, you may do so without using your hands. Just say, “Hey Google” to get the personal assistant to respond, and then say, “capture a screenshot” to start taking pictures.

Using Bixby instead of Google Assistant may be preferable if you’re trying to snap a screenshot on a Samsung phone. On Samsung smartphones, some users have expressed frustration that Google Assistant does not save the screenshot in the gallery but just permits instant sharing; this is not a concern with Bixby, and hence you can use that to take screenshots.
A screenshot button may be included in your Android Quick Settings menu from some Android smartphone manufacturers. From the top of your screen, slide down to access it.
The list of Quick Settings may need to be expanded by swiping down once more in order for you to discover the option you require. The name of the button may vary based on your Android device; look for one called Screenshot or Screen capture.
Your smartphone takes a screenshot of the remaining screen when you hit the button. The screenshot button may be hidden if you can’t see it, and the shortcut buttons displayed in the Quick Settings menu can be changed by tapping the pencil symbol in the menu’s lower-left corner.
Not all smartphones operate in the typical Android manner. For instance, newer Samsung models now use the Power + Volume Down approach to snap screenshots, as opposed to earlier models that still require you to click the Power + Home buttons.
The procedure remains the same after that. The photograph becomes available in your gallery app after you receive an on-screen confirmation. Some phones offer both the conventional approach and additional options.
On some Sony devices, for instance, pressing the Power button will bring up the Options menu. The screen of your Android device can then be recorded and screenshotted from there. The conventional approach is used by phones from Motorola and Google.
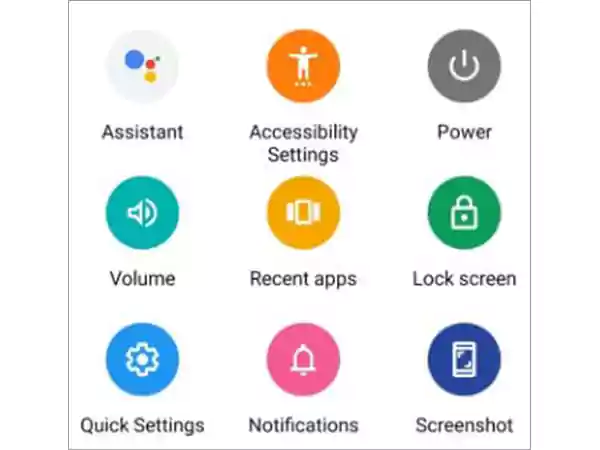
Turn on the Accessibility Menu on your Android device to enable an easy-to-use button overlay. This will introduce a floating button that you can use to perform several actions, including taking a screenshot, navigating your screen, controlling the volume, and turning off the device.
With the standard Android operating system, you can enable the shortcut and give the required permissions after activating the function from Settings > Accessibility > Accessibility Menu.
Users of OnePlus devices can discover the accessibility options under Settings > System, while Samsung users should seek under Settings > Accessibility > Interaction and dexterity.
Open the Google Play Store and search for third-party applications for screenshotting. On Android, you may take screenshots with the aid of numerous apps. Let’s examine a few of the top third-party screenshot applications. Although they offer some cool extra capabilities that are not natively available, their core functioning is the same as the original way.
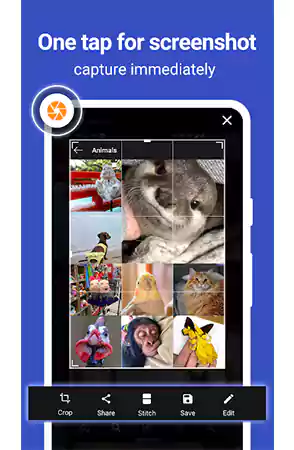
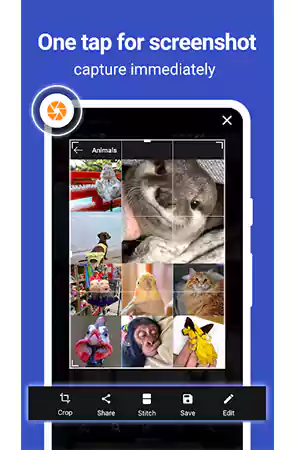
You may use Screen Master to activate either an always-available floating screenshot button or “Shake to take screenshots”—both excellent methods that some Android users may prefer.
The program also enables you to change the Android screenshot format and other screenshot-related settings. You can paste your screenshots on top of one another using Stitch Photo as well.
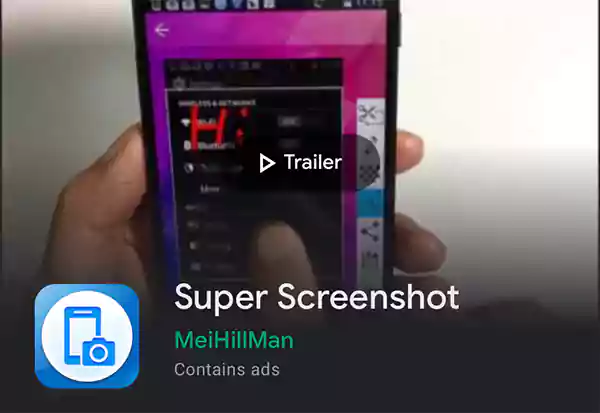
For those looking for a simple and straightforward screenshot program, Super Screenshot is an excellent option because it is free to use. The capability to crop your screenshots before saving them to memory is possibly its best feature.
You may also apply different filters, resize your photos, draw on them, add text notes, and scribble on them. You would require downloading a photo modifying app to obtain the same outcomes using the native Android way. Also, you can save images directly to your phone’s SD card to conserve space.
By default, a screenshot will record whatever is shown on the screen at the time. But you’ll need to take a scrolling screenshot if you want to get the whole page.
Step 1: Simply snap a screenshot and wait for the screenshot toolbar to emerge.
Step 2: Tap the Capture more button and move the screenshot window until it captures the entire page for devices running stock Android 12, such as Google Pixel phones.
Step 3: When finished, click Save to complete the screenshot.
*Until you instruct it to stop, the screen will automatically scroll when using a OnePlus phone.
You might have more success using Android’s built-in screen recorder tool if you’re having problems taking a screenshot of a particular screen.
To record your screen, follow the instructions below if you’re using Android 11 or higher.
Step 1: From the top of your screen, swipe down twice.
Step 2: Click on Screen recorder.
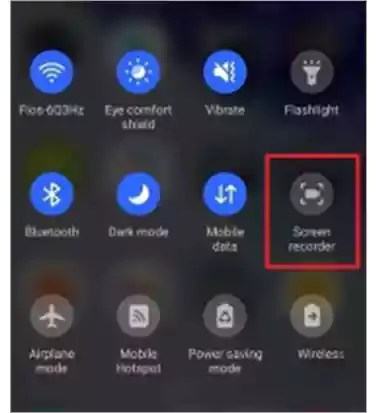
In the event that it isn’t already there, select Edit and drag Screen recorder to Quick Settings.
Step 3: Select what you wish to record, then select Start Recording. After the countdown, the recording starts.
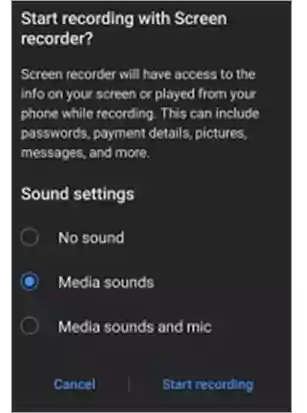
Step 4: Tap the Screen recorder notice by swiping down from the top of the screen to stop recording.
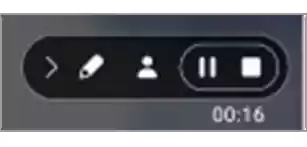
You can doodle on the screen or activate your front-facing camera using the toolbar that will emerge. The toolbar and selfie window can be Repositioned anywhere on the screen. Long-press the icon for the Screen Recorder fast settings to get further settings.
As you can see, there are several options available, regardless of the Android device you’re using, if you need to take a screenshot of your Android smartphone’s screen. By giving you a variety of alternatives for taking screenshots on Android devices, this article will be helpful to you.
Adios!
