There are a number of ways to crop a screenshot on Mac. For those of you who don’t know or are new Mac users, we will also be discussing the keys which are used for taking a screenshot on Mac and how you can crop it as well.
In the Apple world, there aren’t many people who leave it once stepping in. However, the list goes on for new ones joining and becoming a part of it by being new Apple users.
While some get familiar with the different commands and use of them in the Apple products, there are often times when they face issues with it as well. And one such query is “how to crop a screenshot on Mac?”
And if you are a new Mac user who is wondering the same and looking for solutions, we have got you covered. While googling for the steps can be easy, understanding the keys can get slightly difficult. So in this article, we are going to discuss how you can crop a screenshot on a Mac and even take one using pretty simple steps. Now let’s jump right in!
In the case of mobile phones, it is pretty easy and common how you can take screenshots. However, when it comes to desktops or laptops, the case can get a little different. While it isn’t hard to take a screenshot on a desktop as there is no rocket science behind it, it gets complicated when you switch to a different type.
For instance, you are a Windows user who only knows about the keys on Windows. So if you want to take screenshots of it, you will simply look for the Snippet Tool. But what if you have recently switched to Mac? Here is where it gets a little tricky.
If you are a new Mac user who doesn’t know how to snip on Mac or doesn’t know what keys to use for it, it is really simple. All you have to do is press the combination of these keys: Shift + Command + 3.
But, this will only be the case if you want to take a screenshot of the whole screen. As in the case of a particular section or area, you will have a different command to use. Now we will be discussing other ways to snip on Mac.
So once you know what type of screenshot you want to take, just go ahead with pressing the keys of it as mentioned above. And now that you know how to take a screenshot on Mac, let’s discuss the ways how you can crop a screenshot on Mac.
If you have taken a screenshot on your Mac but don’t want the entire image and want to crop some part of it, it can be done pretty easily. There are plenty of methods to snip on a Mac, from built-in methods to online free or paid alternatives. We will be discussing different ways of cropping a screenshot on a Mac below.
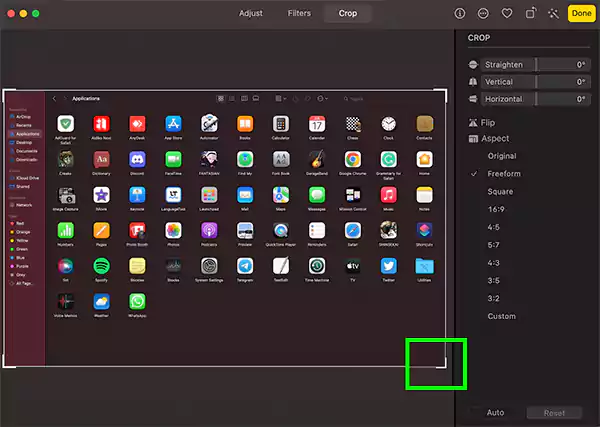
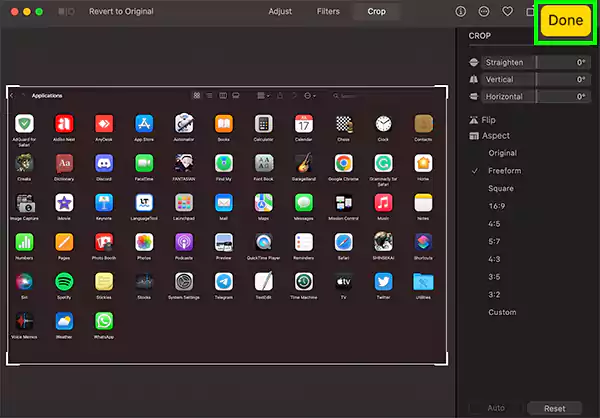
There is a simple and straightforward way to crop a screenshot on your Mac, and that is by using the inbuilt cropping tool. So if you don’t know about the process, we will explain it to you step by step.
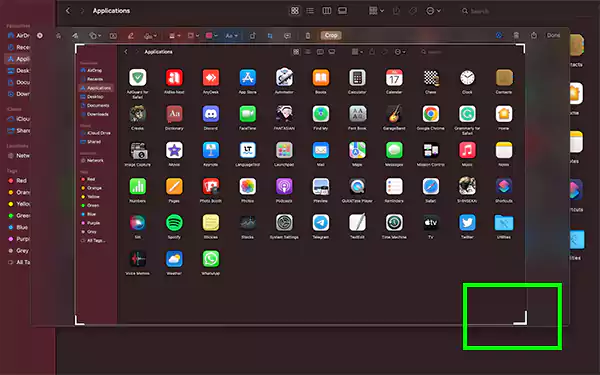
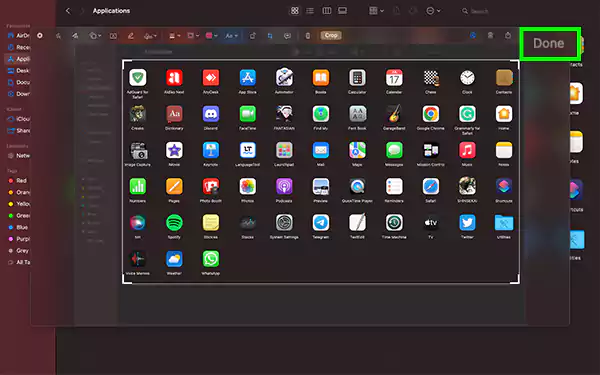
Apart from this, you can also crop the image differently. Follow the steps to know how.

And now, using any of the two methods above, your screenshot will get cropped with the saved changes successfully.
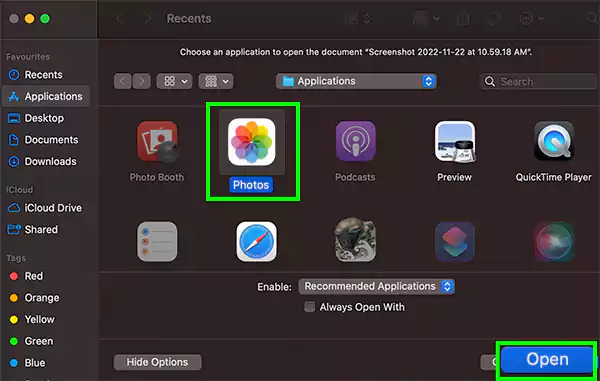
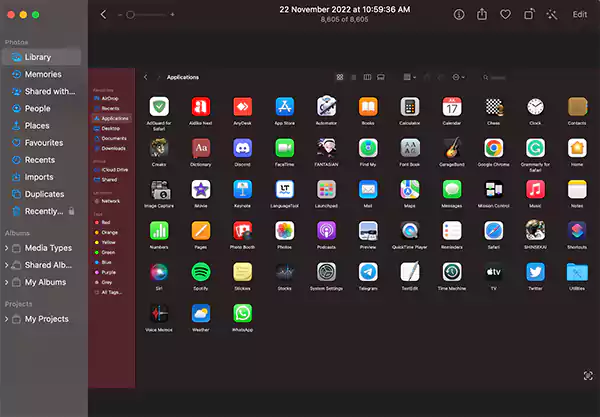
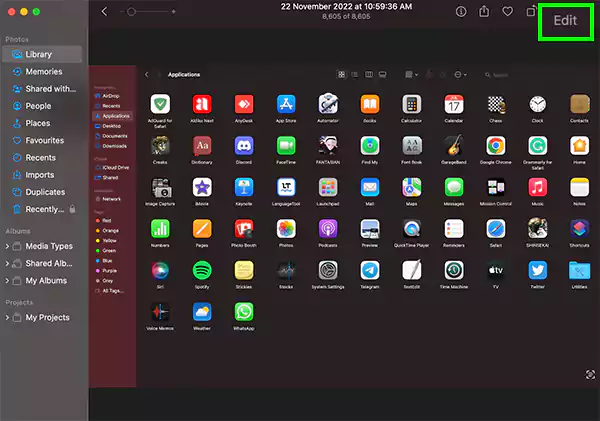
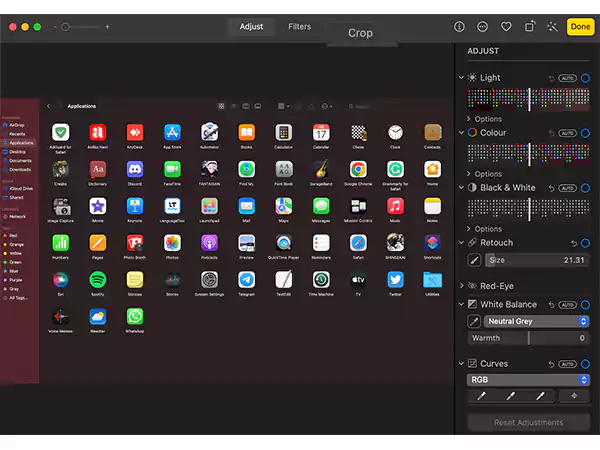
If you are more familiar with the Photos app by Apple and prefer to edit images with it, then the idea of using it to crop your screenshot isn’t half as bad. If you want to know the steps, read on.


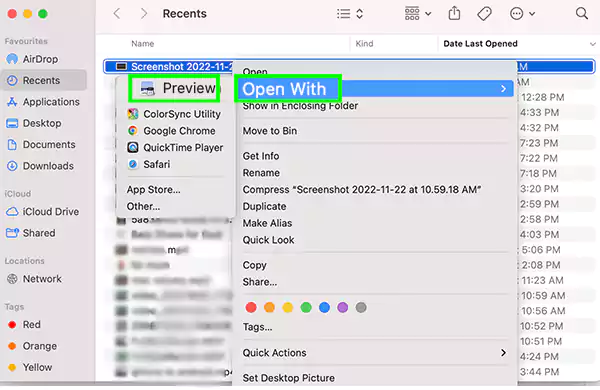
Using these steps, you will be able to crop your screenshot from the Photos app on your Mac. But if you wish to crop screenshots on your Mac using the Preview app, follow the steps given in the section below.
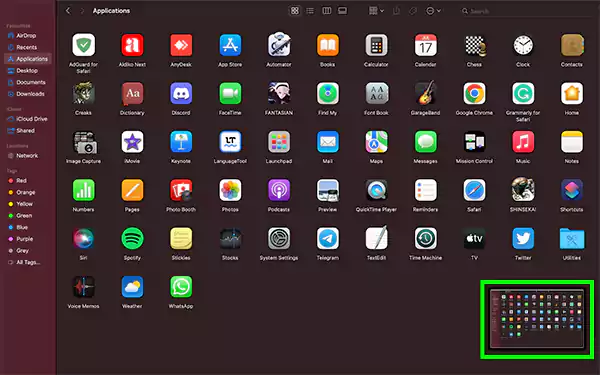
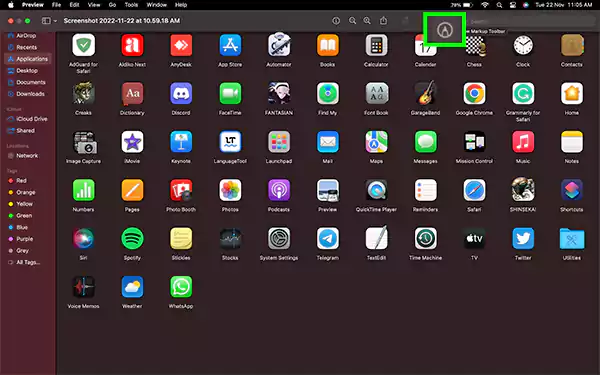
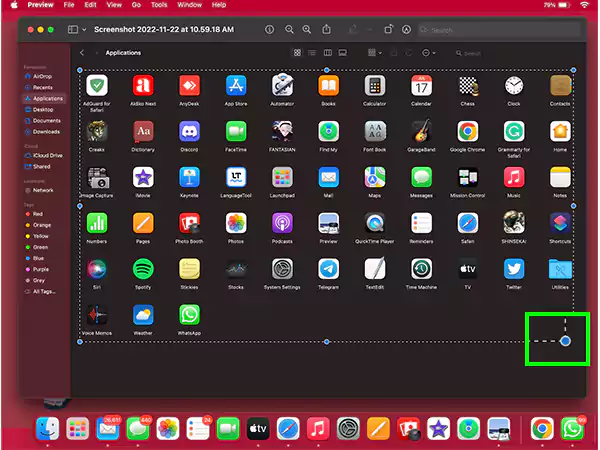
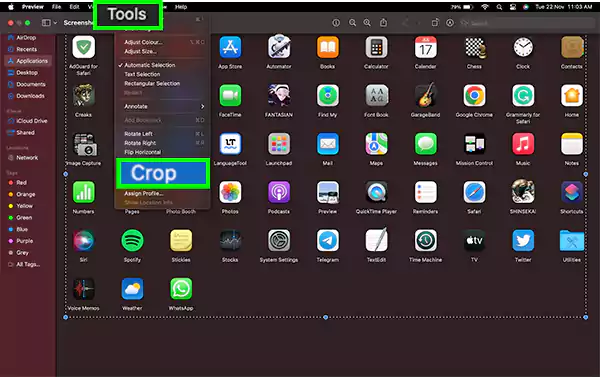
There is more to the Preview app on MacBook other than editing an image or screenshot. You can view images in different formats, edit documents or PDFs, and have several makeup features as well.
So you can use the Preview app as well for cropping a screenshot on Mac. To know how, follow the given steps:

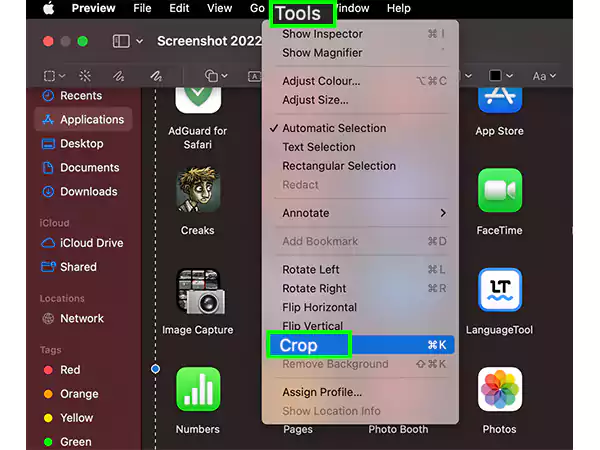
And that was about it for the steps of how you can crop a screenshot on Mac using the Preview app. If you prefer using online tools instead, follow the steps given in the next section.
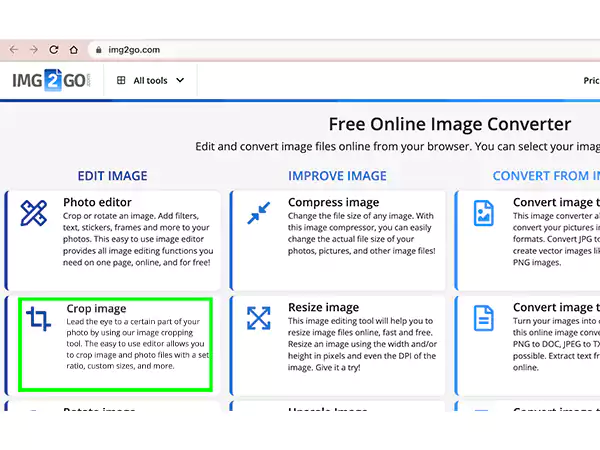
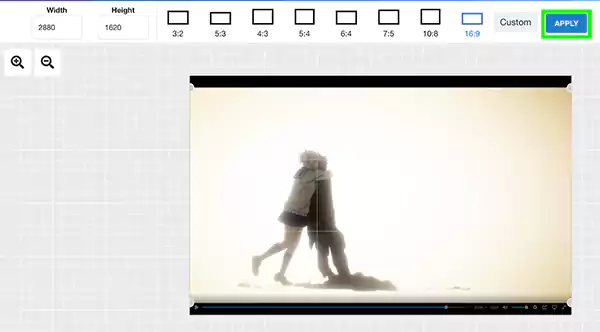
If you want to crop a screenshot on your Mac without using any third-party apps, there are some online tools available like ResizeImage, Picresize, IMG2Go, Cropp.me, etc. to crop a screenshot.
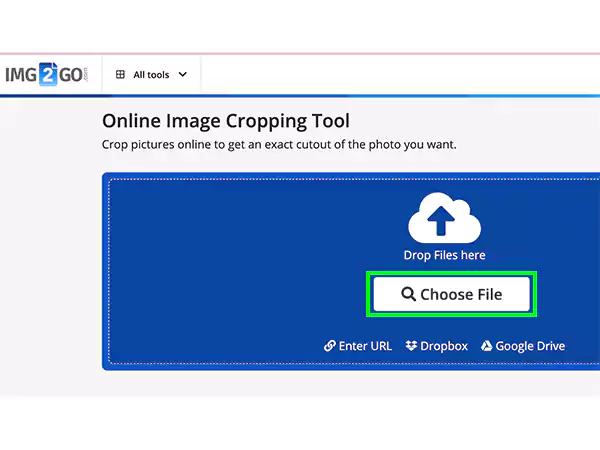
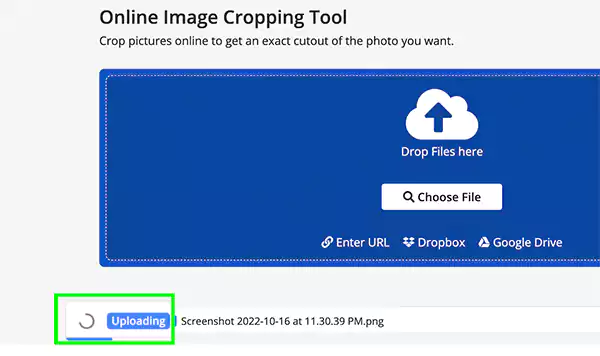
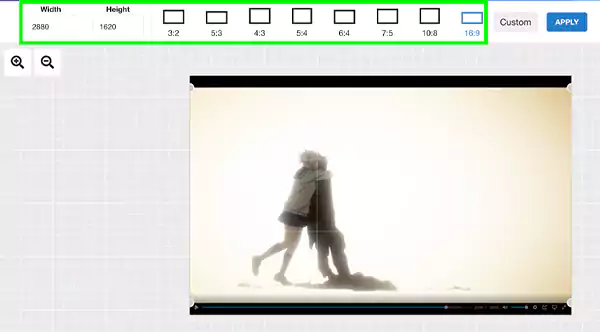
So in this article, we are going to use IMG2Go as an example to help you understand how you can crop a screenshot on your Mac using online tools. For those of you who don’t know, IMG2Go is a free online tool that lets users edit or convert their images in different formats safely.
So now, let’s get started with the steps:
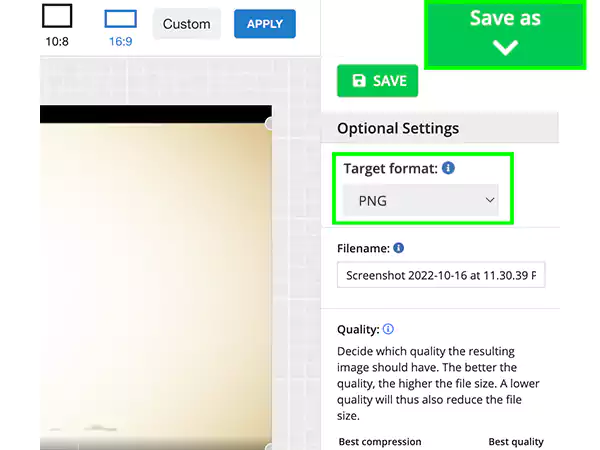

So those were the steps for how you can crop your screenshot using online tools. If you don’t mind using third-party tools for cropping a screenshot, then read the following section.
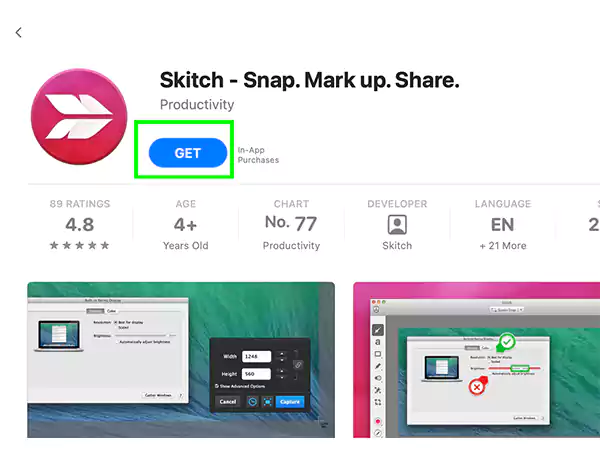
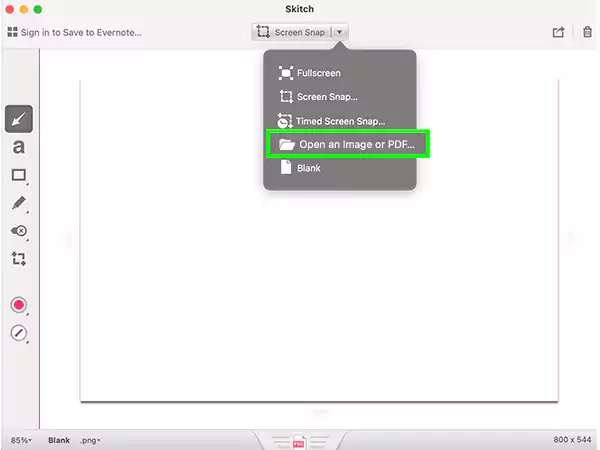
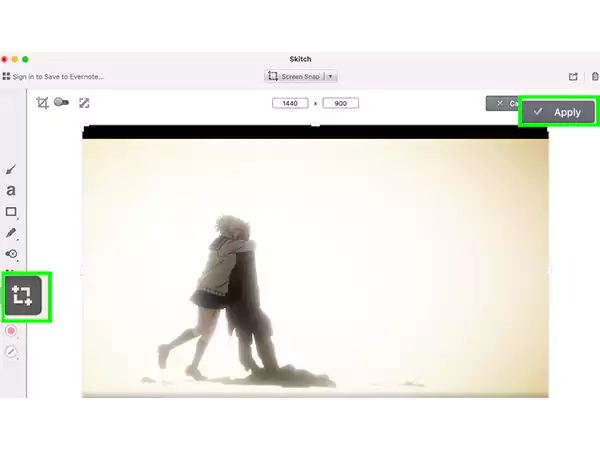
To crop screenshots on your Mac, you can also make use of third-party apps like Snagit, Skitch, etc. Apart from the in-built cropping tool of Mac, Skitch is a simple app using which you can crop, annotate and to some extent, edit your screenshots with its functions. So for cropping the image via the third-party tool Skitch, follow these steps:

Now your cropped screenshot will be saved on your Mac in the selected location. Using the above-mentioned methods, you will be able to crop a screenshot on Mac. It is not a rare thing to crop a screenshot, as there is often limited detail or information to it that we want to display or highlight. By cropping your screenshot, you can save on size and have a simple way of displaying the required information or message.
Yes, on a MacBook, you can capture a selected portion of the screen and even record it. For this, all you have to do is press the keys: Shift + Command + 5, and then choose the “Capture Selected Portion” or “Record Selected Portion” option.
Yes, you can do a Markup of screenshots and edit it along with various other options including crop. However, the options for that will be lesser compared to the ones given in the Photos.
You can use the Live Text feature in Preview to copy and use the text in the photo.