Now that the borders are back open, you may be excited to go out and discover the world finally. With adventure ahead, don’t let the thrill and excitement make you forget to prepare well.
One of the essential parts of preparing for international travel is getting your passport and visa in order. This includes having your photo taken and handled correctly. Follow our guide to make this process more of a breeze, and you’ll be ready to go!
Before taking your photo, you should find out the passport and visa requirements in terms of ID photo. This includes the technical and non-technical requirements.
What we mean by non-technical requirements usually depends on the person whose photo is taken — that means dress code, hairstyle, accessories (or rather, lack of it), posing, and expression.
Then there are the technicalities, such as the background, size, and proportions. While non-technical requirements are often common sense, technicalities can vary and be more peculiar for specific countries and documents.
Both categories are important to create a compliant photo for your passport and visa.
You can find a convenient list of all existing ID photo requirements at this link.
Ensure your camera is set about one to two meters in front of you. As for the settings, it is recommended to have it set to portrait mode, if available, or at least have it focused on you. This way, your photo will not be distorted and will reflect your face as close to reality as possible.
Make sure the camera is pointed straight at your face, and the shot includes your whole head and shoulders.
Lighting is also essential to make sure that your photo identifies you accurately. Make sure that the light source shines on you evenly to ensure your photo is not distorted. There also shouldn’t be any objects that obstruct the light source so that it creates a shadow on you.
We recommend taking your photo in daylight. If it’s too bright, you could open and cover the windows using translucent or other blinds as you need to get the best lighting possible. You could even use white paper to cover it. Usually, it’s most recommended to take a picture across a window.
Now you’re about to take your picture. Remember, ID photos in passports and visas aim to identify you, so pose accordingly. This means that the camera should capture you in a “neutral” everyday position.
Keep your spine straight but not tense and your shoulders even. As for facial expression, keep it neutral — no smiles, but no frowning either! You can smile subtly by raising the corners of your lips slightly and smiling with your eyes. Think confidence — you got this!
Now that you’ve taken your photo, it’s time to take care of the technicalities we have mentioned above. At this stage, you need to set the size and proportions of your face relative to the photo’s frames.
If you have photo editing programs such as Photoshop and have the skills, you may do it on your own. Make sure to set the size and proportions according to the passport or visa requirements and set it according to those parameters. The ruler, grids, and guide tools can help you in this task.
Otherwise, you could use online programs specialized for this task, which we will cover in the next section.
This program is entirely online, so you don’t need to download any software, nor does it require registration. It is also entirely free of charge.
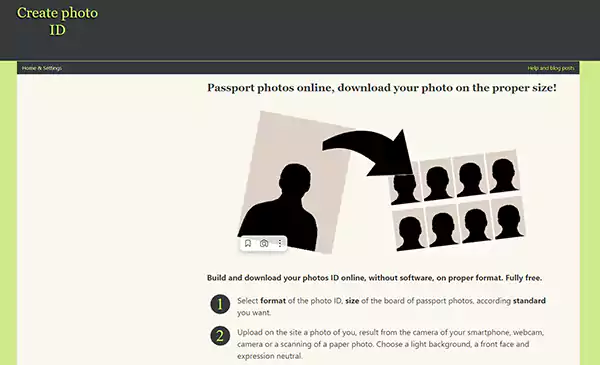
The program focuses on passport photo cropping and covers passport photo requirements for many countries. If you need photos for other documents like visas, with requirements differing from what is available, you may use the custom sizing option.
Some manual work is still required, though. This online program counts on the user to mark facial features on the picture so the program can set the size and proportions of the photo. The service doesn’t adjust the background.
As a result, the user will get a digital photo and printable template of their photo.
Also an online program, this service lets you simply upload your photo and have it done automatically.
Named Visafoto, this online software does photos for passports, different types of visas for countries worldwide, and other documents. Besides cropping and setting proportions, it also changes backgrounds and can fix head tilt and red eyes.
Unlike the previous program, Visafoto is automated, so the user does not need to do any work and can get their fully compliant photo quicker, with an acceptance guarantee.
Besides a digital photo file, Visafoto also provides a printable template, so customers do not need to do more work formatting their photos to print.
Yet another online software, this one, has paid and free options. The free and paid option has different features. The paid package includes printed pictures delivered to you, compliance checks, an acceptance guarantee, and retouching, while the free option does not include any of those features.
This online service also covers passports, visas, and photos of other formats.
PersoFoto also works based on the user detecting their facial features to set the size and proportions of the photo.
As for the results — it depends on the option you choose. If you choose the paid option, you can get printed photos delivered.
If your passport or visa application requires you to print your photos, you can print them yourself or have them done at a copy shop. In either case, ensure your photos are printed on high-quality paper that fully complies with the document’s requirements.
If you’re printing yourself, it is usually preferable to have postcard-sized photo paper (A6 format), as printable ID photo templates are usually made in this format. Other than that, such photo paper formats also fit several photos at once, while not being too big like A4, you end up printing too many and wasting paper and ink.
If you think taking a picture of yourself is a lot of work, wait until you take one of the babies! Actually, once you get the grip of taking the perfect shot, the rest of the process is practically the same. Our children are perfect, but we’ll give you tips on getting that perfect ID photo shot!
For young babies, you can lay them on a white bedsheet. Try to get their entire face in the photo. Usually, photo requirements allow for newborns up to a certain age to not have their eyes open in photos.
For toddlers or babies who can already sit, you may sit them on a child safety car seat. You could also cover the seat with a sheet in the color you need.
In any case, you could try using a toy or funny expressions behind the camera to attract the child’s attention.
Once you get the photo, the other process is the same.