In this digital world where everything is online, businesses are also being promoted through social websites. The Facebook business page offers a great way to promote your product, brand or business. There are billions of users who stay active on Facebook for most of the time and get information about their products and services from there only. So this can be one of the most effective ways to take your product or service to the masses without spending much on advertising.
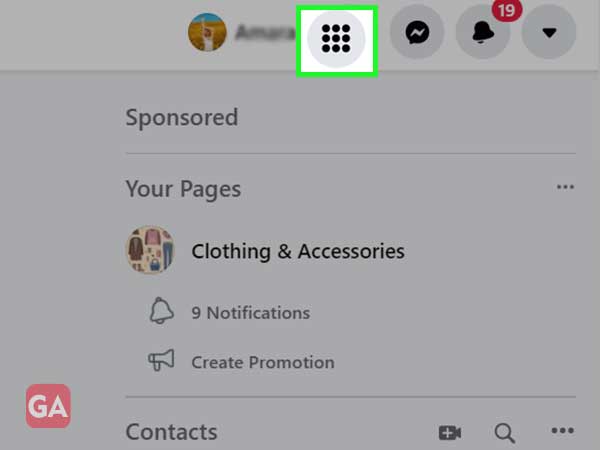
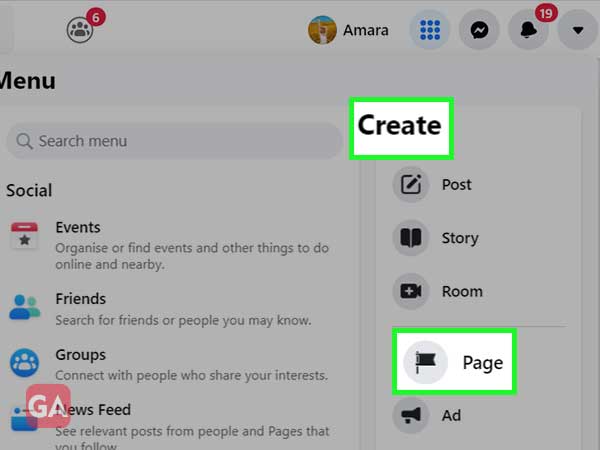
If you are not much aware of the ‘Facebook Business Page’ feature, this is how you can create a Facebook business page and let it make the rounds.
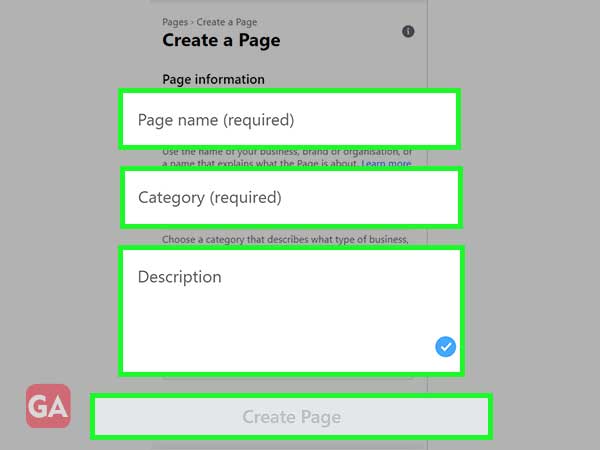
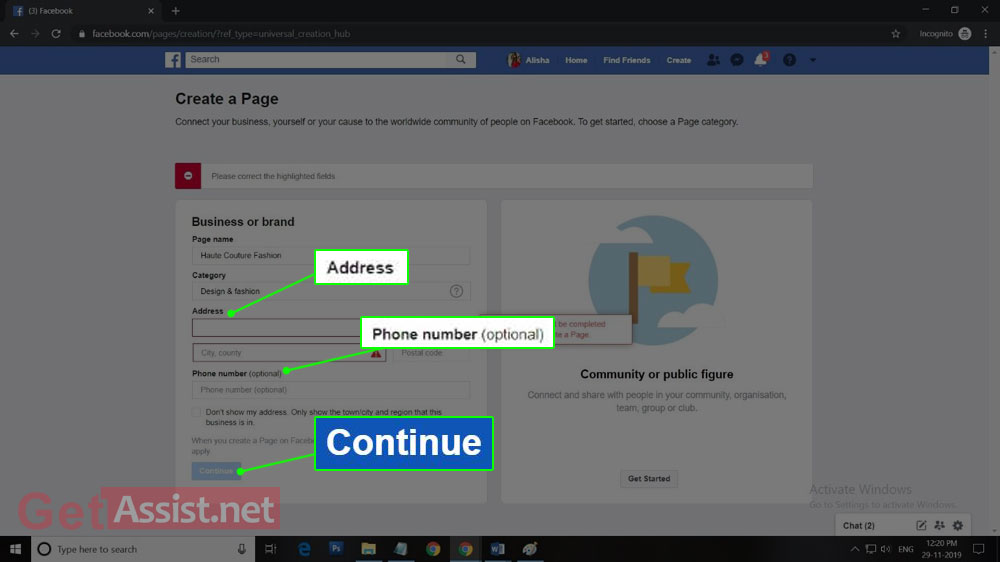
After this, click on ‘Create Page’.
That was all about how you can create your Facebook business page, but that is not the end of the job. There’s a lot more that you need to do to completely set it up and start expanding your business.
Here is a related video that you can watch:
Once you are done setting up your page, the next step is to add colors to it by adding pictures.
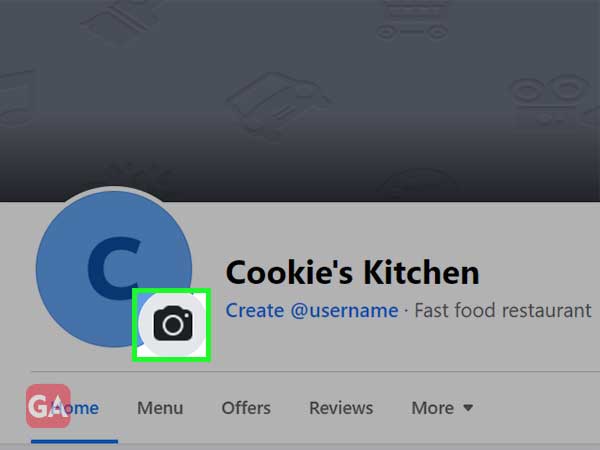
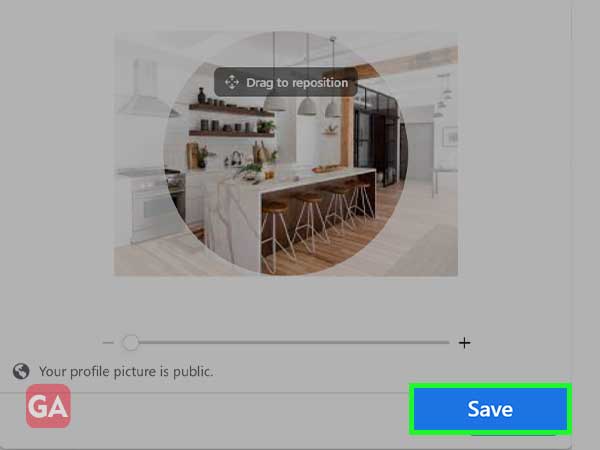
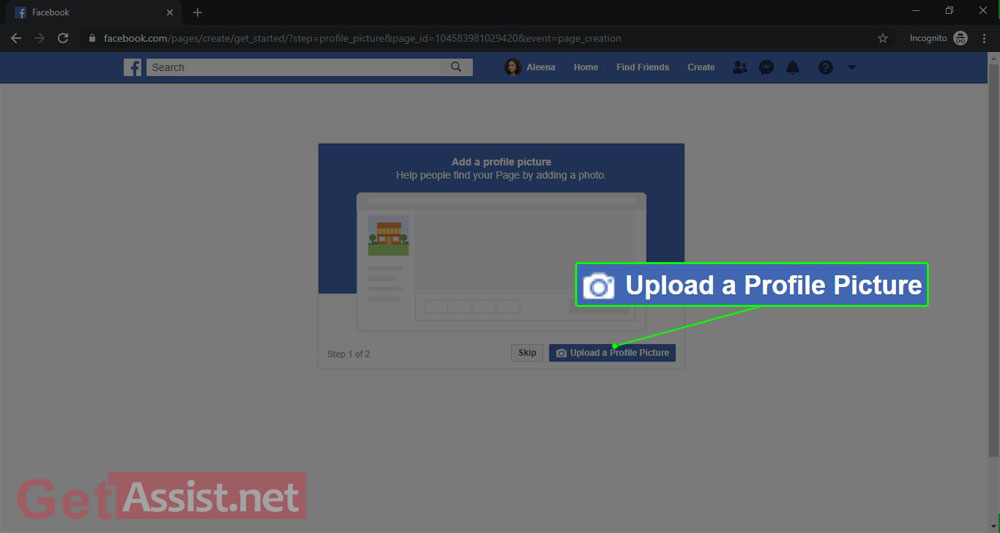
Profile Picture- Start by uploading profile pic for your business page. The profile picture will be the first impression of your business page, so make sure it leaves a mark on the audience. The photo must represent your brand or must be absolutely relatable to your business.
The profile picture will accompany your business name in the Facebook search results. If you are promoting a brand, you can use the logo or if it is a local business, something that will give an overview of your business will work.
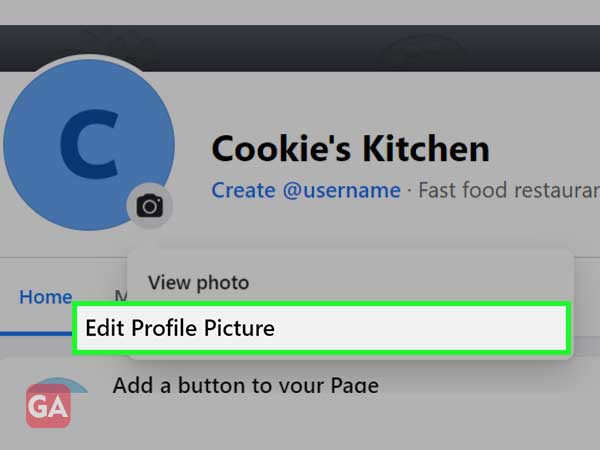
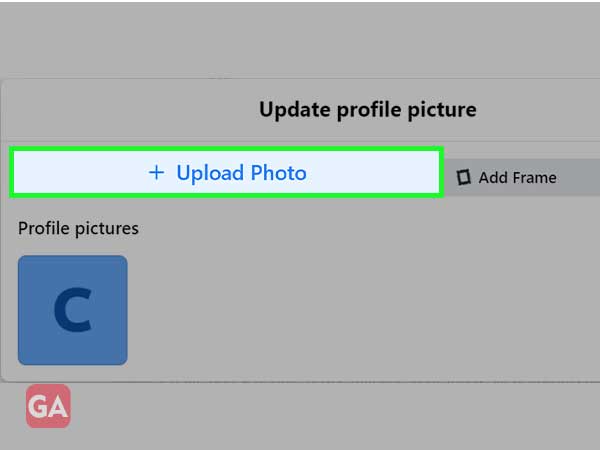
To upload a profile picture:
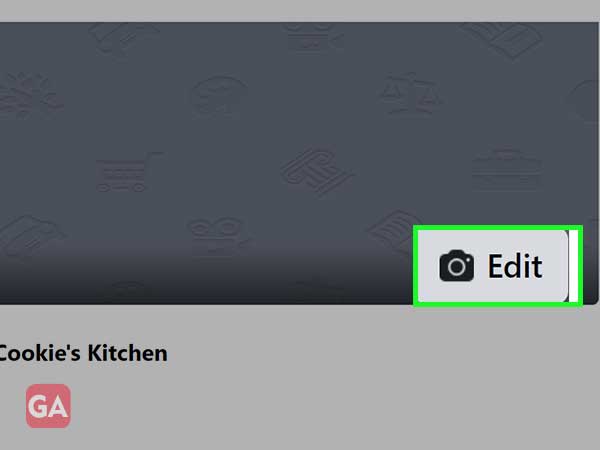
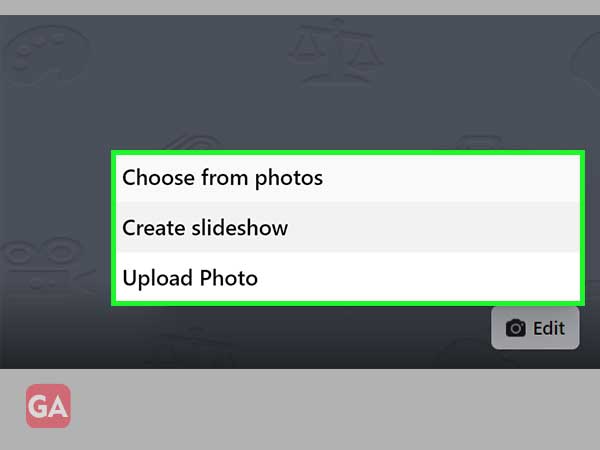
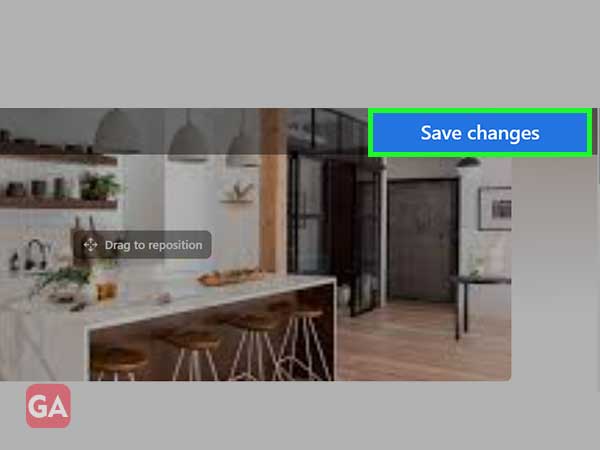
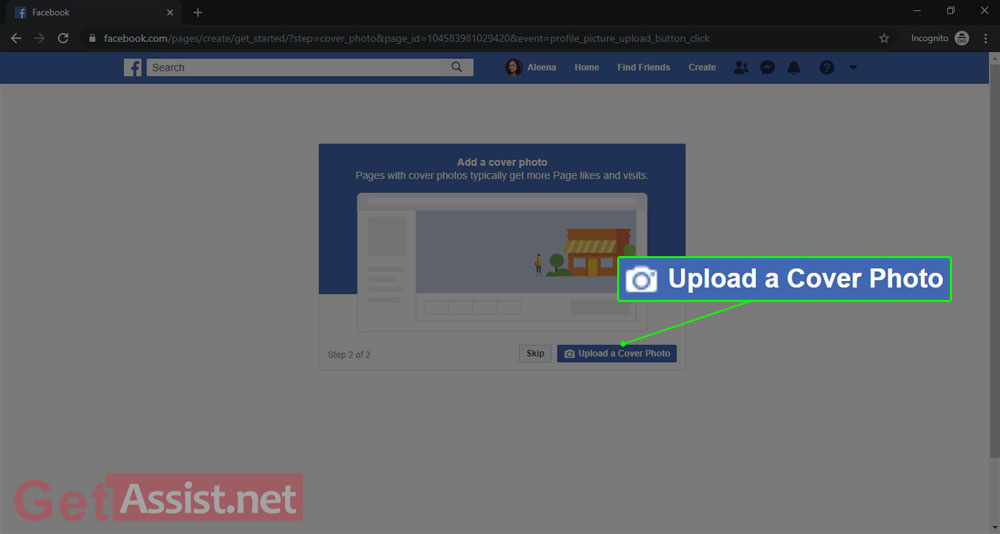
Cover Photo- Next, you will have to upload the cover image for your business page. It will represent the core theme of your business and its overall personality.
To upload a cover photo:
That was about the second important part of setting up a business page on Facebook.
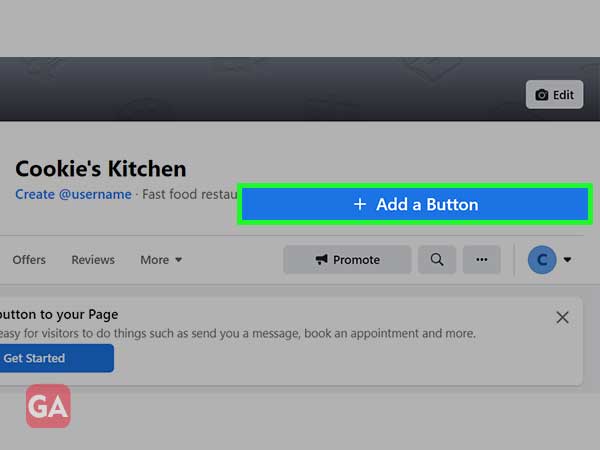
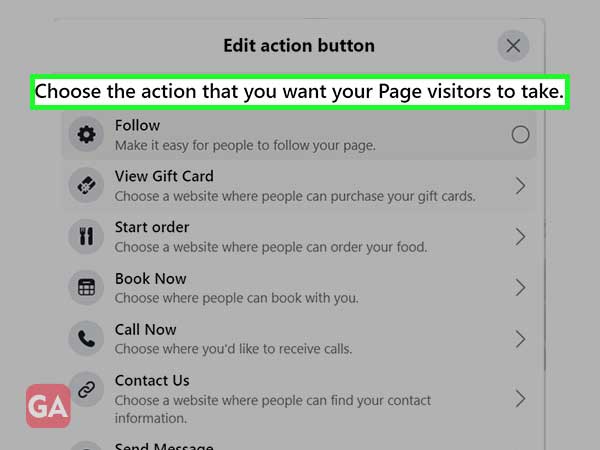
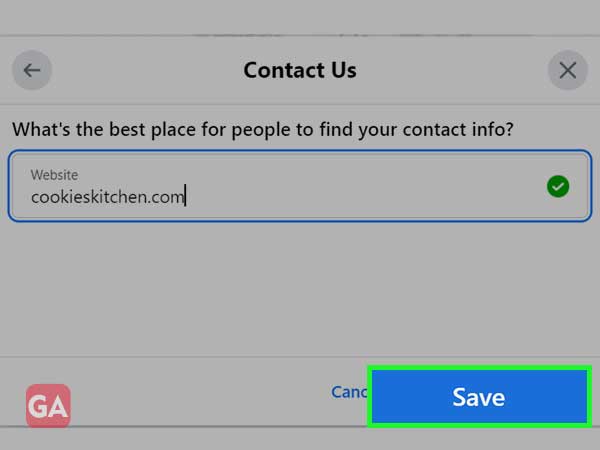
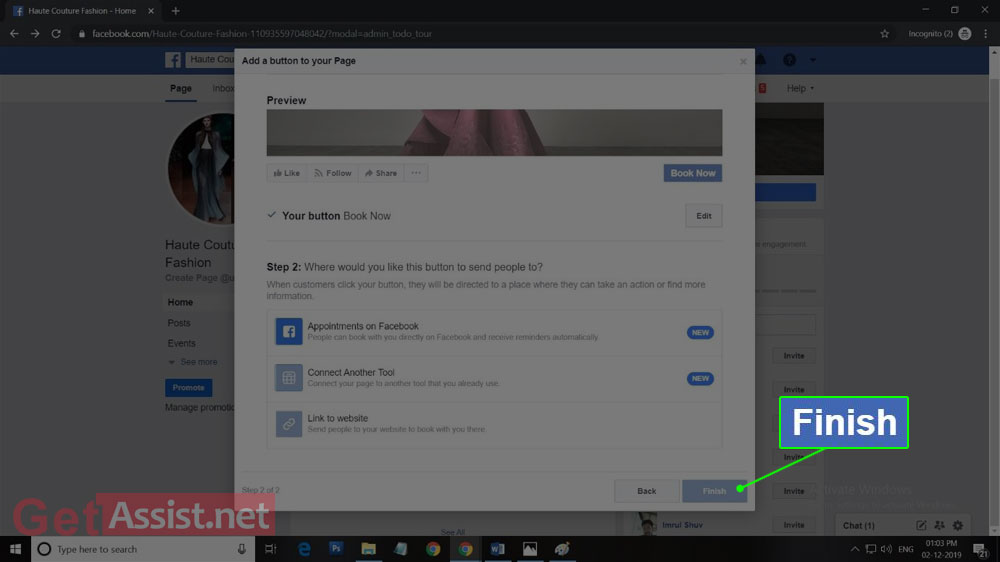
If you are running a business, this feature is really significant for you. By adding a button to your FB page, you can make it easy for visitors to send you a message, book an appointment and much more. For that, click on ‘+ Add a Button’ option.
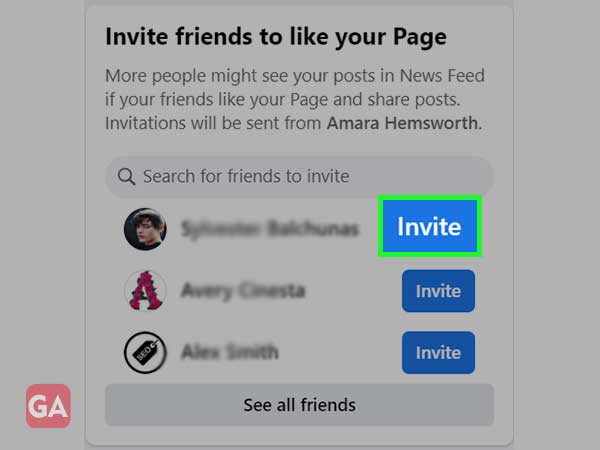
The next important step is to invite your Facebook friends to like your page and see what you have to offer. On the same page, you will find this section as shown in the image below, just click on ‘Invite’ for the friend you want to share your page with. If your friends like your page, they will be able to see all your page’s activities on their news feed.
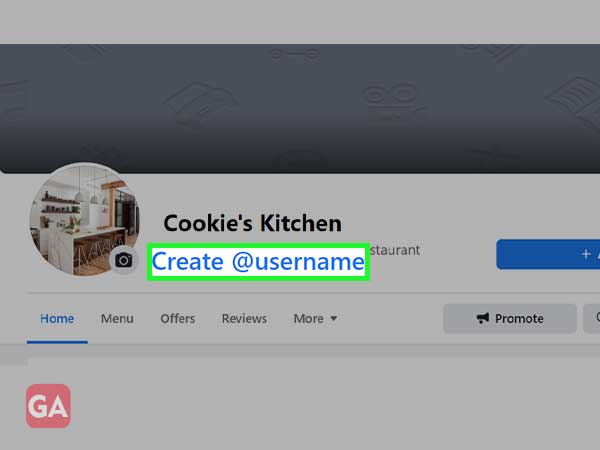
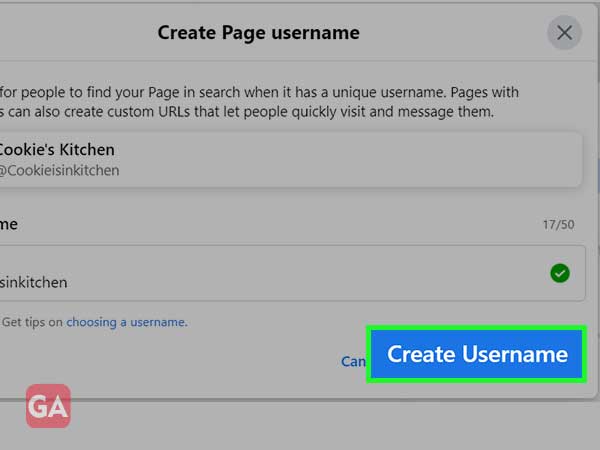
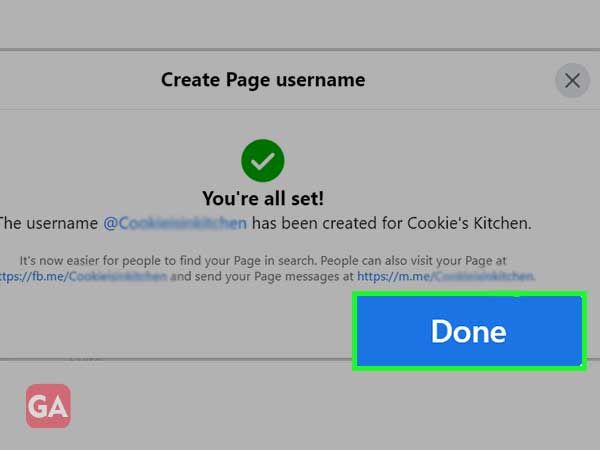
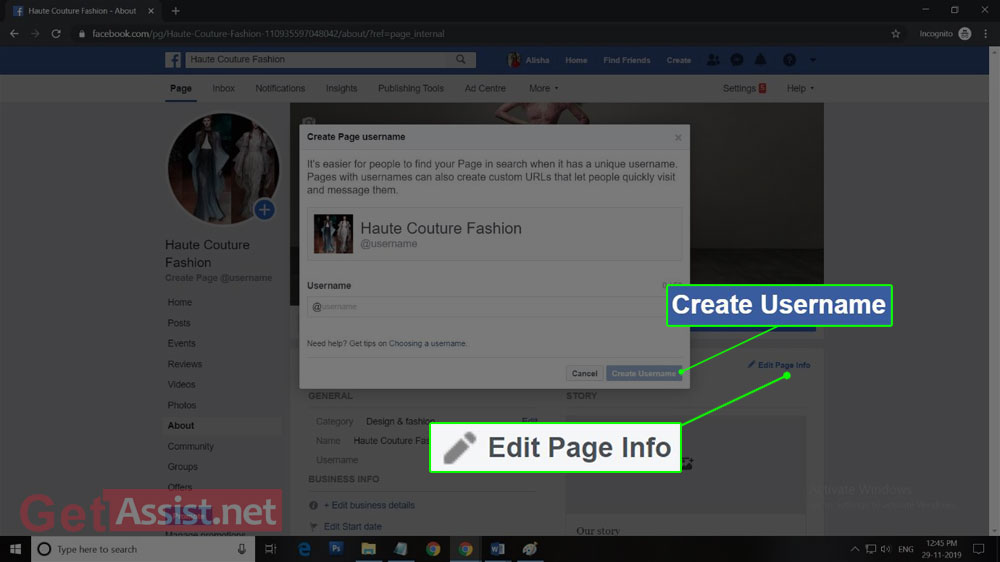
The next step is to tell people how they can find your page on Facebook. So you need to create a username for your page that is also known as vanity URL. It can be only up to 50 characters long and make sure it is easy to remember. You can use your business name or a slight variation of it.
To create a username for your Facebook page:
This is a section on your FB page where you can add various information related to your business that will help in its expansion.
Under ‘Set Up Your Page for Success’ section, you will find three options depending on the category of your business.
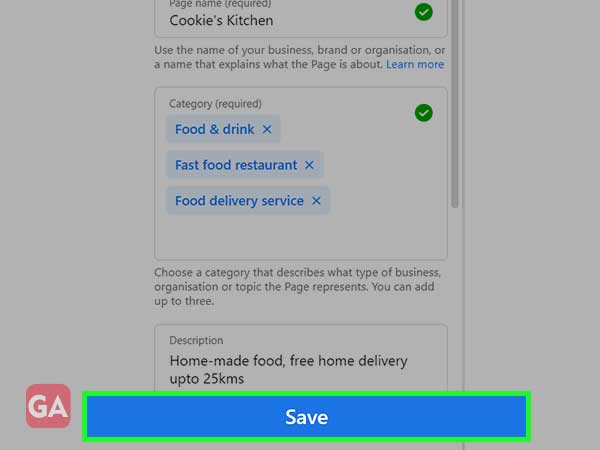
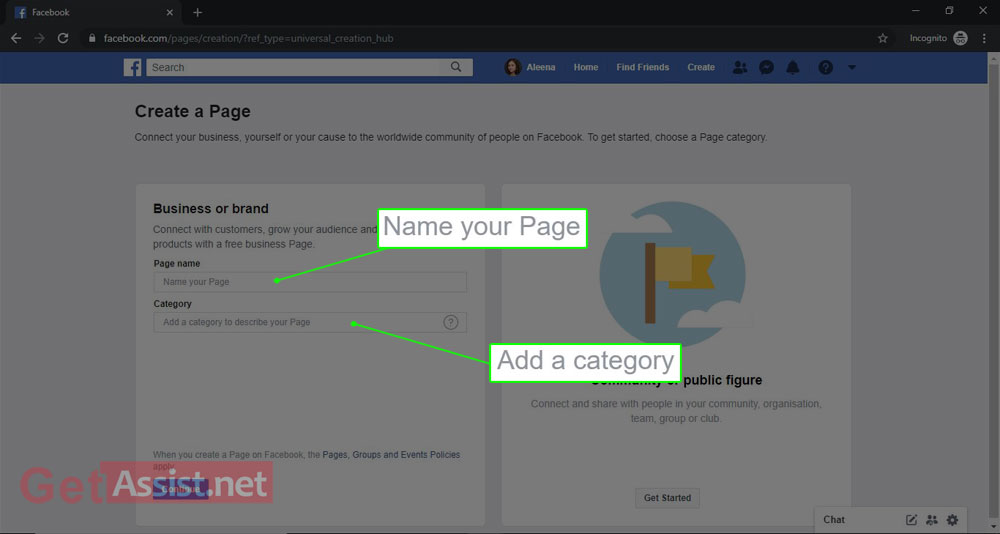
| Create a page name |
| Choose a category |
| Add a profile picture |
| Add a cover photo |
| Add a description |
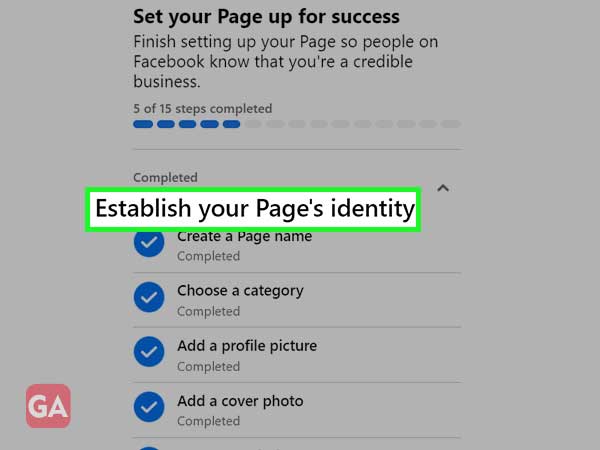
If you have already completed the above steps, just proceed to the next option.
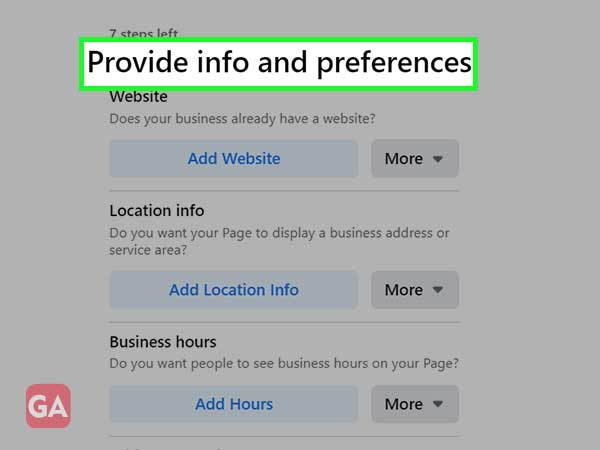
| Add your business’s website |
| Add the business location |
| Mention your business hours |
| Add your phone number |
| Set your messaging preference |
| Add an action button |
Complete all the above steps to proceed to the next option.
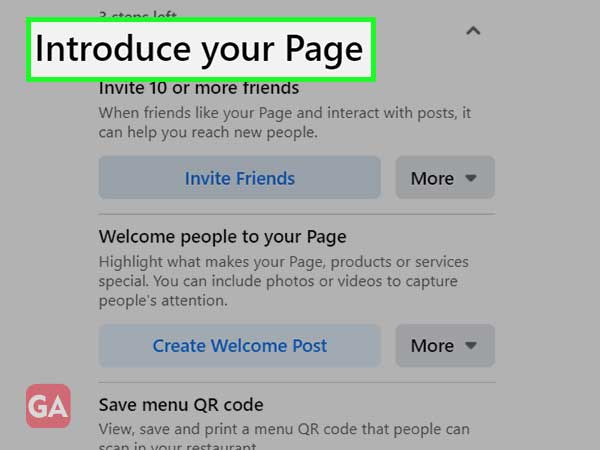
| Invite your friends |
| Create a welcome Post |
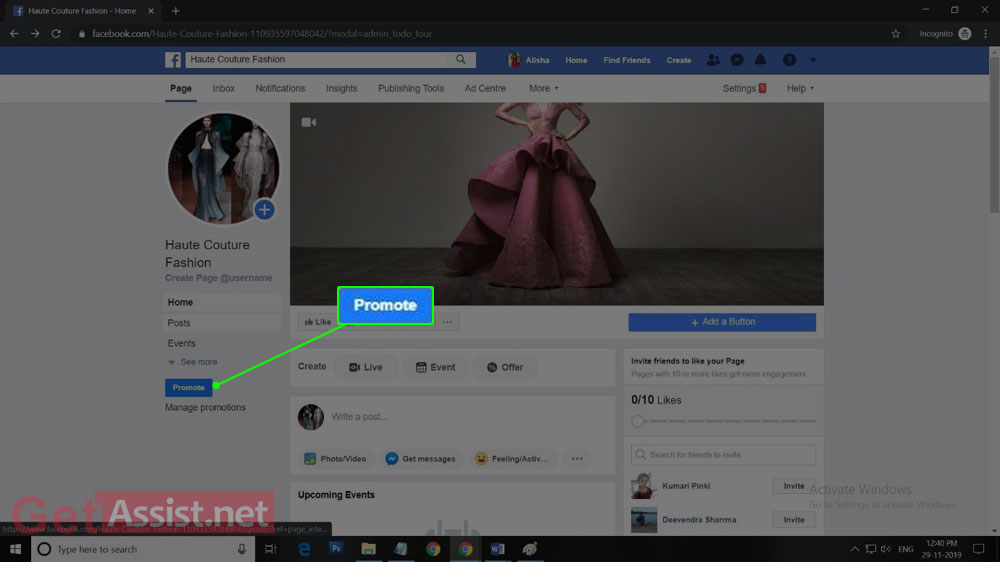
After completing all the above steps, you are ready to promote your page.
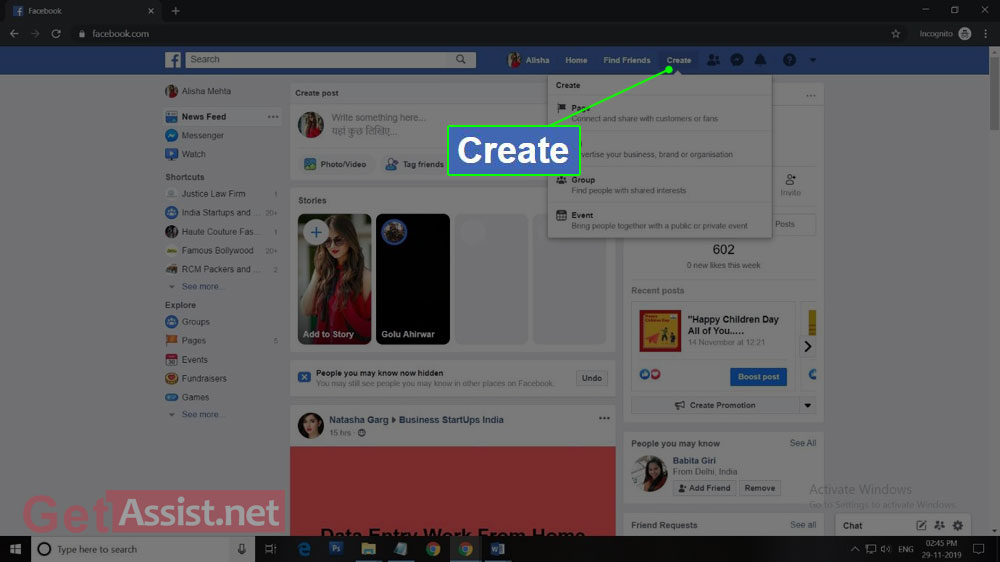
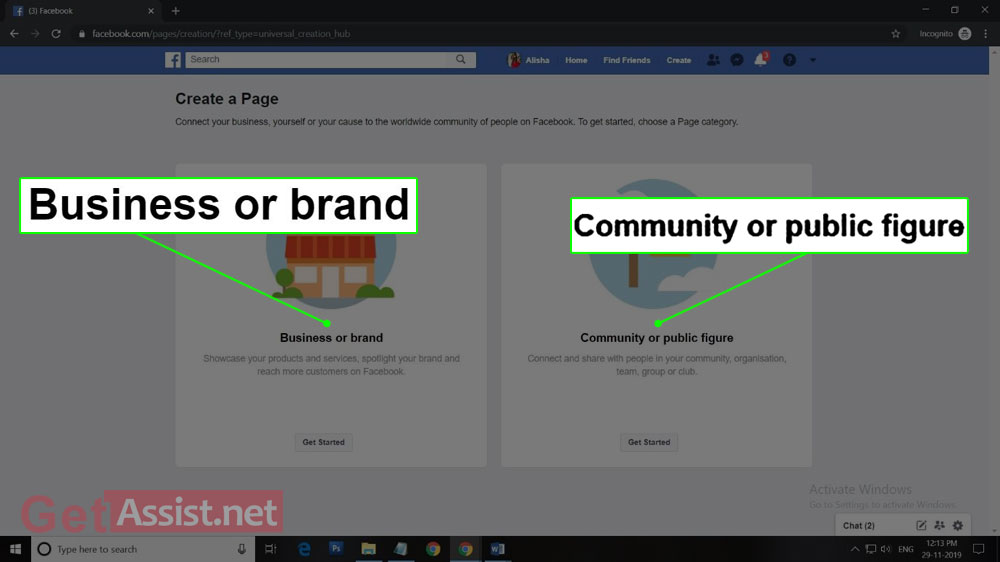
First is ‘Business or Brand’ where you can promote your product, service or brand to expand your customer base.
The other one is ‘Community or Public Figure’ where you can connect with more people in your community, organisation, team etc.
So as the choice is clear click on ‘Get Started’ for the first option i.e. Business or brand.
Doing so will mark your acceptance of Facebook’s terms and conditions for Business Pages, so make sure you have read them properly before proceeding.
The profile picture will accompany your business name in the Facebook search results. It will also be shown on the top left of your Facebook page. If you are promoting a brand, you can use the logo or if it is a local business, something that will give an overview of your business will work.
Once you are done with selecting a good picture, click on ‘Upload a Profile Picture’.
Voila! Your page has been created. A brief synopsis of the page will provide you with what features you are going to get to promote your page. Clicking on the prompts will also help you. There is much more to do before you start sharing your page.
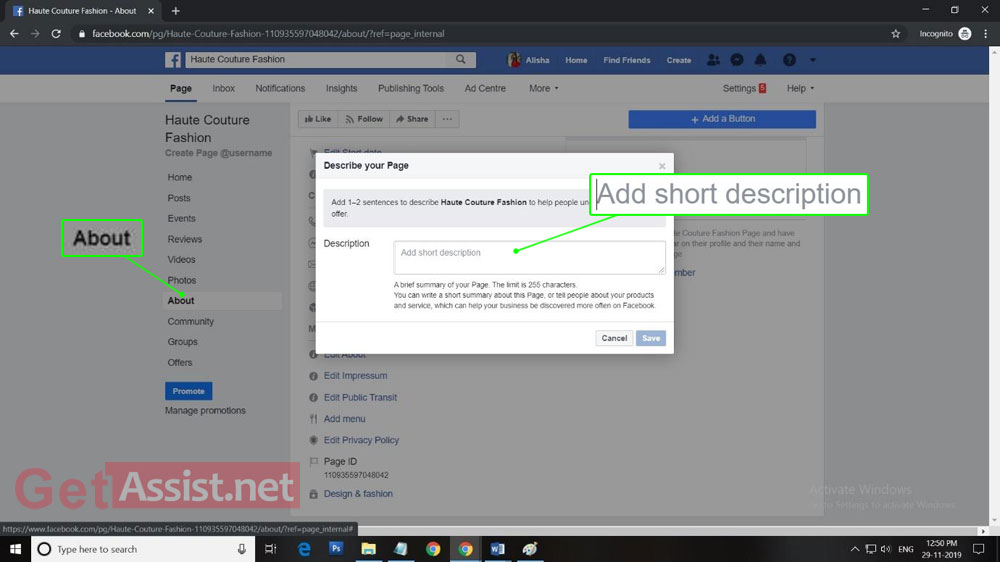
Show the world what you are going to offer them. Tell people about your business in just 1-2 sentences.
Click on ‘About’ from the left column and then click on ‘Edit About’. You will see a dialog box saying ‘Describe Your Page’ where you have to add the description and click on ‘Save’.
The next step is to tell people how they can find your page on Facebook. So you need to create a username for your page that is also known as vanity URL. It can be only up to 50 characters long and make sure it is easy to remember. You can use your business name or a slight variation of it. To create username:
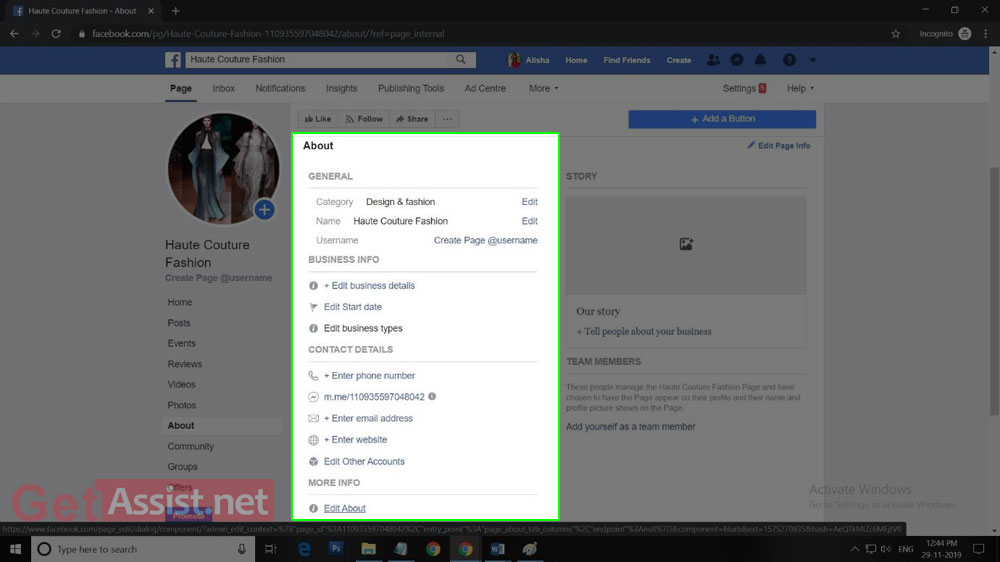
This you can do later as well but it is important to fill out all the fields of ‘About’ section of the page so that the customers can easily obtain information about you. Customers look for various details to determine whether to take your services or not, so if they will not be satisfied with the information provided on your page, they will look for other options.
In the ‘About’ section, you can add your business details, start date, phone number, email address and website.
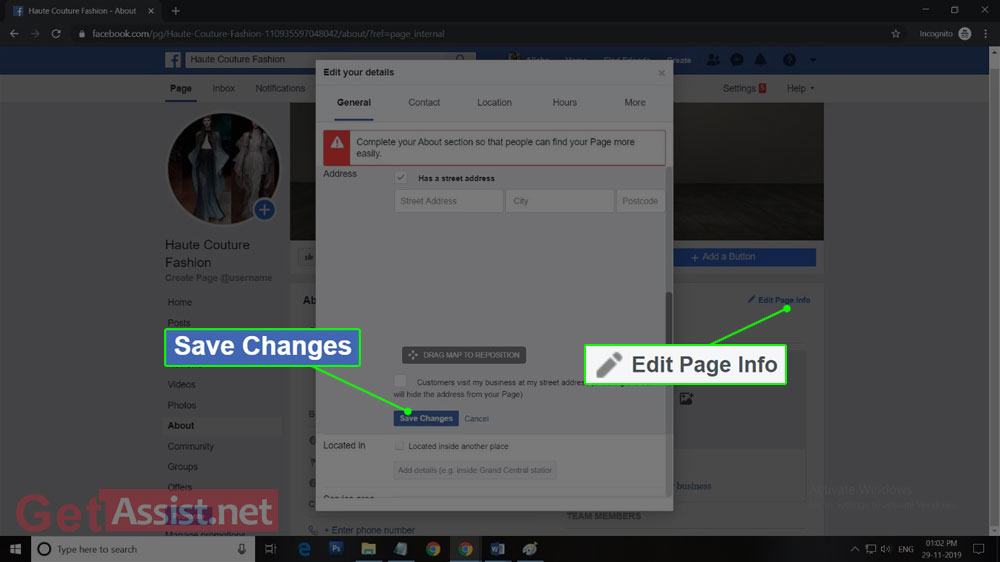
On the left side, you will see an option ‘Edit page info’, clicking on that will allow you to set the location of your business as well the opening hours. Once you are done entering the entire location and other details of your business, click ‘Save Changes’.
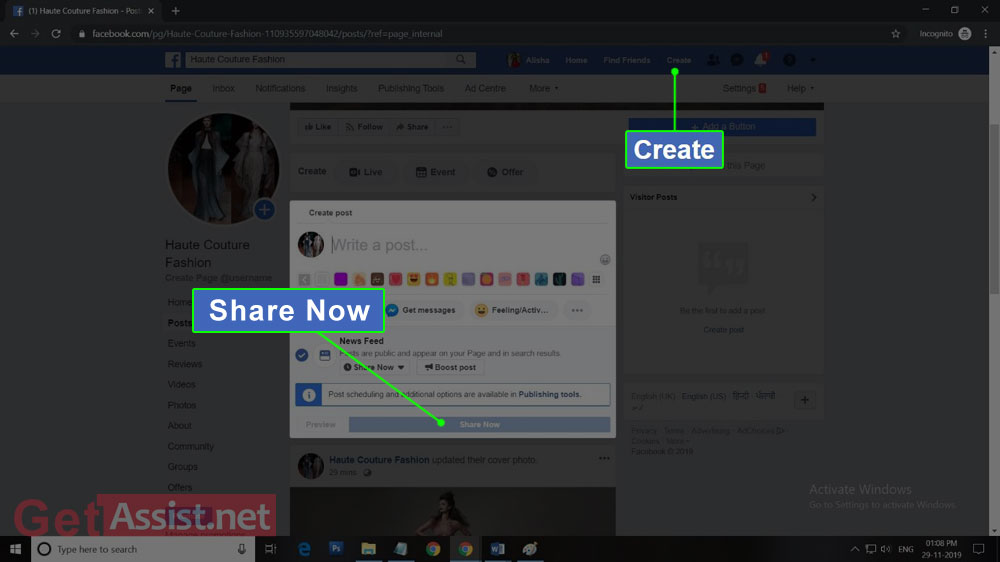
Before you start inviting people to your business Facebook page, you must have something to showcase or engage them. A no-post page will not make a good impression, hence create one or two posts beforehand. It would be better if you create your own post, or you can also post an event or a product offer. Click on ‘Create’ from the top and in the dialog box that appears, you will be able to post text, photos or videos. Click on ‘Share Now’ once you are ready with your first post.
Start by inviting your family and friends to like the page. You can use your other social accounts and website to promote your page. Ask your customers to review your product or service on Facebook and you can also use ‘follow us’ logo on your promotional materials.
By this time your business page must have been ready, the next important question arises is “How to use Facebook page for business”? It is the time when you have to focus on optimizing your page, maximizing engagement and meeting Facebook marketing goals. Here are the steps you must undertake to improve your page’s performance:
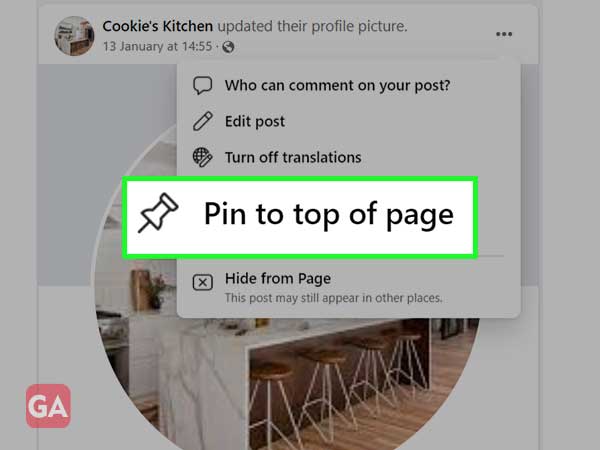
To do this, go to the post and click on the three-dots given at the top right of the post and click ‘Pin to top of page’.

If you want to create a business Facebook page and don’t have a personal account, no
worries, you can directly set up a Facebook business account and create a page using
the same. However, if you already have a personal Facebook account, you cannot
create a separate account as Facebook doesn’t allow creating multiple accounts.
As per Facebook’s policy, you can have only one account. If you want to promote your
business, instead of creating a separate account, you are allowed to create a business
page. Also, you can manage multiple pages using the same Facebook account.
A Facebook business page costs nothing and can be created for free anytime using
your profile. Instead of using your personal Facebook account to promote your
business, you can create a business page using it and promote your business or
product by posting updates, photos, and videos. You can create and manage as many
pages for free through a single account
There are different ways through which you can promote your Facebook page without
spending a penny.
To separate your Facebook business profile from your personal account, you need to
create a business and ad account. Go to business.facebook.com and create an
account. Business Manager allows advertiser on Facebook who handles multiple pages
and ad accounts. This way you can also keep your business separate from your
personal Facebook account.