Using Outlook as an email client is very useful especially when it lets you configure other email accounts such as Yahoo, SBCGlobal, Gmail, and AT&T.
So if you are an AT&T user and want to set up your account in Outlook, this guide is going to help you. Outlook is available in a number of versions so you need to follow the steps as per the Outlook version you have. This will help you an easy login to the AT&T account using Outlook.
Let’s begin with the guide to setup AT&T Email on MS Outlook and conveniently access to your AT&T emails, calendars, contacts, and much more.
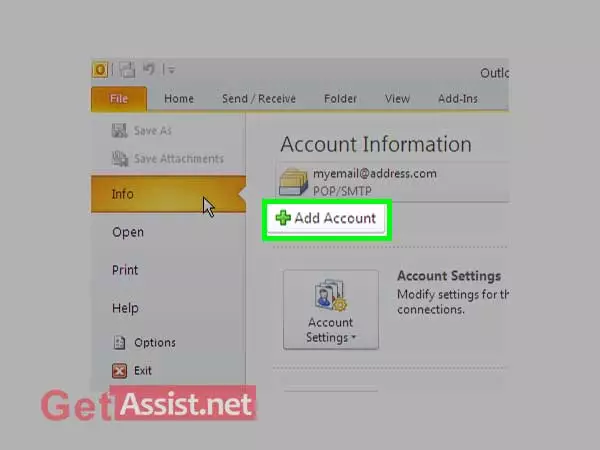
If you are using Outlook 2007 and want to set up an AT&T mail account for it; here are the steps to perform if you are setting up your email for the first time or on a new device. Make sure to use the correct AT&T email settings for Outlook 2007 to configure your account properly.
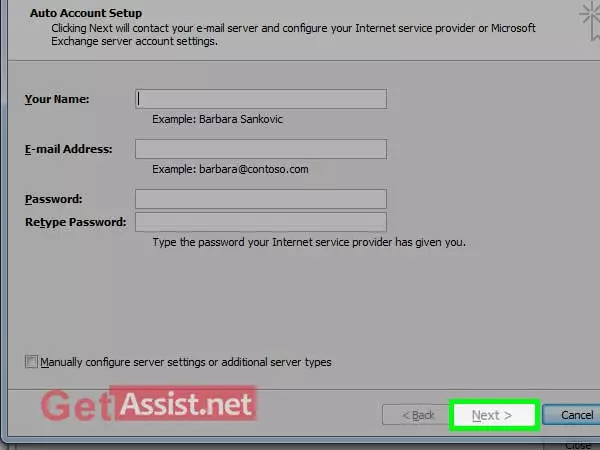
User Information
Your Name: Enter your name that you want to display to others
E-mail Address: Enter full AT&T email address
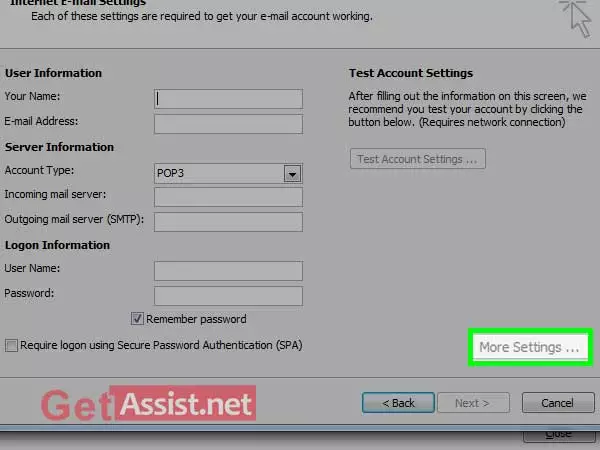
Server Information
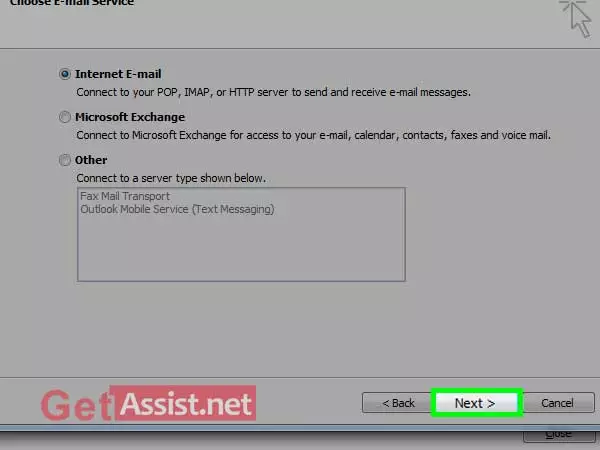
Account Type: Choose IMAP or POP3
Incoming mail server: imap.mail.att.net (IMAP) or inbound.att.net (POP3)
Outgoing mail server: smtp.mail.att.net (IMAP) or outbound.att.net (POP3)
Logon Information
User Name: Enter your full email address.
Password: Enter your AT&T secure mail key
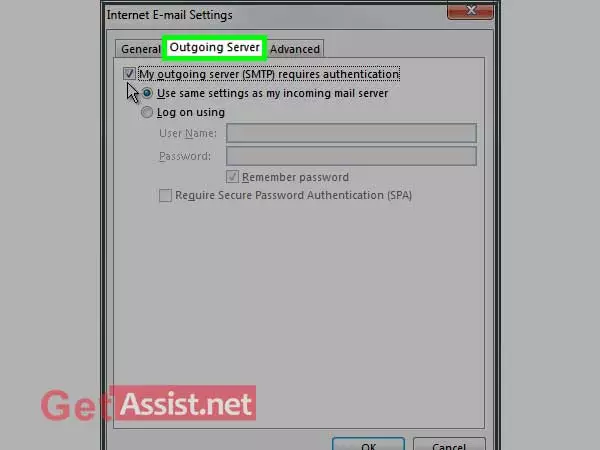
Check the box for ‘Require logon using Secure Password Authentication (SPA)’ and click on ‘More Settings’.
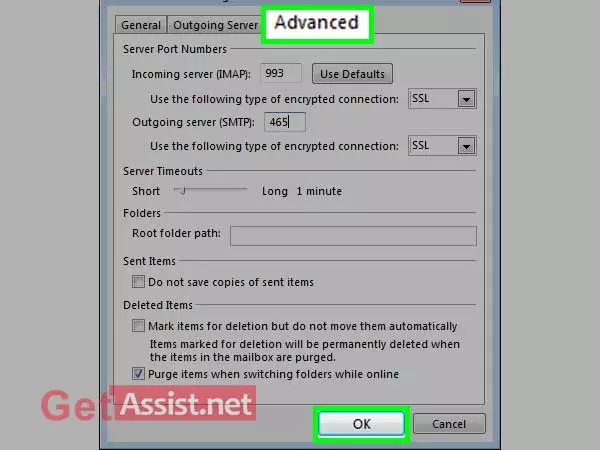
Incoming server – Enter 993 (IMAP) or 995 (POP3)
Check the box for ‘This server requires a secure connection (SSL)’.
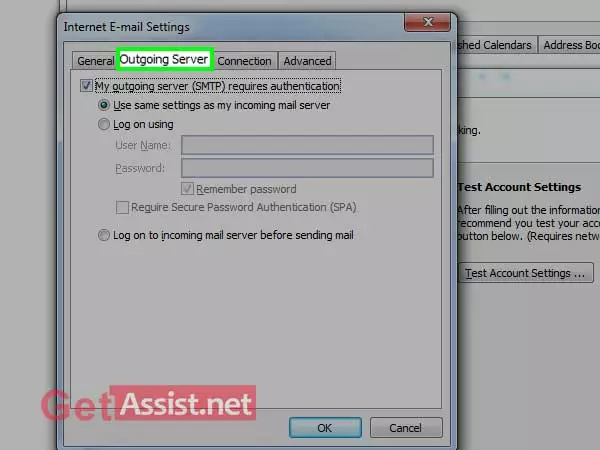
Outgoing server- Enter 465 (IMAP and POP3)
Use the following type of encrypted connection – SSL

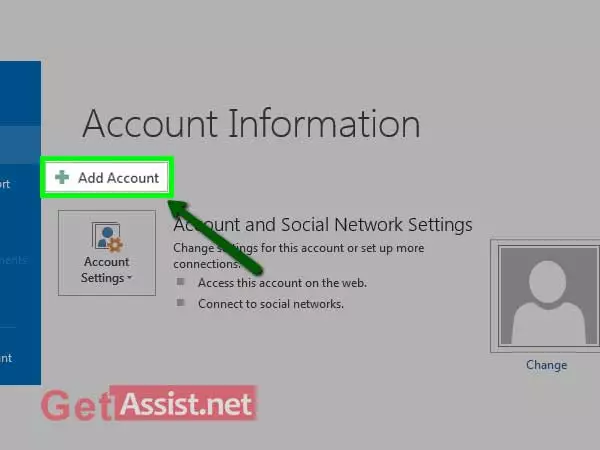
If you use Outlook 2013 and want to set up an AT&T mail account for it; here are the steps to perform if you are setting up your email for the first time or on a new device. Make sure to use the correct AT&T email settings for Outlook 2013 to configure your account properly.
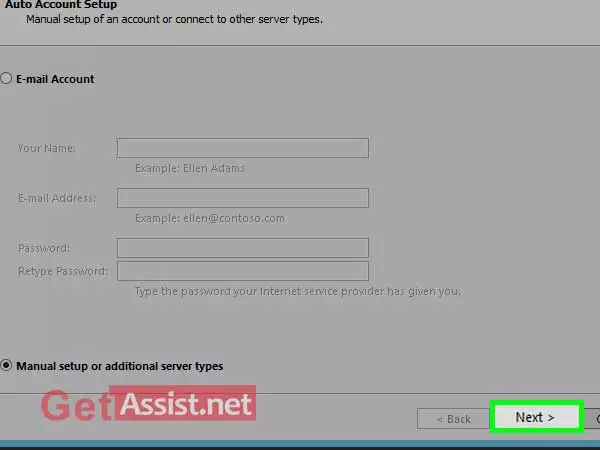
User Information
Your Name: Enter your name that you want to display to others
E-mail Address: Enter full AT&T email address
Server Information
Account Type: Choose IMAP or POP3
Incoming mail server: Enter imap.mail.att.net (IMAP) or inbound.att.net (POP3)
Outgoing mail server: Enter smtp.mail.att.net (IMAP) or outbound.att.net (POP3)
Logon Information
User Name: Enter your full email address.
Password: Enter your AT&T secure mail key
You also have to check the box for ‘Remember password’ and ‘Require logon using Secure Password Authentication’. Once you are done with that, click on More Settings.
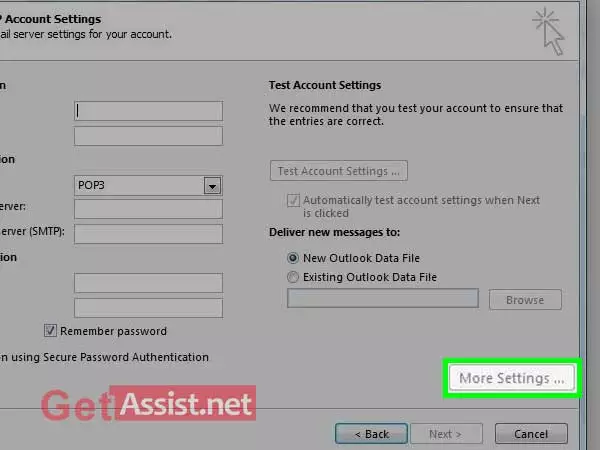
Incoming server- Enter 993 (IMAP) or 995 (POP3)
Use the following type of encrypted connection- SSL
Outgoing server- Enter 587 (IMAP) or 465 (IMAP and POP3)
Use the following type of encrypted connection- SSL
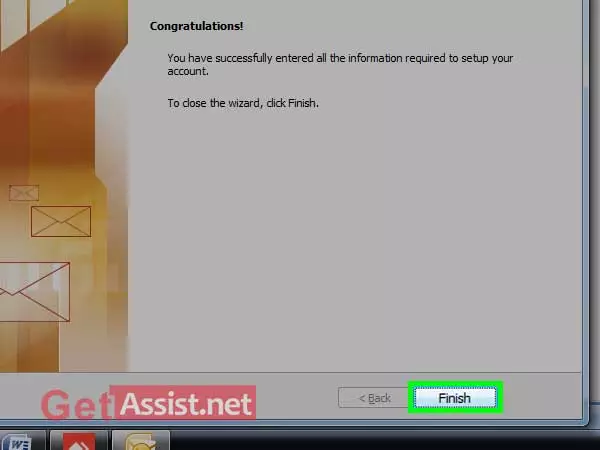
Now, click on OK, and then press ‘Next’. Once your AT&T email account gets successfully set up, click on ‘Finish’.
If you use Outlook 2010 and want to set up an AT&T mail account for it; here are the steps to perform if you are setting up your email for the first time or on a new device. Make sure to use the correct AT&T email settings for Outlook 2010 to configure your account properly.
User Information
Your Name: Enter your name that you want to display to others
E-mail Address: Enter full AT&T email address
Server Information
Account Type: Choose IMAP or POP3
Incoming mail server: Enter imap.mail.att.net (IMAP) or inbound.att.net (POP3)
Outgoing mail server: Enter smtp.mail.att.net (IMAP) or outbound.att.net (POP3)
Logon Information
User Name: Enter your full email address.
Password: Enter your AT&T secure mail key
Check the box for ‘Require logon using Secure Password Authentication (SPA)’ and click on ‘More Settings’.
Incoming server – Enter 993 (IMAP) or 995 (POP3)
Use the following type of encrypted connection- SSL Outgoing server- Enter 465 (IMAP and POP3)
Use the following type of encrypted connection- SSL
Now, click on OK, and then press ‘Next’. Once your AT&T email account gets successfully set up, click on ‘Finish’.
If you use Outlook 2016 and want to set up an AT&T mail account for it; here are the steps to perform if you are setting up your email for the first time or on a new device. Make sure to use the correct AT&T email settings for Outlook 2016 to configure your account properly.
User Information
Your Name: Enter your name that you want to display to others
E-mail Address: Enter full AT&T email address
Server Information
Account Type: Choose IMAP or POP3
Incoming mail server: Enter imap.mail.att.net (IMAP) or inbound.att.net (POP3)
Outgoing mail server: Enter smtp.mail.att.net (IMAP) or outbound.att.net (POP3)
Logon Information
User Name: Enter your full email address.
Password: Enter your AT&T secure mail key
You also have to check the box for ‘Remember password’ and ‘Require logon using Secure Password Authentication’. Once you are done with that, click on More Settings.
Incoming server – Enter 993 (IMAP) or 995 (POP3)
Use the following type of encrypted connection- SSL Outgoing server- Enter 465 (IMAP and POP3)
Use the following type of encrypted connection- SSL
That is how you can configure AT&T to different versions of Outlook and if you are facing any errors or issues while using AT&T on Outlook, make sure to update your AT&T email settings today.