Due to cyber-security, the need of Antivirus software and such tools are becoming essential day by day! In this category, ‘Avast’ is the one that is enjoying immense popularity.
Avast Antivirus Software
Avast antivirus is a well-known antivirus that has been around for a while helping users in protecting their PCs from malicious files and viruses. In fact, it is one of the best antivirus options that work on multiple platforms including both Mac and Windows PCs alike.
Albeit, it is designed to safeguard the operating systems via offering a bunch of protection features and services like webcam, anti-phishing protection, internet threat scanning, and secure password vault. But, it has its own flaws because of which users may experience a range of issues, out of which; ‘Avast won’t open’ is the most prevalent one.
In fact, quite recently there are many Windows users who’ve reported that they’ve experienced “Avast won’t open in Windows 10” for various reasons like—
Incompatibility issues lead to BSOD errors.
Driver conflicts with other available apps.
Avast installation might be broken that may have been corrupted
The Avast Antivirus Service may not be running properly & so on.
So, if you’re using a Windows 10 PC and encountered the same problem then, fixing the Avast issue holds paramount importance since it protects your system against all sorts of malware/viruses. Thus, here’s the guide on how you can do so!
Top 6 Solutions to Fix Avast Won’t Open Problem on Windows 10
Notwithstanding the fact that there have been various methods that Windows users consider in order to get rid of this particular ‘Avast not opening’ problem; we’ve presented in front of you only those solutions which have been the most helpful for this problem.
So, without any worries, let’s get started—
Solution 1: Update Avast and Your PC’s Operating System
On the very first basis, it is recommended that you should check whether you’re running on the most up-to-date version of ‘Avast Application’ as well as of your ‘Computer Operating System.’
So, to check and update the Avast Antivirus program, consider executing these steps—
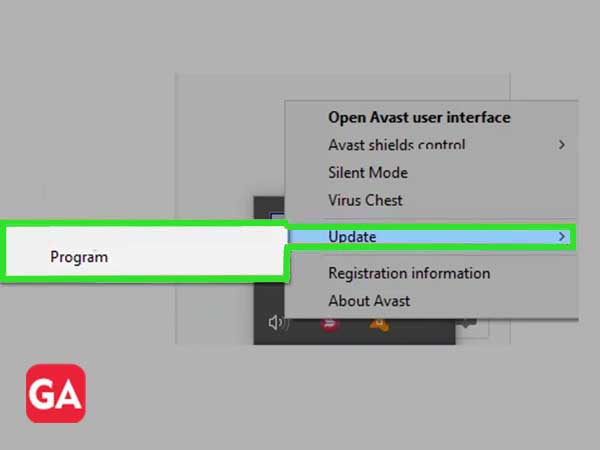
Step 1: Locate the Avast app icon and perform a right-click action onto the same to select ‘Update>Program.’
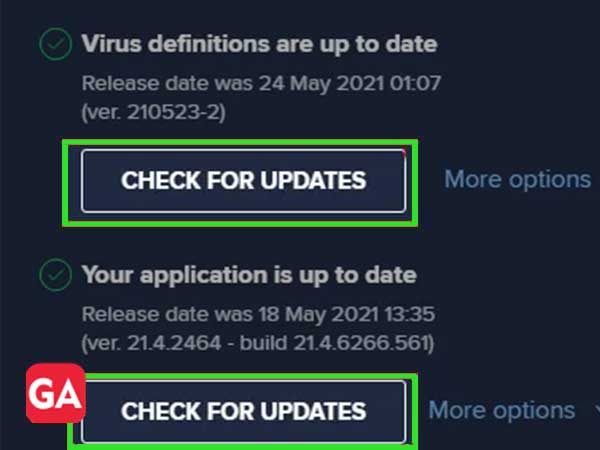
Step 2: Then, you need to select the ‘Check for Updates’ option and if there’s an update available, wait until the program checks for and installs the required updates.
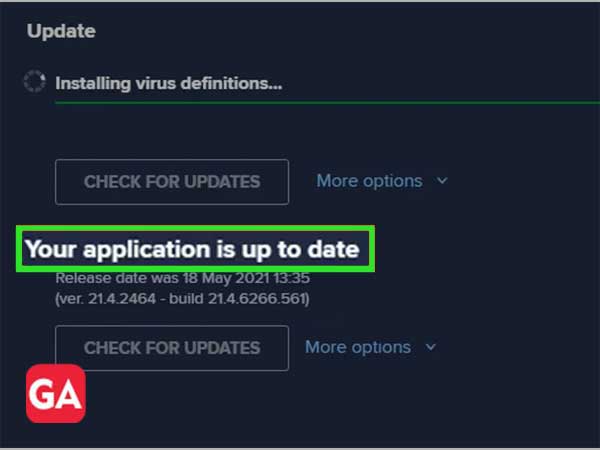
Step 3: Once the update is complete, you’ll receive a status message that pops up saying your application is up-to-date.
Step 4: After that, you can give a quick ‘Restart’ to your computer to complete the update process.
Similarly, you need to be sure to update your Windows O.S. to the latest version and to do so—
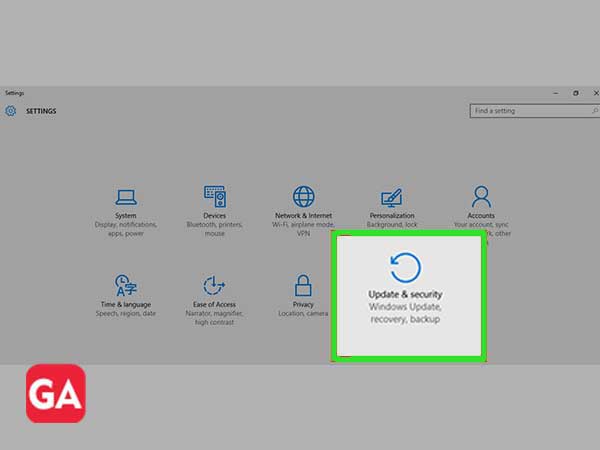
Step 1: Open the Settings window by pressing ‘Win + I’ keyboard shortcut.
Step 2: Then, you’ve to select the ‘Update & Security’ option from the settings window that opens.
Step 3: After that, what you need to do is select the ‘Windows Update’ option which is located in the left pane.
Step 4: Upon doing so, click the ‘Check for updates’ button and if any updates are available then, Windows will automatically download it onto your operating system.
Step 5: Now, once the update of your Windows O.S. is complete, check whether the Avast antivirus program is running properly or not.
However, even after the update of Windows 10 O.S. and Avast antivirus program, if Avast is still not able to work properly on your updated Windows 10 O.S. then, move on to try the below-listed solutions.
Solution 2: Perform a Clean Boot
As per this solution, you’re suggested to opt for the ‘Clean Boot’ process. The clean boot process is considered to help users identify issues with the Windows 10 background processes. Well, because it uses only essential files and folders required to run a PC/Laptop.
So, bearing that in mind, here’s how you can perform a clean boot—
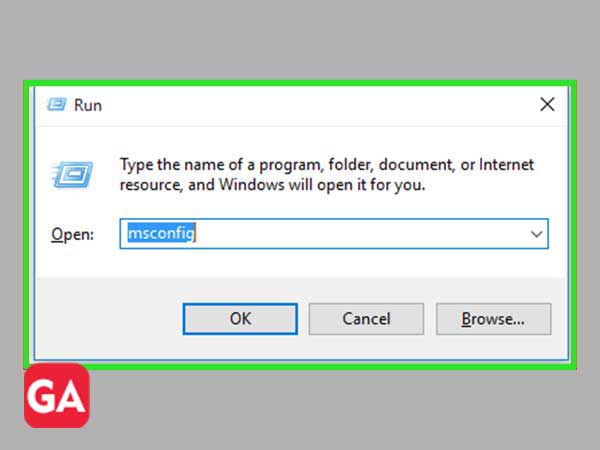
Step 1: Press ‘Win +R’ keyboard shortcut to open the ‘Windows Run Dialog Box.’ In that, type in “msconfig” and click on the ‘OK’ button to launch the ‘System Configuration’ window.
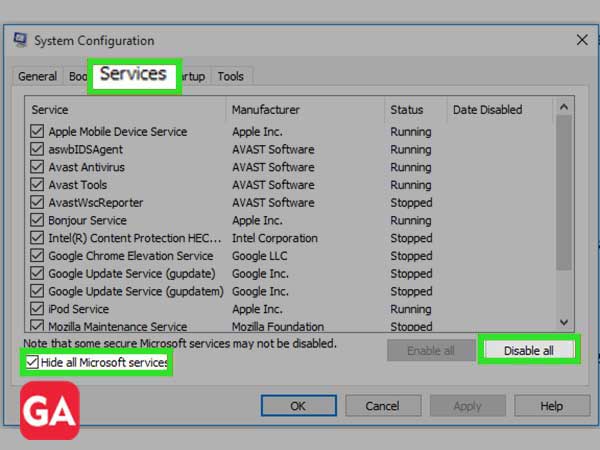
Step 2: Inside the system configuration window, select the ‘Services tab’ and simply check the ‘Hide all Microsoft devices’ box.
Step 3: Then, choose the ‘Disable All’ option.
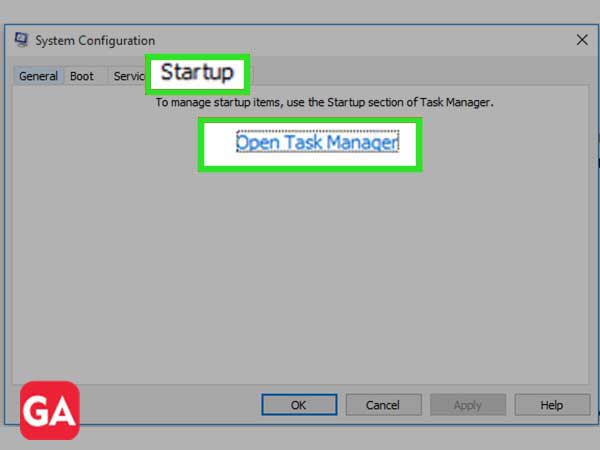
Step 4: Following that, switch to the ‘Startup tab’ and click on the ‘Open Task Manager.’ There, check if any processes are running. If not, simply click on the ‘Close’ button.
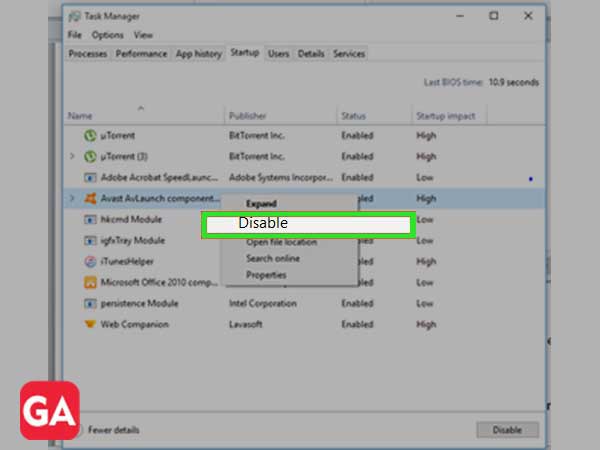
Step 5: After doing so, perform the right-click action on all the ‘Tasks’ and click the ‘Disable’ button.
Step 6: In the end, click on the ‘OK’ button in the ‘System Configuration’ window and then, give a quick ‘Restart’ your computer.
Upon doing so, try running the ‘Avast Antivirus Program’ to check whether the issue has been resolved or not!
Solution 3: Check Avast Installation
If you’ve properly installed the Avast app on your system then it will appear in the list of ‘Programs and Features.’ But, if it’s not opening, or you’re not able to detect it then, maybe you need to verify whether the Avast application is properly installed or activated or not!
For that, these are the three simple steps you need to follow—
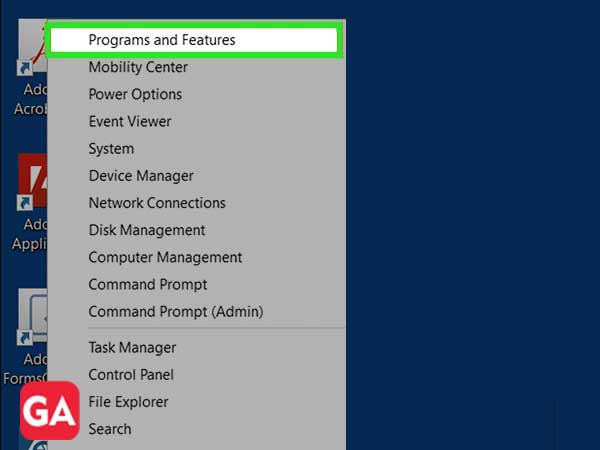
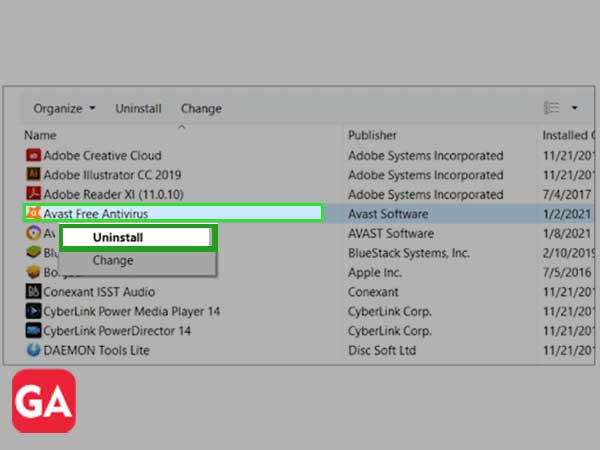
Step 1: Perform the right-click action on the ‘Windows Start Menu.’
Step 2: Then, click on ‘Programs & Features’ from the list of menu that appears.
Step 3: Inside the programs & features list, if ‘Avast’ doesn’t appear then, it means it is not installed correctly on your PC, and you’ll have to download and reinstall it.
However, if ‘Avast’ appears on the ‘Programs & Features’ list and is still not able to open properly on your Windows 10 then, you can directly move on to try this next solution.
Solution 4: Repair Avast
No matter what is wrong with the Avast Antivirus Software, you can consider repairing it because this solution has already worked for plenty of Windows users who encountered the same issue with Avast.
So, if you want to repair Avast then, these are the steps you need to perform—
Step 1: Begin by logging in to your computer with an ‘Administrator Account’ because you cannot delete programs using any other account.
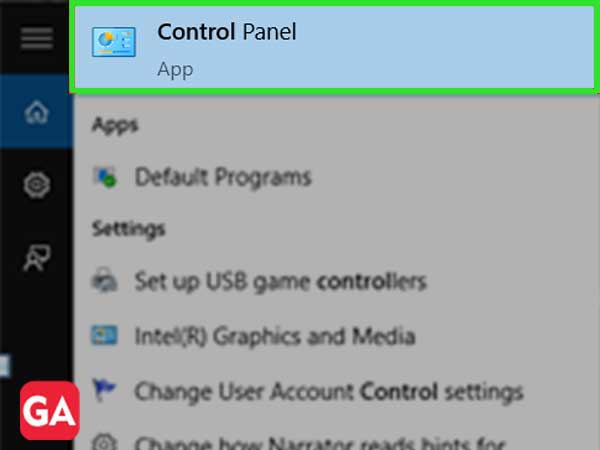
Step 2: Once you logged in, click on the ‘Windows Start Menu’ and search for ‘Control Panel app’ by typing “Control” in the search bar.
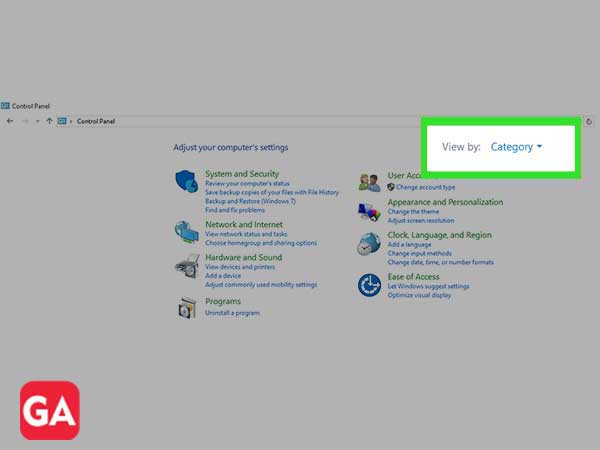
Step 3: Inside the Control Panel, what you’ve to do is change the “View by” option to “Category.” This you’ll be able to find in the top right corner of the window.
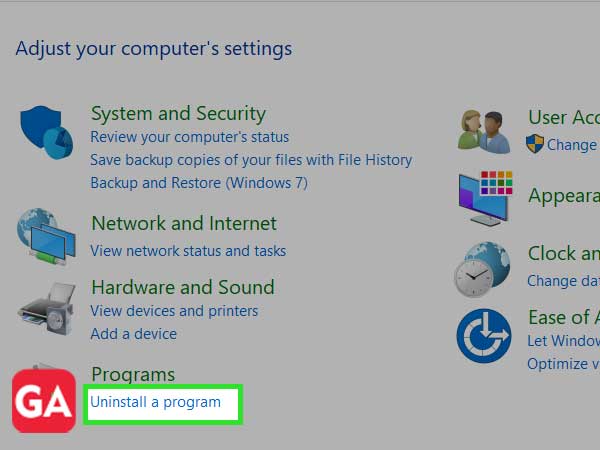
Step 4: Then, simply click on ‘Uninstall a Program’ under the Programs section.
Step 5: Following that, you need to locate the “Avast” program and once you’re able to find it, click on ‘Uninstall/Repair’ option for the same.
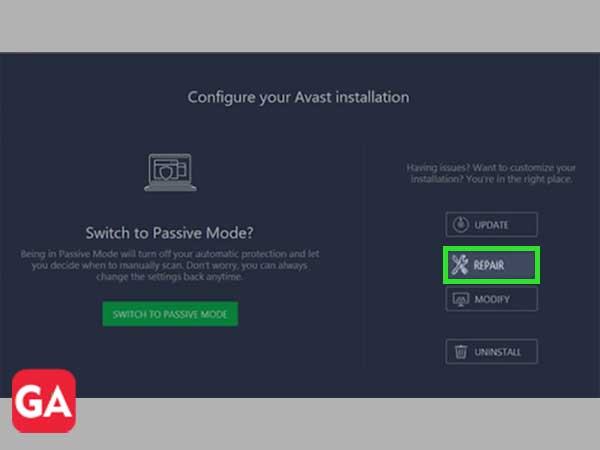
Step 6: In doing so, its uninstall wizard opens in front of you and inside it, you’ll see several options including—
Update
Repair
Modify
Uninstall
Step 7: Out of all, you need to select the ‘Repair’ option followed by the ‘Next’ button to fix the installation of the Avast program.
Step 8: Now, a message will pop up on the screen for confirmation of the repair process.Once you confirm, Avast will likely be restarted with the ‘Default Settings’ that used to work before the occurrence of the discussed error.
Step 9: In the end, all you need to do is click on the ‘Finish’ button and restart your computer to check whether Avast now opens properly on your device or not!
Solution 5: Restart the Avast Antivirus Service
It’s possible that an error related to Avast Antivirus service is preventing the Avast software from opening properly on Windows 10. Therefore, it’s suggested that you should restart the Avast Antivirus service via following the below instructions carefully and in the right order—
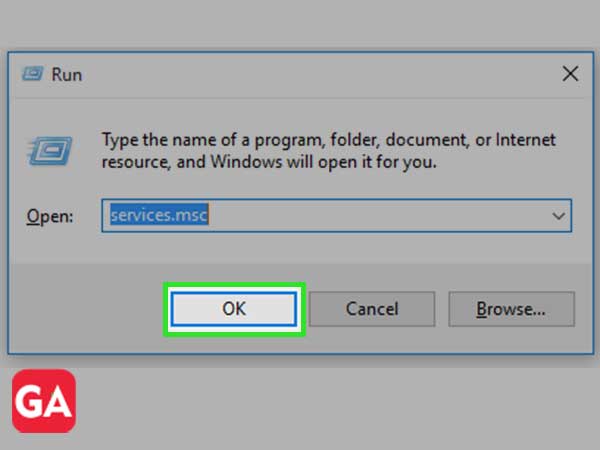
Step 1: Press ‘Windows + R’ shortcut on your keyboard to open the ‘Windows Run Utility.’
Step 2: In Windows Run Utility box, type “services.msc” without the quotation marks and click on the ‘OK’ to open the ‘Services tool.’
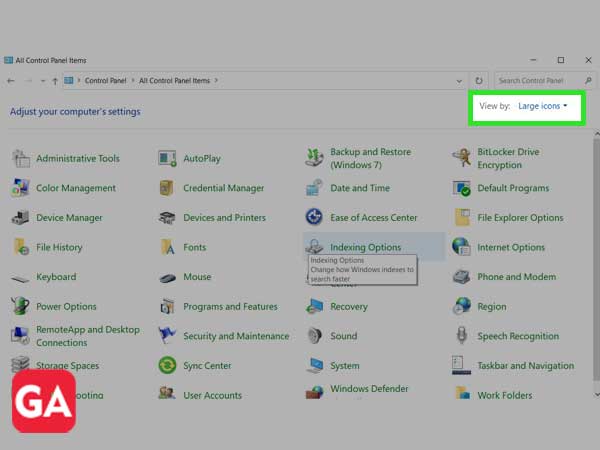
Step 3: Then, inside the Control Panel window that opens in front of you, change the “View by” option from the top right corner of the window to “Large Icons.”
Step 4: Following that, you need to scroll down the options until and unless you locate the ‘Administrative Tools’ and once you’re able to do so, click on it.
Step 5: Similarly, locate the ‘Servicesshortcut’ at the bottom of the window and click on it to open this as well.
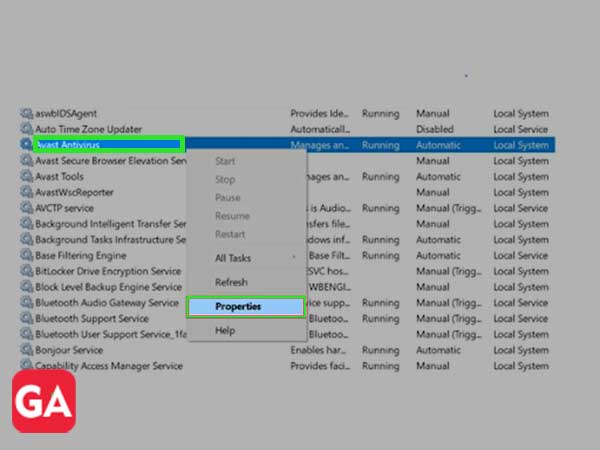
Step 6: After that, you’ve to look for the ‘Avast Antivirus Service’ on the services list and once you’re able to do so, perform the right-click action on it and select ‘Properties’ from the contextual menu that appears on the screen.
Step 7: In doing so, if the Avast service is started (this you can check just next to the Service status message) then, you have to stop the process for now by clicking on the ‘Stop’ button at the middle of the window. And, when it gets stopped, you can leave it stopped until you proceed again.
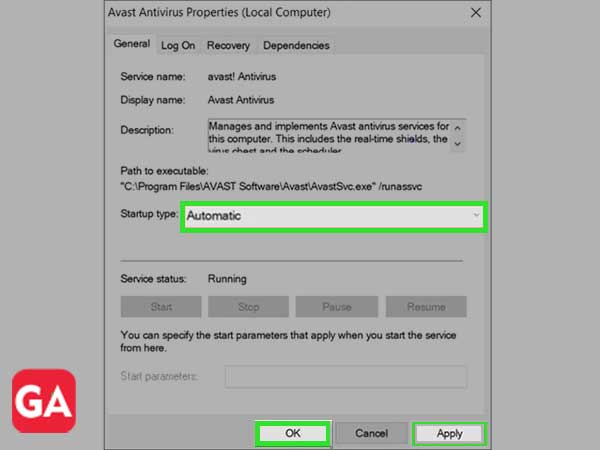
Step 8: Now, before you proceed, make sure that in the service’s properties window, the option under the ‘Startup type’ menu is set to “Automatic.”
Step 9: In continuation, you have to ‘Confirm’ any dialogue boxes that may appear in front of you when changing the startup type and then, hit the ‘OK’ and ‘Apply’ buttons.
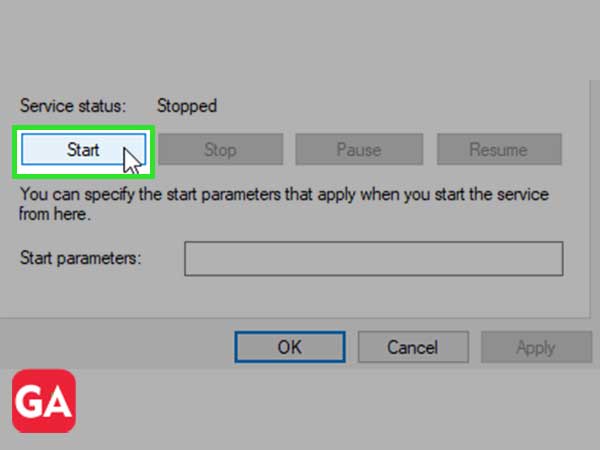
Step 10: Upon doing so, click on the ‘Start’ button (which is in the middle of the window) before exiting.
Now when you click on Start, you may receive the following error message:
Windows could not start the Avast Antivirus program on the Local Computer. Error 1079: The account specified for this service differs from the account specified for other services running in the same process.
Well, if this happens, you need to also follow the below-given instructions to fix it.
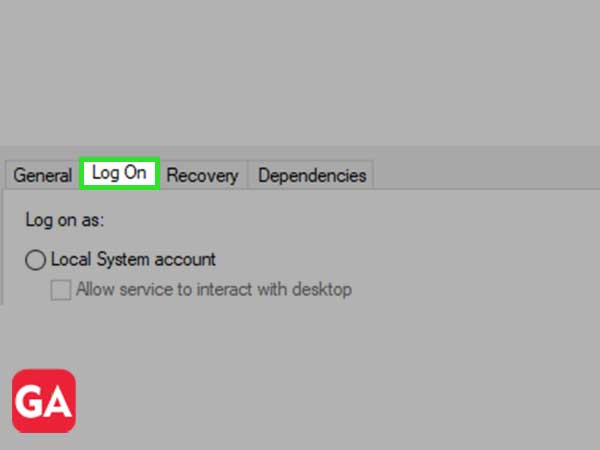
Step 1: Open ‘Service’s Properties’ window again and navigate yourself on to the ‘Log On’ tab.
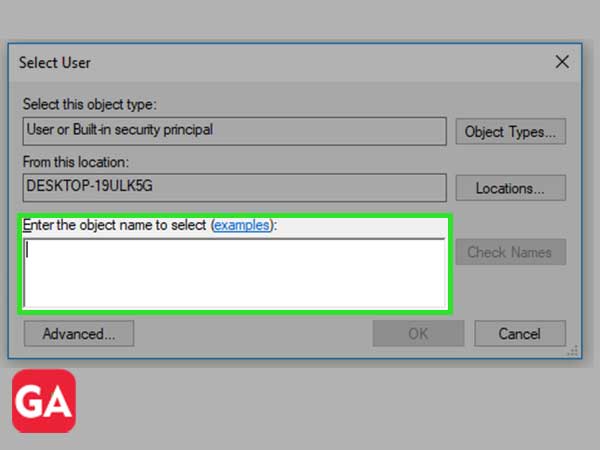
Step 2: There, select the ‘This Account’ radio button and click the ‘Browse’ option.
Step 3: After that, you’ve to type in your ‘Account’s name’ under the entry box that reads—“Enter the object name to select.”
Step 4: Following that, click on the ‘Check Names’ option and just wait for a while until the name becomes available.
Step 5: Once you finish, hit the ‘OK’ button and type in your ‘Password’ in the given password text-box only if you’re prompted to do so.
In doing so, you’ll probably not receive the same error message again and your Avast program will be able to restart without any inconvenience.
Solution 6: Perform a Clean Install
No doubt, a clean install can fix almost any issue related to Avast including this particular problem as well. And, luckily, the process of clean installation is pretty easy to execute.
So, if you decide to perform a clean install then let’s tell you it does more than the regular uninstall because it deletes the cache files and removes the related registry entries which may have gone corrupt leading to issues like you’re currently experiencing!
With that said, here are the steps to perform a clean installation—
Step 1: To perform a clean install, first download the latest version of the ‘Avast Installation’ and for that, navigate yourself here.
Step 2: Once you reach onto the Avast.com webpage, click on the ‘Download Free Antivirus’ button which is in the middle of the website.
Step 3: Along with that, you’ll also be required to download the ‘Avast Uninstall Utility’ from the same link and save it on your computer.
Step 4: After you’ve downloaded these files, disconnect your device from the internet and simply boot into ‘Safe Mode’—
To do so, use the ‘Win +R’ keyboard shortcut to open the ‘Run Dialog Box’ and inside the same, type in “msconfig” before clicking the ‘OK’ button.
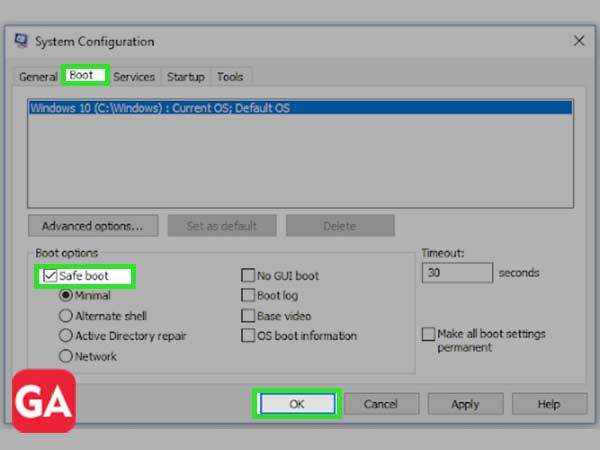
In doing so, the System Configuration window opens, and inside it, navigate to the ‘Boot Tab.’
There, you’ve to check the box beside the ‘Safe Boot’ option and then, click the ‘OK’ button to restart your computer to boot into Safe Mode.
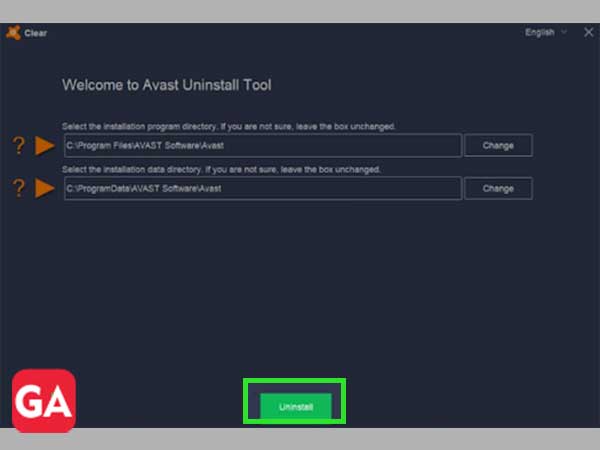
Step 5: Now, run the ‘Avast Uninstall Utility’ and simply browse for the location where you’ve installed ‘Avast.’ Basically you’ve to navigate through the ‘File Explorer’ to find the right folder.
Step 6: Following that, click on the ‘Remove/Uninstall’ option and give a quick ‘Restart’ to your computer by booting it into the ‘Normal Startup’ for checking whether now Avast is able to open normally or not!
Hopefully these solutions will be able to help you fix the ‘Avast won’t open’ issue that you’ve recently encountered on your Windows 10 O.S. so that you can use this tool safely and conveniently.
Additional Avast Issues and Solutions
It is worth informing you that the discussed issue is not the only problem you experience with Avast. There are also similar situations related to Avast won’t open issues that you may encounter if not today then tomorrow. So, why not be well-prepared in advance for such a situation also?
Having said that, we’ve below-mentioned the two major situations with their respective solutions to completely fix the ‘Avast won’t open’ issue.
Situation 1: Avast Causes Black Screen Issue in Windows 10
In recent times, there are a lot of Windows users who’ve reported that the ‘Avast Antivirus Software’ after installation is responsible for causing ‘black screen issue’ in Windows 10.
Albeit, this is not a usual problem, but if you’ve experienced it then, here’s the solution to resolve the same—
Solution:Add Exception in Avast
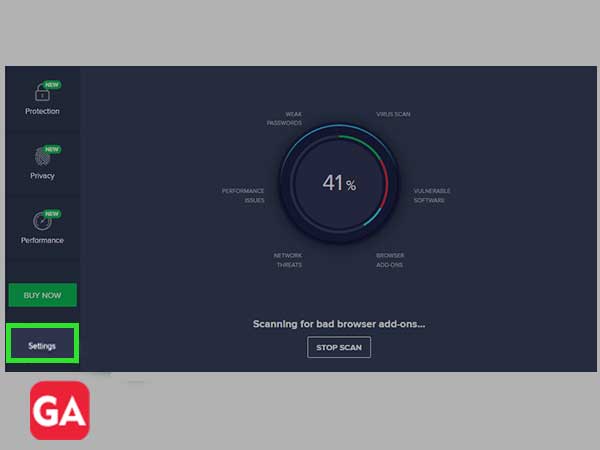
Step 1: To do so, begin by opening the Avast software.
Step 2: Then, click on its ‘Menu’ to select ‘Settings’ from the right pane.
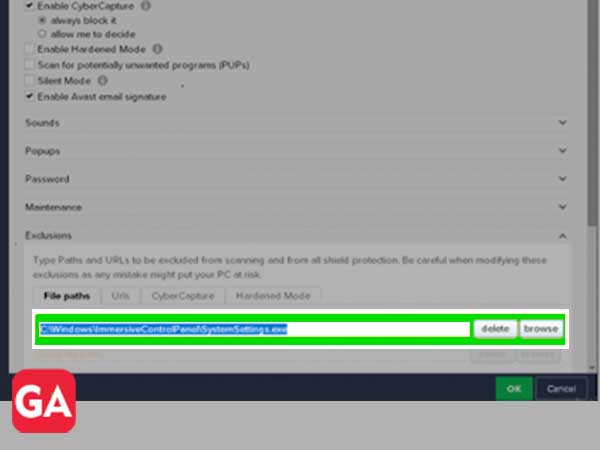
Step 3: Following that, you’ve to navigate onto the ‘General’ tab and there, choose ‘Exceptions’ to click on the ‘Add Exception’ button.
Step 4: Next, you need to enter this path ‘C:\Windows\Explorer.exe’ as an exception and click on ‘Add Exception.’
Step 5: Similarly, you’ve to again click on the ‘Add Exception’ button and enter the following path—‘C:\Windows\ImmersiveControlPanel\SystemSettings.exe’
Step 6: After entering this path as an exception, click on ‘Add Exception’ and quickly reboot your computer to check if the black screen issue has been resolved following this method.
Situation 2:Windows 10 Action Center Not Recognizing Avast
Those who don’t know ‘WMI Repository’ store meta-information for WMI classes! So, in case if this WMI repository is mistreated in any way then, that time you’re likely to experience issues with any of the ongoing activity.
Considering that as a reason why Avast is not responding properly, or whyWindows 10 system isn’t recognizing Avast; you can verify the WMI repository to resolve the Avast won’t open issue.
Solution: Verify WMI Repository
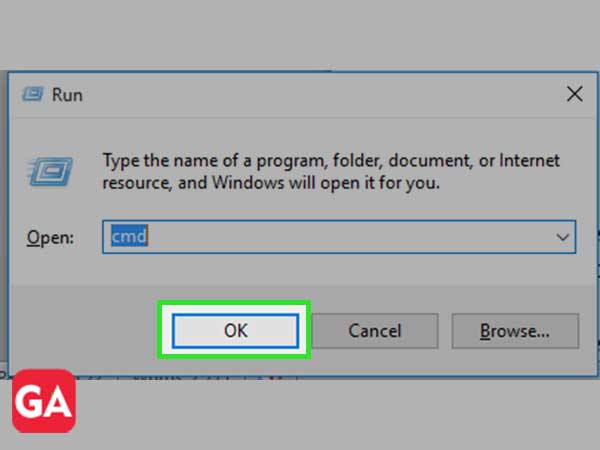
Step 1: To do so, press ‘Win +R’ keyboard shortcut and enter “cmd” before clicking the ‘OK’ button from the ‘Windows Run Utility’ box.
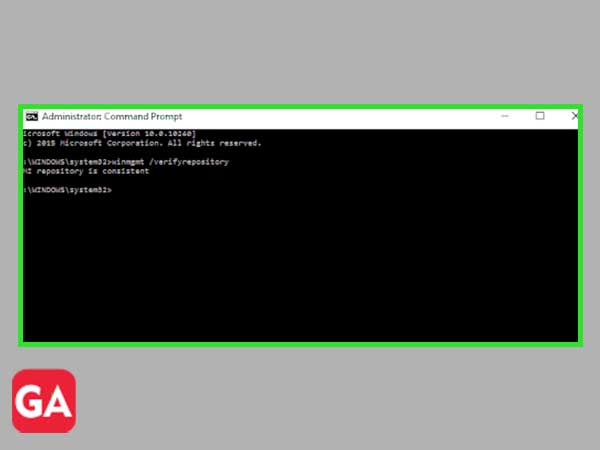
Step 2: In doing so, the ‘Command Prompt’ window will open in front of you and inside the same, what you’ve to do is type this command “winmgmt /verifyrepository” and simply hit the ‘Enter’ button.
Step 3: From doing so, if the repository seems to be consistent then, type the following command “winmgmt /resetrepository” and press the ‘Enter’ key. However, if it seems to be inconsistent then, instead of the above command, you need to run this “winmgmt /salvagerepository” command in the window.
Step 4: This way, once you build the WMI repository successfully, you can reboot your PC to check if Windows 10 is now able to recognize Avast antivirus.
Bottom Line
That’s all! This is the entire guide on how you can completely fix the encountered ‘Avast Won’t Open’ issue without the need of any further assistance.